Create and edit mail forms and restricted fields.
Before reading this article you'll need to prepare to use mail forms and restricted fields on your project.
You'll also need to create your project fields, so you can apply them to mail types to build your mail forms.
The character limits for fields and tooltips are:

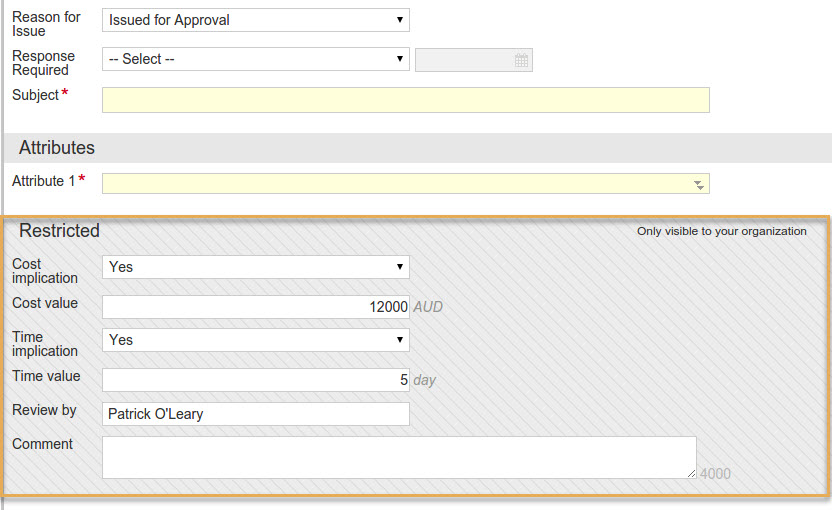
Restricted Fields allow Aconex project owners to track sensitive information against specific mail types. This information is restricted (only visible) to the Aconex project owning organization.
For example, you may decide to track potential cost or time impacts against Site Instructions so that Head Contractors can factor that data into their projected contingency.
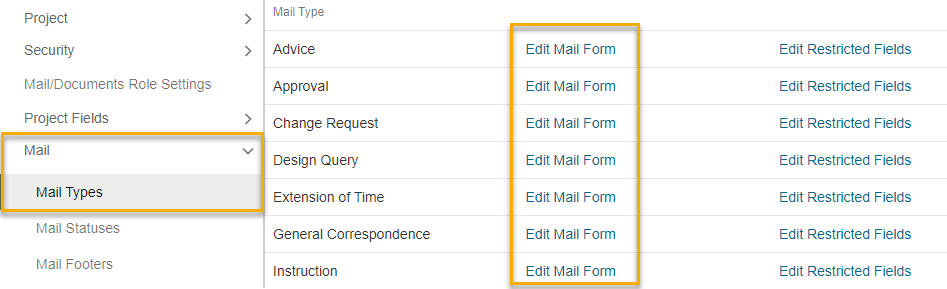
Configure restricted fields from Setup > Project Settings > Mail Types and click Edit Restricted Fields against the appropriate mail type. The list of restricted fields is separate from project fields.