Calendars and reporting periods in Cost

This is an overview of the calendars and reporting periods in Connected Cost.

Calendars define the project’s work days and the work hours per day.

With this information, full-time equivalent hours (FTEs) for each reporting period are calculated.

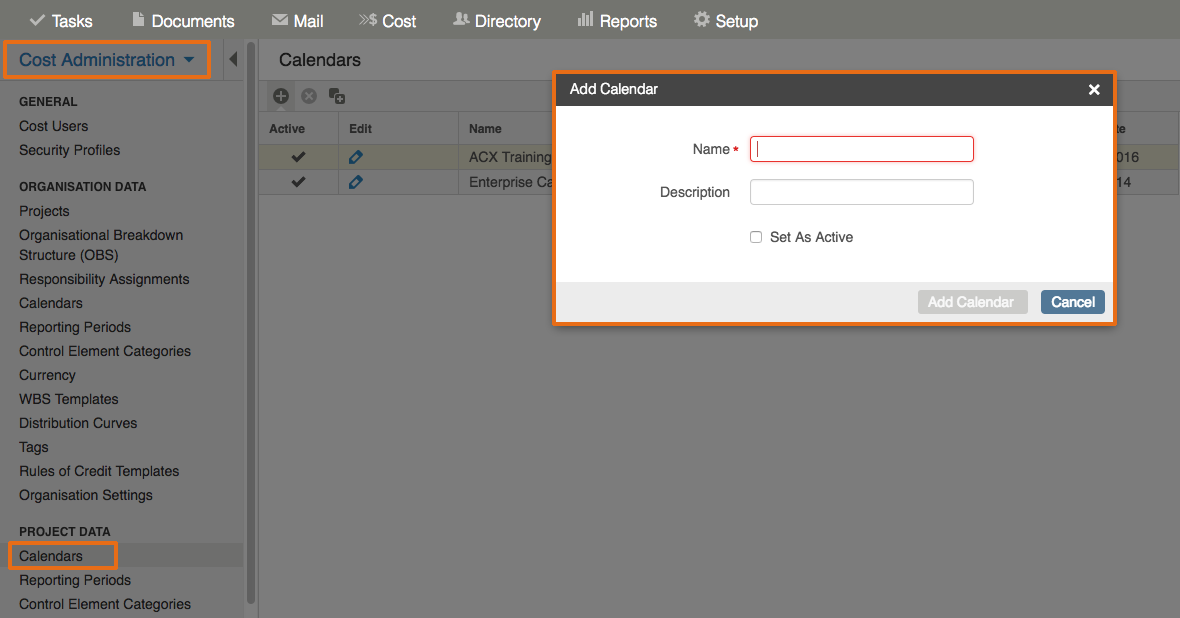
To define a project calendar:

  1. In Cost Administration, Calendars appear under the Organization Data headings.
  2. Click the Add icon on the toolbar.
  3. Enter a Name and Description (optional) for the new calendar.
  4. Check the Set to Active checkbox to make the calendar available. This will not assign the calendar to the project; only make it available to be assigned. Assigning a calendar to a project is done on the Project Settings page.
  1. Click in the Start Date cell and enter the date that you want the calendar to start. This should be the first day of the first reporting period for the project.
  1. Click in Work Day Pattern cells and enter the work hours for each workday. This will automatically define the workdays and work hours per day beginning with the start date of the calendar.

Tip!

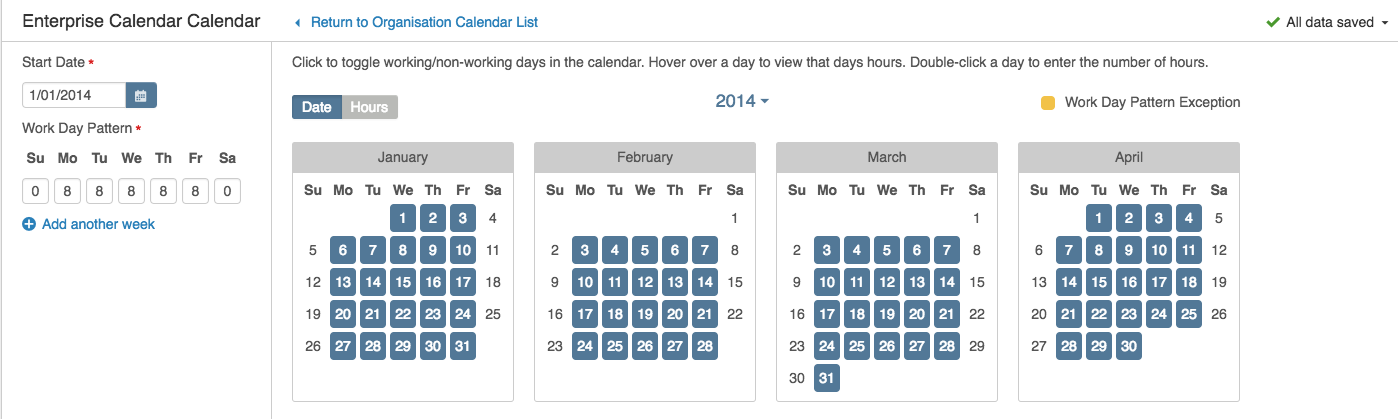
If you have a unique pattern of workdays and/or work hours per day (i.e. 5 days a week, 10 hours per day followed by 3 days a week, 10 hours per day), you can click the Add another week link to add another workday pattern.

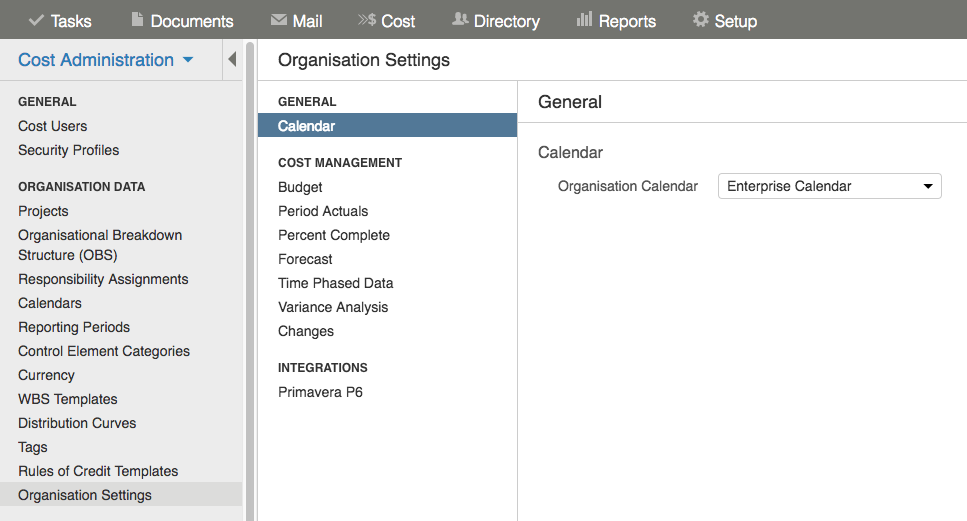
To assign a calendar to a project:

  1. Under Cost Administration, Organization Data navigate to Organization Settings.

  2. Click on the Calendar link on the left side navigation pane.

  3. Click the Project Calendar drop-down menu and select a calendar. This drop-down list is populated with both Organization and project calendars that are “active”.

Reporting Periods

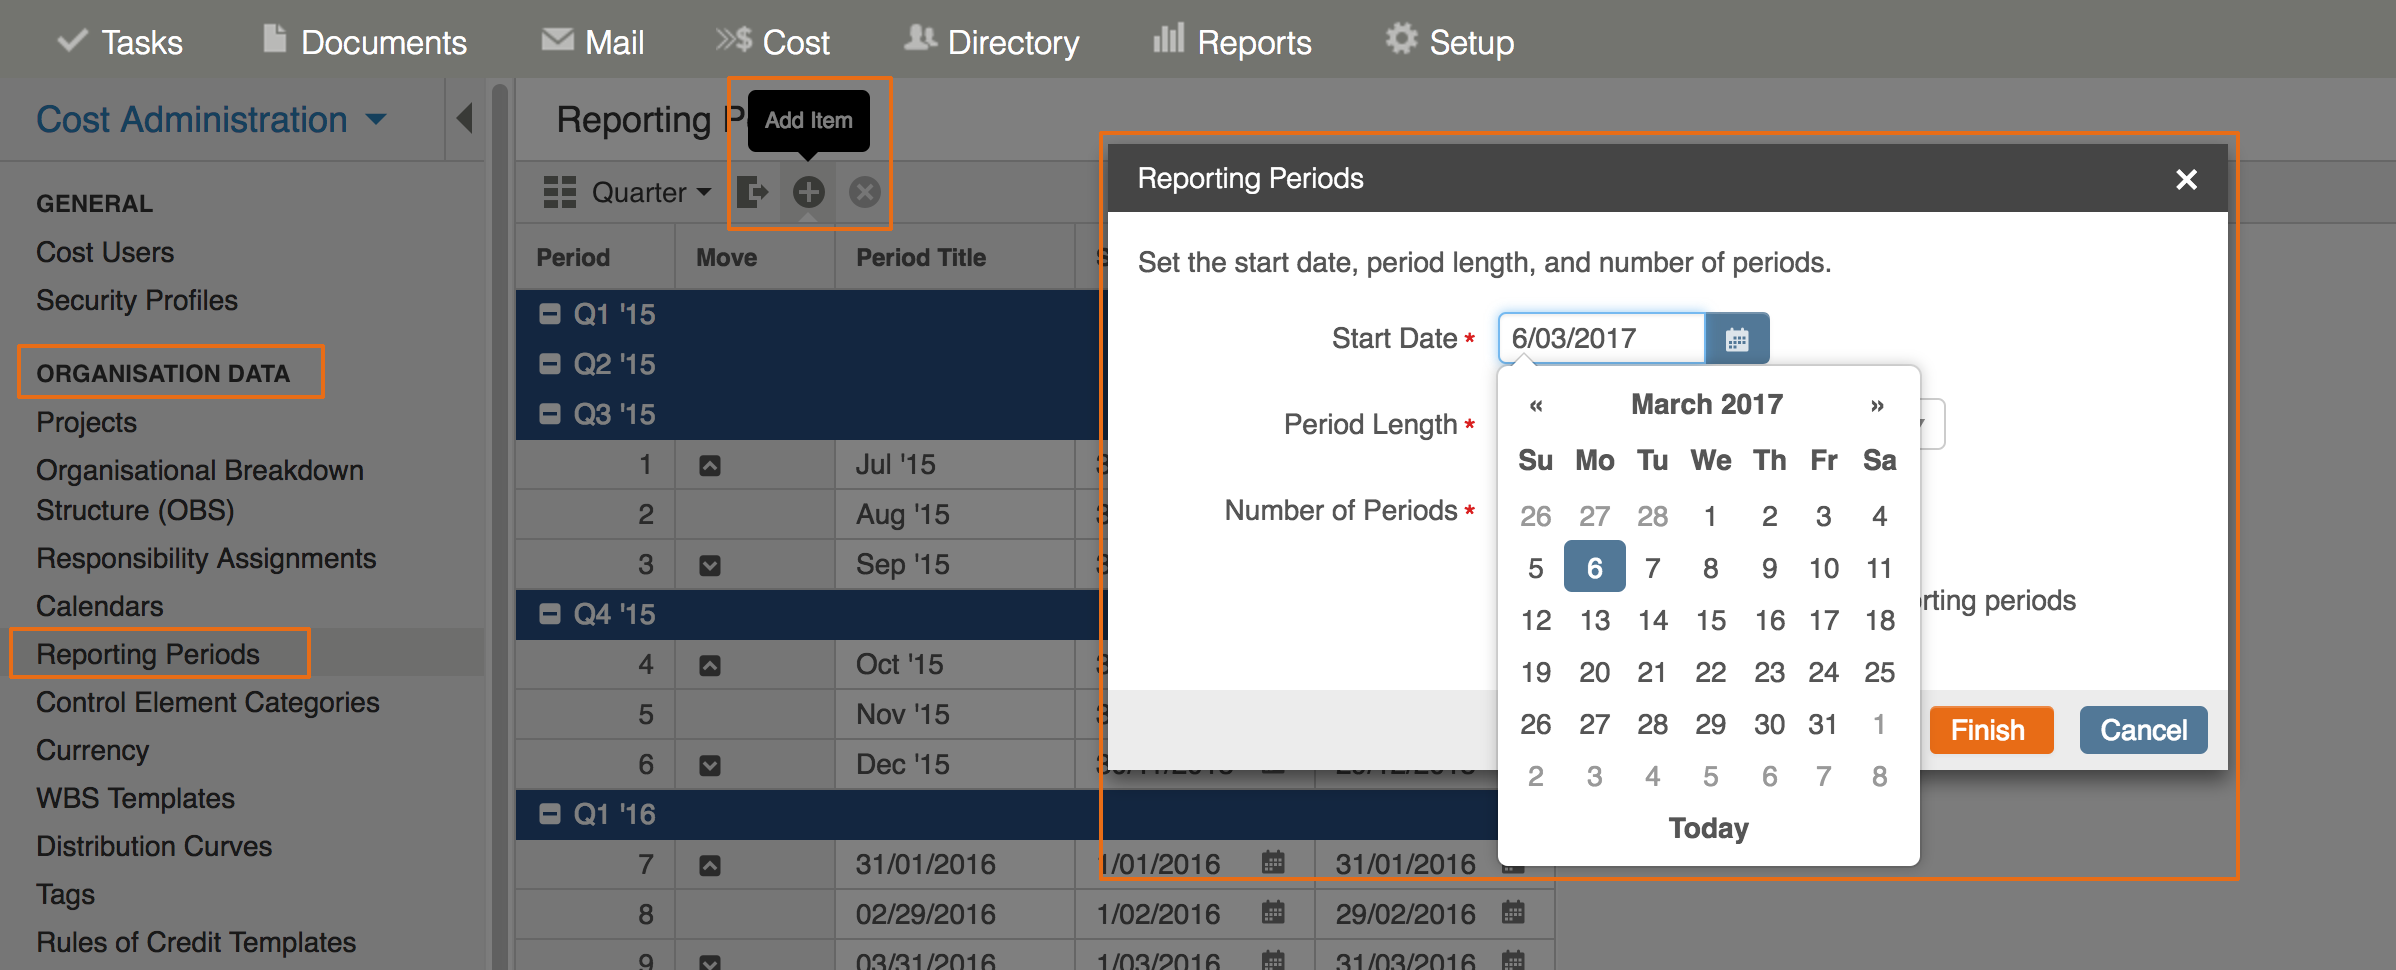
Reporting periods are a set of predefined time intervals applied to a project. Reporting periods allow you to calculate the period budgets against which you will track progress, monitor performance and measure project activities.

Reporting periods are created at both the organisation and project level and are linked together during the project setup to facilitate portfolio reporting.


To create reporting periods:

To group reporting periods:

  1. Under Cost Administration, Organization Data navigate to Reporting Periods.
  1. Click the Add icon on the toolbar.
  1. Click in the Start Date field and enter the first day of the first reporting period. This should also be the first day of the project calendar.
  1. Click the Period Length drop-down menu and define the length of each reporting period.
  1. Click in the Number of Periods field and enter the number of project reporting periods.
  1. Click Finish.

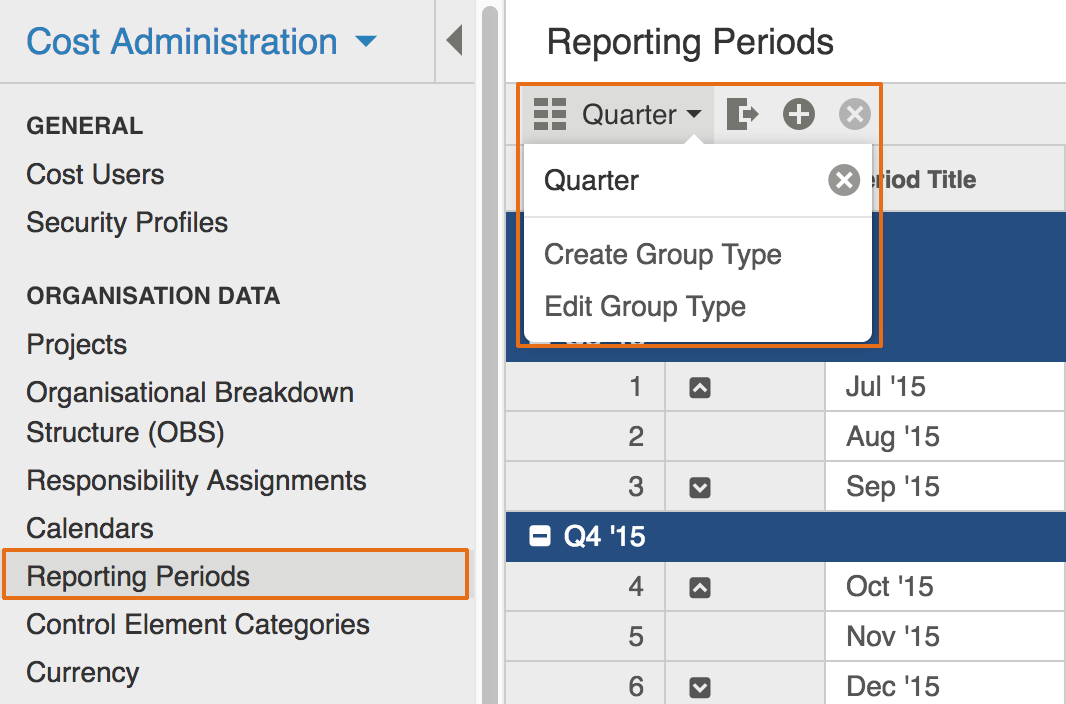
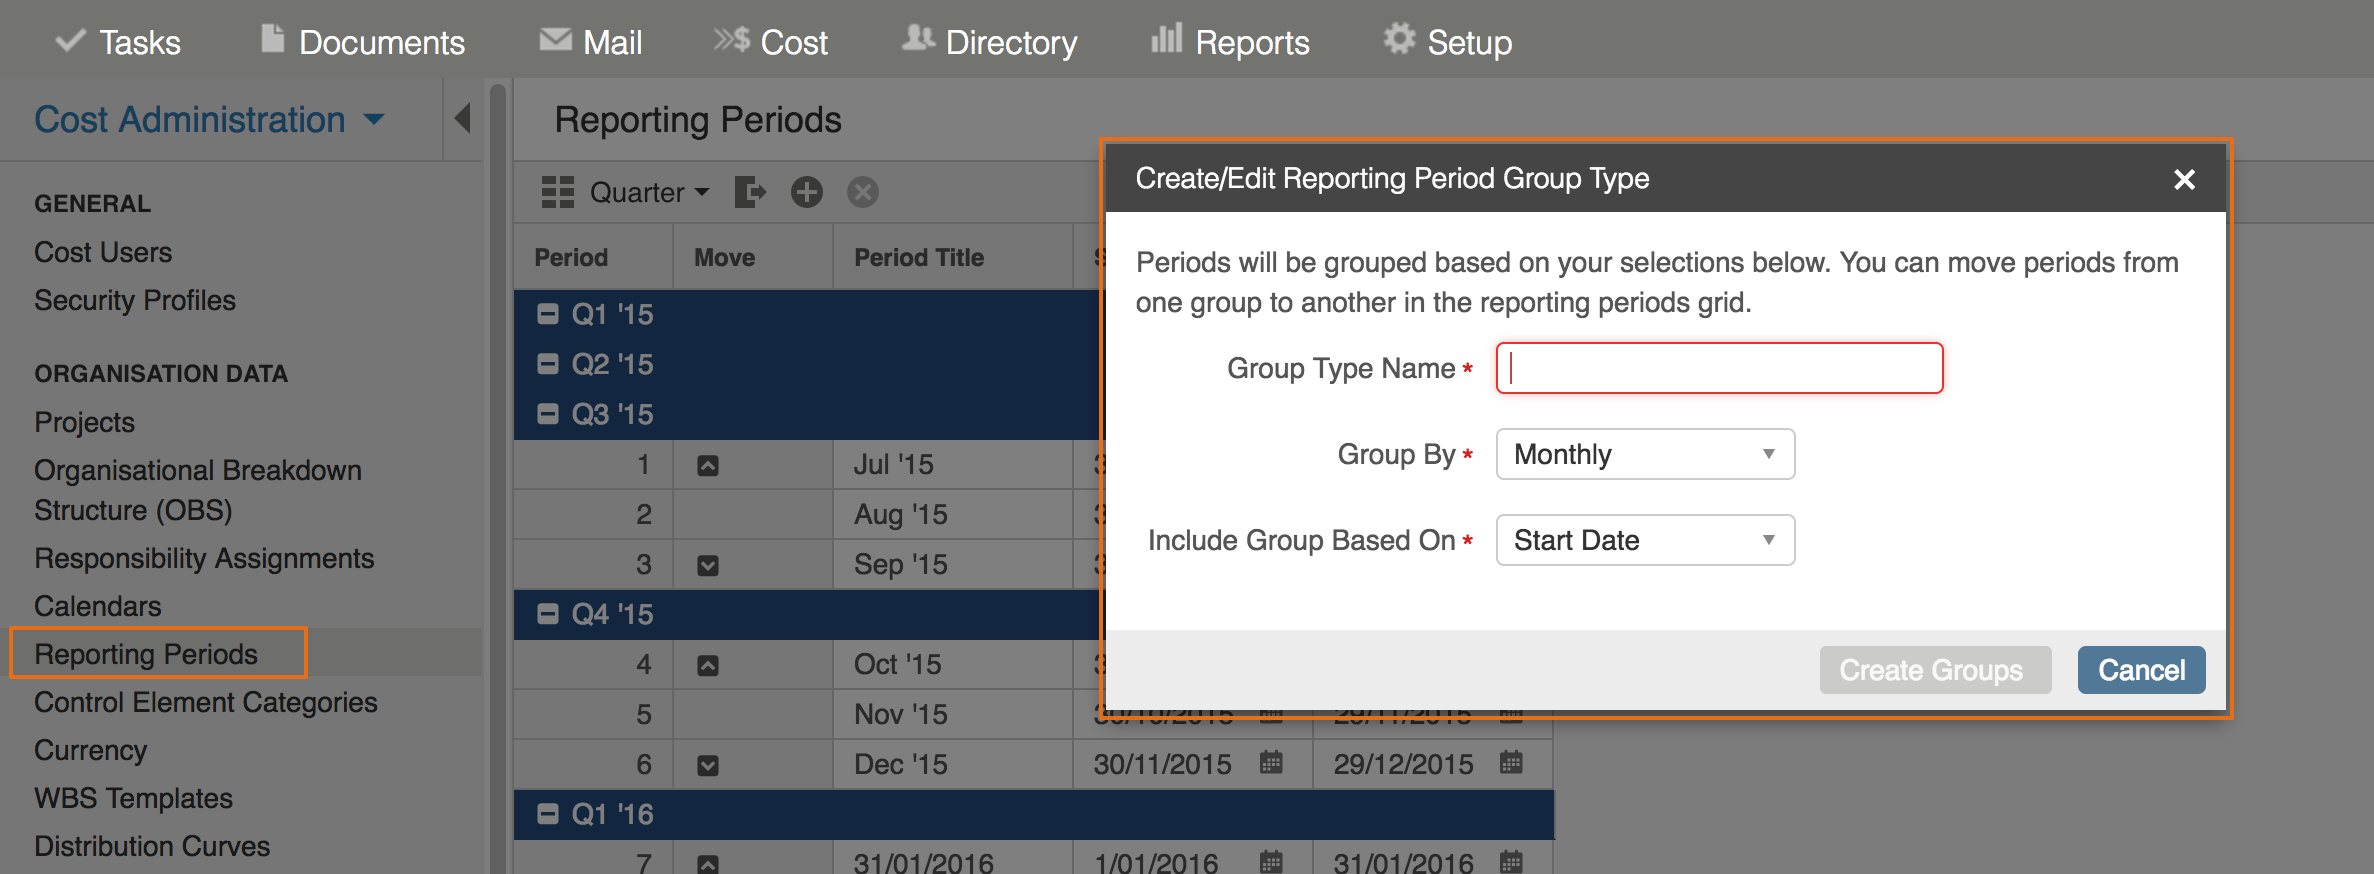
Reporting periods can be grouped together to summarize data in time-phased data reports. For example, you may want to group monthly reporting periods into quarters, or weekly periods into months.


To group reporting periods:


  1. Under Cost Administration, Organization Data navigate to Reporting Periods.
  1. Click the Group Type drop-down in the toolbar. If a group type has already been defined, click the dropdown menu, and select Create Group Type.
  1. In the Group Type Name field, enter a name.
  1. Click the Group By drop-down menu and select the duration to group reporting periods.
  1. Click the Include Group Based On dropdown menu and select either Start Date or Finish Date.
  1. Click Create Groups.