The Cost Worksheet structure is set up using WBS and Control Accounts data, which is then the Control Elements form is populated using budget and forecast data.
You populate the Cost Worksheet by importing two sets of data. Firstly, use the WBS and Control Accounts to create the worksheet structure, then import the Control Elements with budget and forecast data.
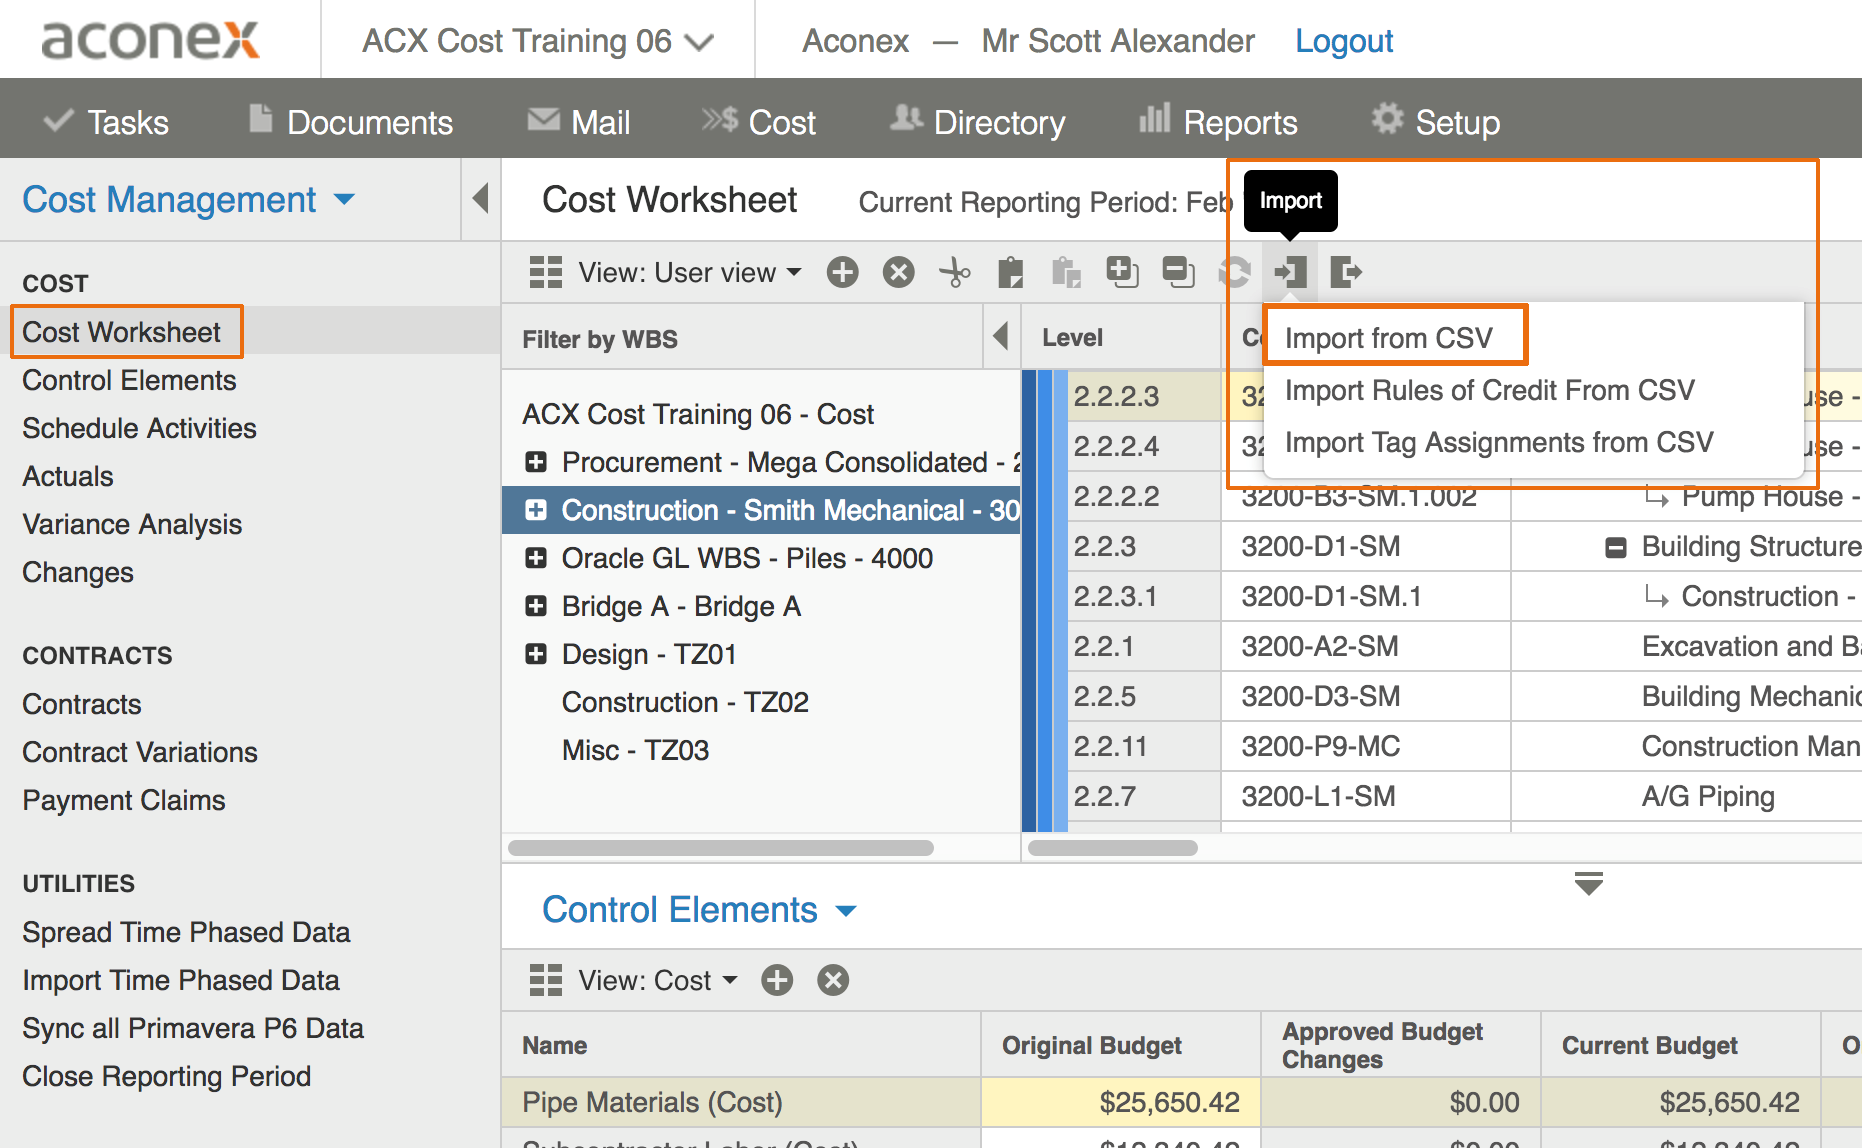
You can build an import file by exporting the current Cost Worksheet or downloading the template from the Import screen. There are a number of mandatory columns which you have to include.
The import file requires each row be classified as wbs or controlAccount in the Type column. You must also specify the Parent Code, which is used by the system to build the Cost Worksheet hierarchy. This code must exist in the file or in the Cost worksheet.
For level 1 WBS or Control Account rows, you can use the special code <ROOT>.
| Parent Code | Name | Code | Description | Type |
|---|---|---|---|---|
| [parent.code] | [name] | [code] | [description] | [_type] |
| Area A | A-000 | wbs | ||
| Area B | B-000 | wbs | ||
| A-000 | Area A-Sub Area 1 | A-000 | controlAccount | |
| A-000 | Area A-Sub Area 2 | A-000 | controlAccount | |
| A-000 | Area A-Sub Area 3 | A-000 | controlAccount |
For information about the Cost Worksheet calculation options such as percent complete method and forecast method, see Cost Worksheet Calculations.
Note: Control Element Categories must be created in either Organization or Project Settings before they can be used.
Control Element types are defined when you create Control Element Categories and must be Cost, Hours, or Quantity.
Note: Budget and Forecast information can be imported but is not mandatory.
| Control Account Code | Name | Type |
|---|---|---|
| [controlAccountCode] | [controlElementCategory.name] | [controlElementCategory.type] |
| A-001 | Concrete | Cost |
| A-001 | Demolition | Cost |
| A-001 | Disposal | Cost |
| A-001 | Fencing | Cost |
| A-002 | Concrete | Cost |
| A-003 | Concrete | Cost |
| A-003 | Demolition | Cost |


