Support Central
Create a list of object properties from your models and export them for further analysis.
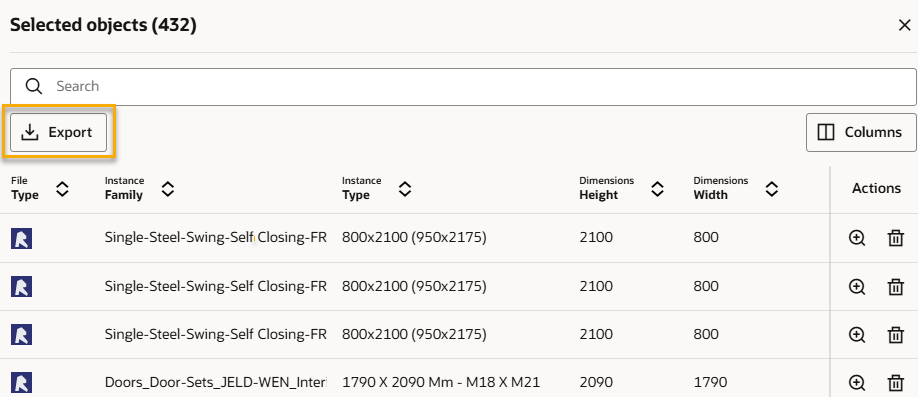
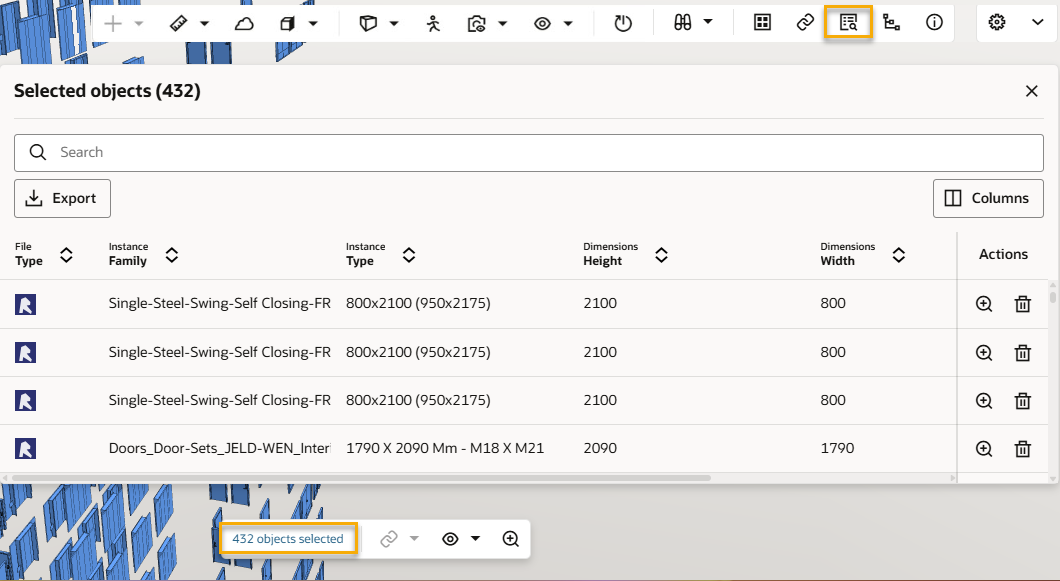
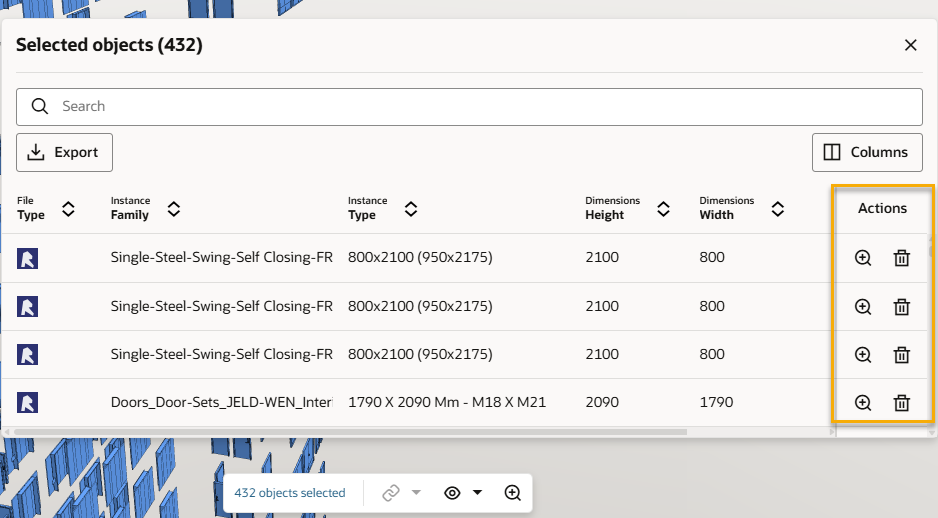
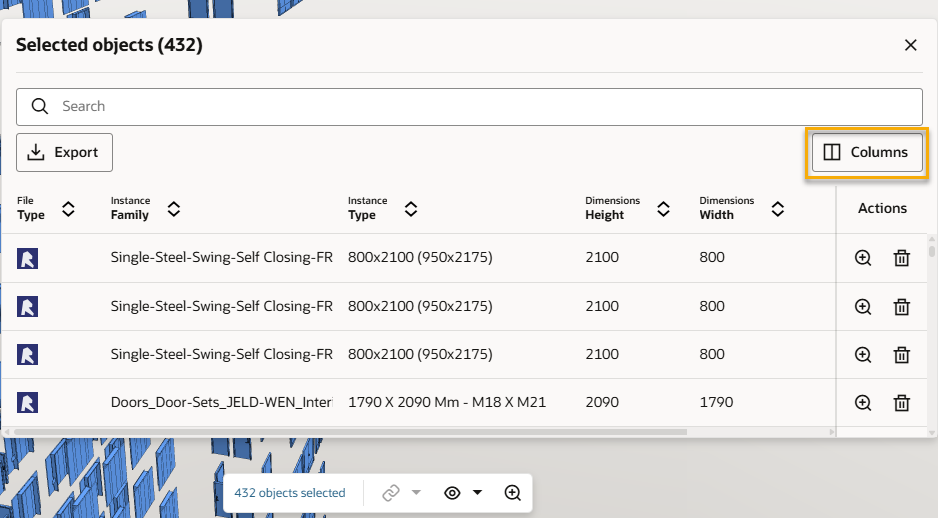
The Selected Objects list helps you create a specific list of objects and their properties. Select the objects you want to view properties for, then decide what properties you want to see. You can then export to CSV to review or import into other applications. This is useful for example, to ensure your model meets the required standards and project specifications. Plus it can help you determine what materials are required for construction.
We'll remember your chosen columns next time you visit the model viewer, unless you clear your browser cache.
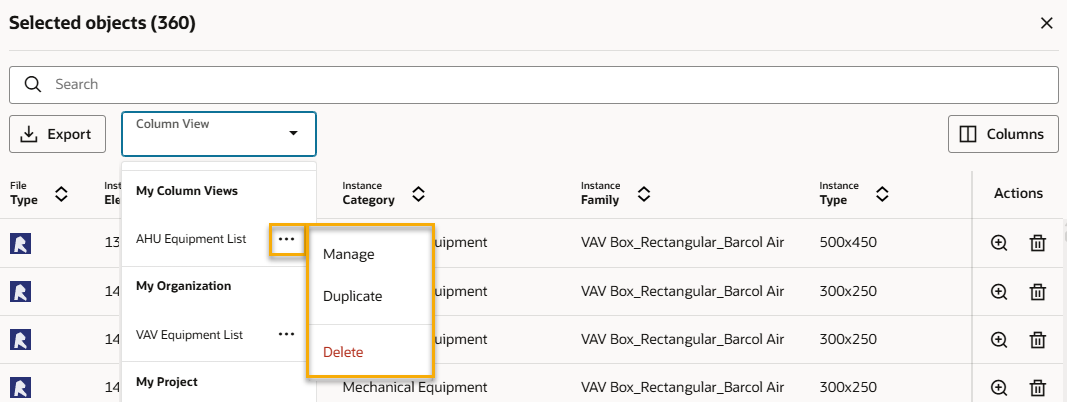
You can switch between your saved column views to more easily view and export properties across different objects and models. If you have permission, you can also share your column views with others in your organization or project.
Select a column view to quickly view a saved selection of properties.
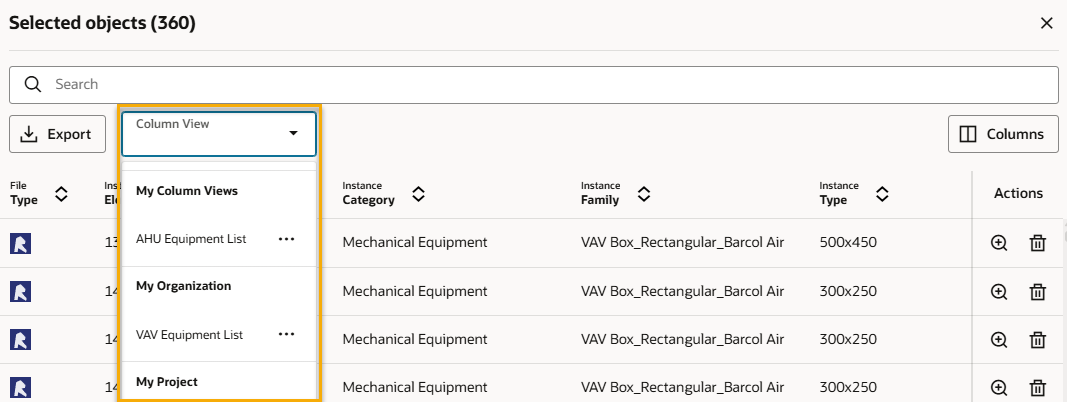
By default, the object list contains common properties used by IFC and Autodesk formats. You can choose which properties you want to display and save the view for later.

When you create or edit a column view you can choose to share it:
Privately (visible only to you).
With your organization. You'll need to have the Model Coordination Administrator permission granted to your user role to perform this action. This secured asset also allows you to edit or delete organization-wide column views that anyone in your organization created.
With everyone on the project. Your organization needs permission to manage Model Coordination activities. See Allow other organisation's to manage Model Coordination activities. This permission also allows you to edit or delete organization-wide and project-wide column views that anyone in your organization created.
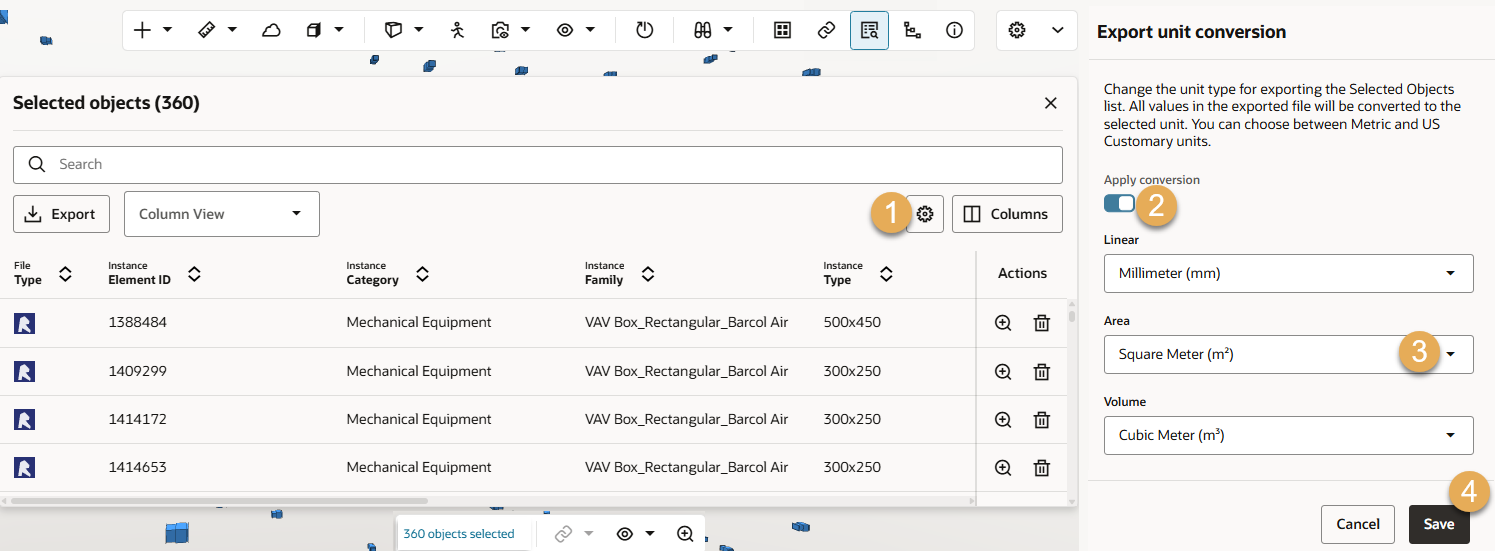
Note: Do not leave the screen while the file is being generated. For Chrome and Edge browsers, if the export generation is cancelled, then a partial export file will be created. The export may take a while if you have a large number of columns and objects.