Configure your Identity Domain for Single Sign-On

Follow these steps to configure your Identity Domain as part of the SSO setup for your organization.

Identity Domain or IDCS?

There are two ways to complete this setup. It depends on what your screen looks like when you start the process. Most of you will be using an Identity Domain in Oracle Cloud (this article), while others will use IDCS.

If your Identity Domain screen looks different you may be using the Redwood preview look and feel. You can switch this off at the bottom right of the screen.

How to use this guide

  1. You should have read the steps to enable Single Sign-On (SSO) for either the paying or non-paying organization. 
  2. Follow the steps below to set up your Identity Domain.
  3. Provide Oracle with your Identity Domain ID. You can find instructions to do this below.
  4. Once Oracle confirms the Lobby is configured to use your Identity Domain, you can then create an Identity Provider (IdP) Policy
  5. Follow the remaining steps for either the paying or non-paying organization.

Step 1: Create a new configuration for a SAML-based integration in your IdP

Details of this step are specific to your IdP application and provider (Microsoft Azure Active Directory, Microsoft ADFS, Okta), but for all SAML-based IdP integrations, the process is similar.

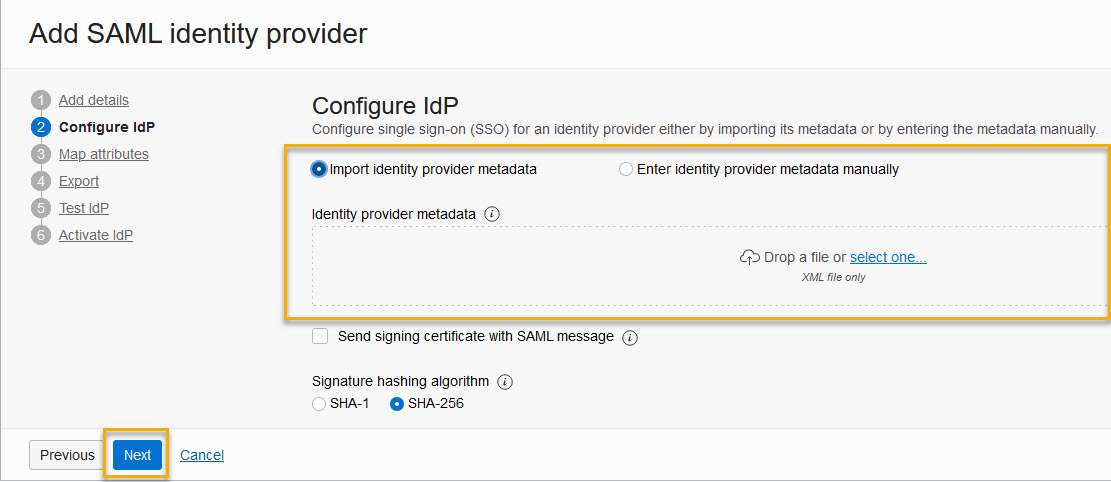
Follow your application’s instructions to create a new SAML-based integration. This will involve downloading a Federation Metadata XML file that you will later import. Once the setup is complete you can return to your IdP SAML setup screen and complete the process.

Once you have the Federation Metadata XML file, the first stage of your IdP setup is now complete – you will return to complete this later. 

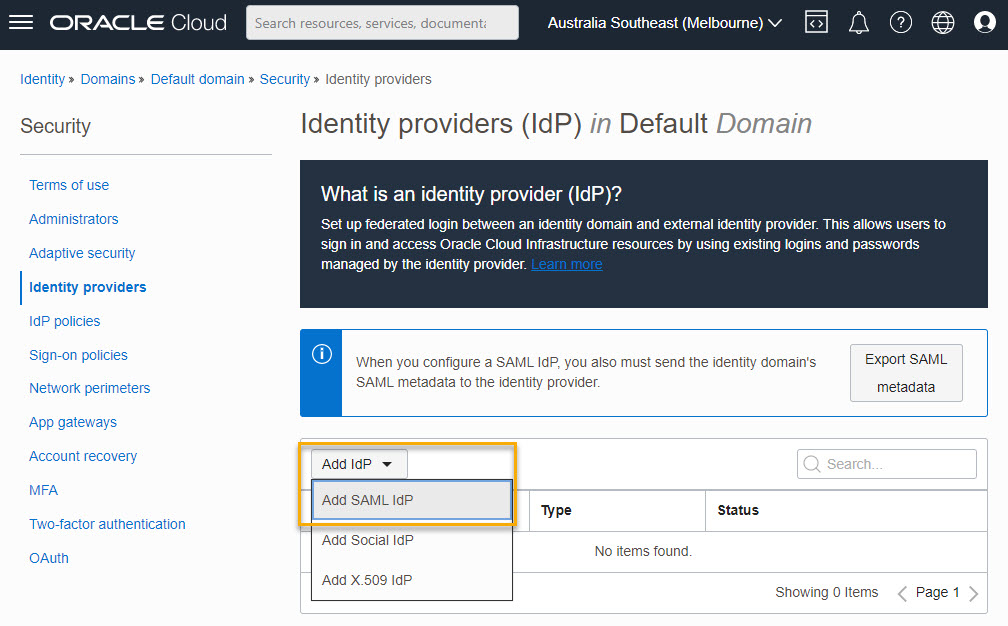
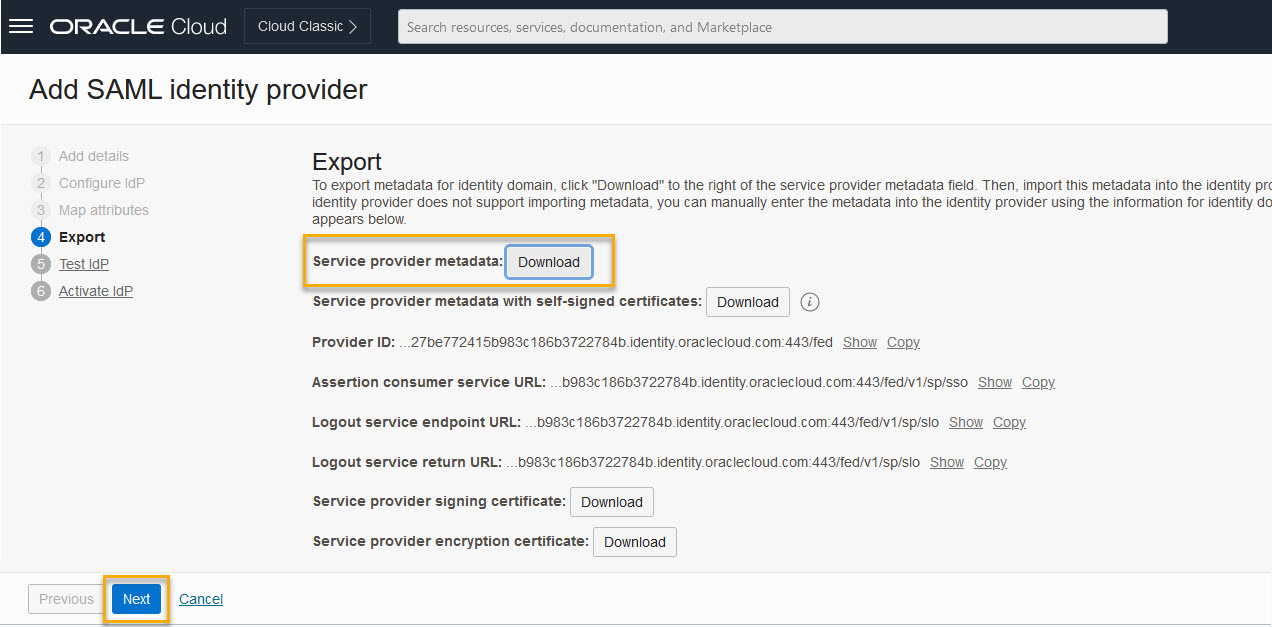
Note: Your IdP requires you to populate the Entity ID and the Reply URL of the Identity Domain. Depending on your provider you’ll need to either upload a Federation Metadata XML, or enter these details manually. 
 
As an example, the Entity ID and Reply URL can be formed from your Identity Domain URL as follows:

Entity ID: https://idcs-exampleid1234.identity.oraclecloud.com:443/fed
Reply URL: https://idcs-exampleid1234.identity.oraclecloud.com/fed/v1/sp/sso
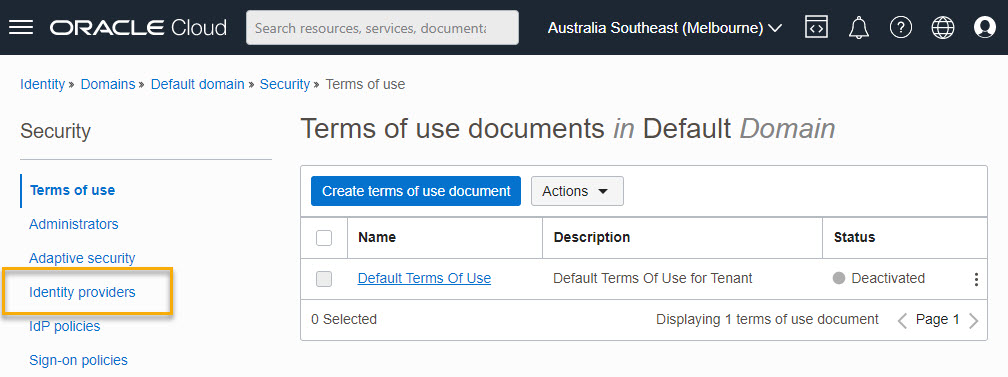
Step 2: Navigate to the overview screen

  1. Log in to your Oracle Cloud Console. You should see the screen below.

Tip!

If your screen does not look like this, you may be using IDCS. You'll need to follow these instructions.

  1. You need to navigate to the overview screen that looks like this: 

Tip!

If you already see this Overview screen, you can skip to the Identity Domain Configuration section below.

  1. Click the menu at the top left and select Identity & Security.
  2. Click Domains.
  1. Make sure the compartment is selected and click the Default link in the table.

Tip!

You should now be on the overview screen.

Step 3: Identity Domain Configuration

  1. From the overview screen click Security.
  1. Click Identity Providers.
  1. Under Add IdP, click Add SAML IdP.
  1. Upload the Federated Metadata XML file that you downloaded from your SAML IdP.
  1. On the Map screen use the default values and click Next.
  1. Download the Metadata file.
  2. Switch back to your SAML IdP to complete the setup.

Step 4: Finish configuration in your IdP

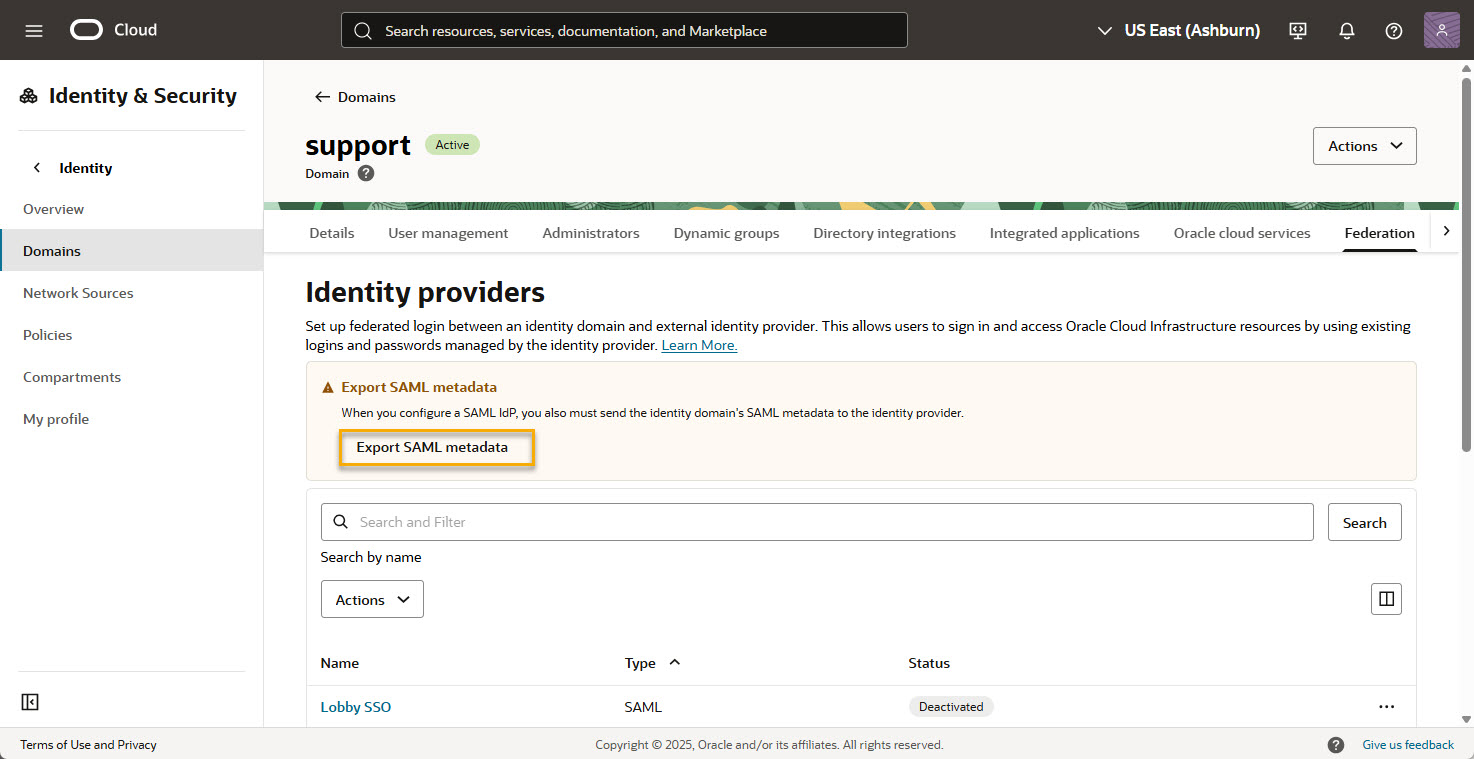
You can now return to the configuration of your IdP service.

  1. Follow your IdP application’s process to upload a metadata file and upload the Federated Metadata XML file you downloaded.
  2. After the upload, you should see a screen indicating URLs and other info, taken from the metadata file.
  3. Confirm that the user identity is based on the user’s email address.
  4. Typically IdPs have policies or groups that indicate if a user is eligible to use a configured SAML provider. Confirm that users are added to those groups or policies in your IdP if required.
  5. At this point, both your IdP and Identity Domain are fully configured and ready for testing. Switch back to the Identity Domain window and use its test capabilities.

Step 5: Test and finish configuration

  1. Click Test Login.
  1. You will be presented with your IdP’s sign-in screen. Enter valid credentials for a user that exists in your IdP that is configured to use the SAML Federation App. A user account with the same email must also exist in your Identity Domain. 
  2. If the test sign-in was successful you will see the following message:
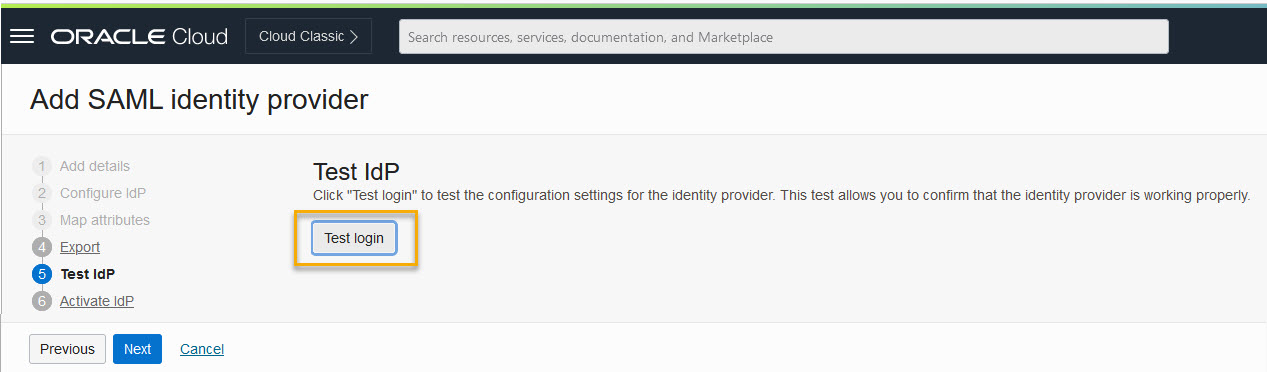
Your connection is successful.

You may close this window and go back to the admin console.

If the test login failed you will see a screen similar to the one below. Please read the error description to amend the setup or create missing data:

Connection failed. Configuration may need to be modified.

No user was returned during the SAML assertion to user mapping via the NameID attribute for partner Azure AD: NamedID poleary@majestic.com, user attribute name userNamed, message: ***See below***.
Show Assertion Details
You may close this window and go back to the admin console.

Step 6: Activate your Identity Domain

  1. Click Activate and then click Finish.

Tip!

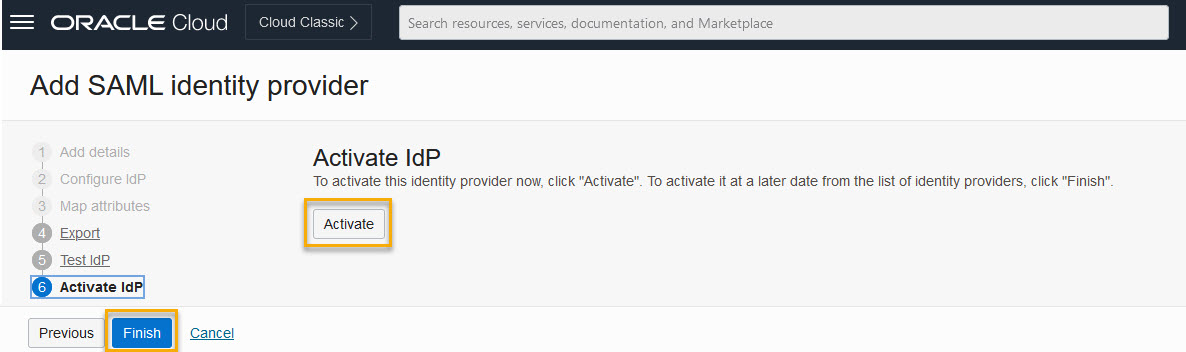
Note: Activating your identity domain will not affect existing Lobby users. They can continue to sign into the Lobby as usual.  Only after you create an IdP Policy will users see a change to their sign-in process and be directed to your organization's identity provider.

Step 7: Turn off the Oracle Cloud welcome email

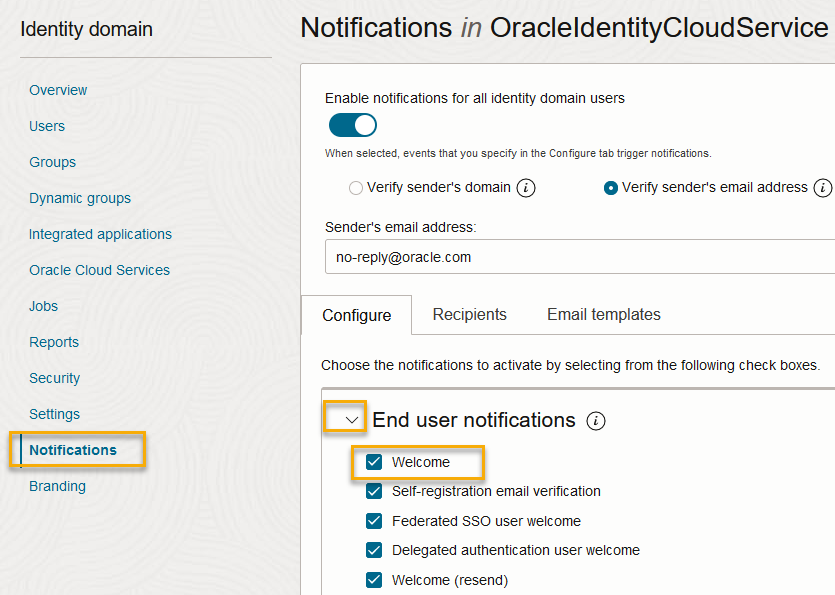
Turn off this setting so your users don't receive a welcome email from Oracle Cloud. This email will not take them into Aconex so it's best not to send it.

  1. From your Oracle Cloud Console overview screen click Notifications.
  2. Click to expand the End user notifications list.
  3. Uncheck the Welcome checkbox.
  4. Click Save Changes.

Step 8: Provide Oracle with your Domain ID

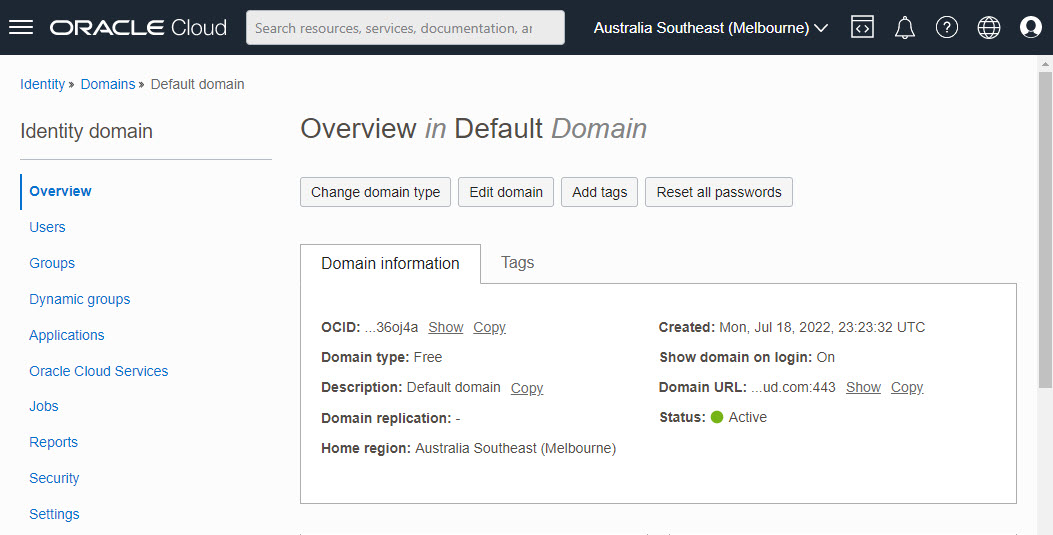
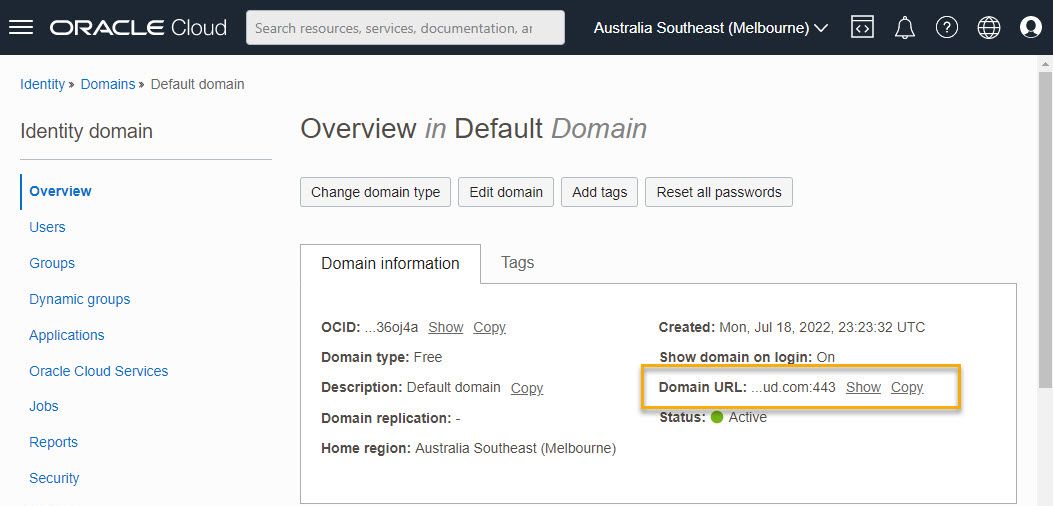
After configuring your Identity Domain you need to provide Oracle with the ID for your Identity Domain. 

The easiest way to do this is to paste your Domain URL into the ticket. The URL will look something like this: https://idcs-.identity.oraclecloud.com/ui/v1/myconsole

You can find your Domain URL in the overview screen.

You will not be able to create an Identity Provider (IdP) Policy until Oracle confirms the Lobby is configured to use your Identity Domain. 

You've successfully configured your Identity Domain. 

Next, you need to create an Identity Provider (IdP) Policy. Note: Oracle needs to have confirmed the Lobby is configured to use your Identity Domain before you complete these next steps.