Support Central
All projects will have dozens of issues raised against, all of which have to be managed in various ways. For example, opening them, and reviewing and editing their details.
Once an issue has been created you can do several things with them from the:
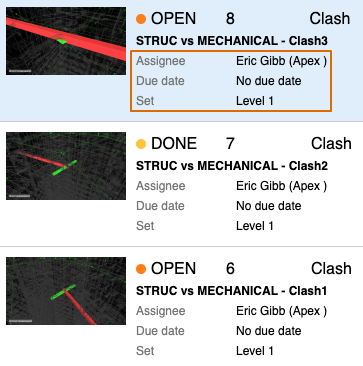
The Issues screen is where you can access and see the details of your project issues. You can also edit them and add comments. As there are likely to be many issues, you can filter them by including Status, Type, Assignee and Issue set.
The Issues screen is made up of three main areas:

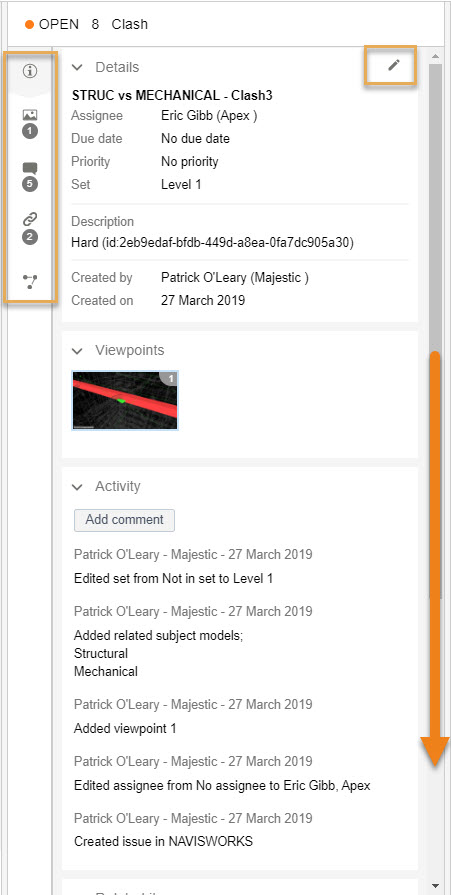
To see an issue’s details, click on it in the list to open it. The information you can see in the list is:
If you have lots of issues, you can filter these individually or in combination of any of the following:
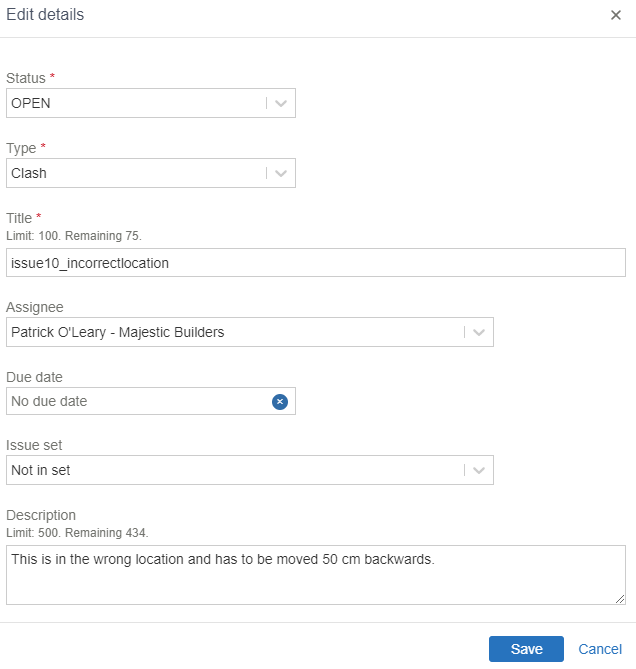
This part of the screen is divided into two sections. One gives you an at-a-glance view of the issue’s details in the following sections. Clicking on any of the icons takes you to its information. You can also edit a section’s information using the Edit icon on the right side of the panel. The second part of this screen shows the following:
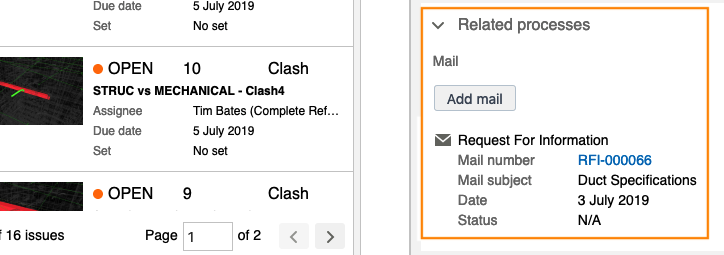
You can raise and track Aconex mail, an RFI for example, directly from a design issue without leaving the Issues screen. You can see all the activity and history of all the mail you send in the Details panel/Related processes. Each mail includes a link back to the issue register.
You can speed up the process of editing design issues by editing them in bulk. You do this by filtering the current ones to create a list of the ones you want to change using the Bulk edit button. For example you might want to select them by Status or Type. You can then update these by changing fields such as Assignee and Due Date.
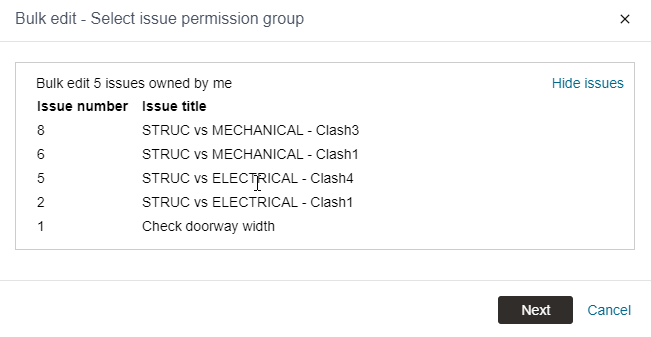
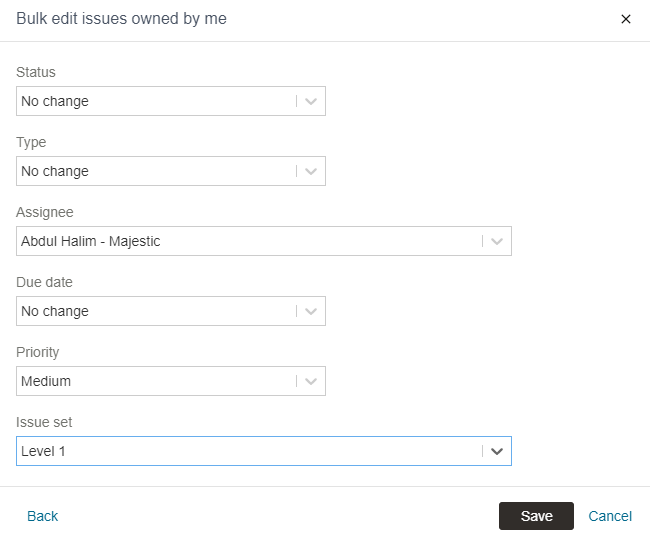
You can only do this if you have edit permissions.
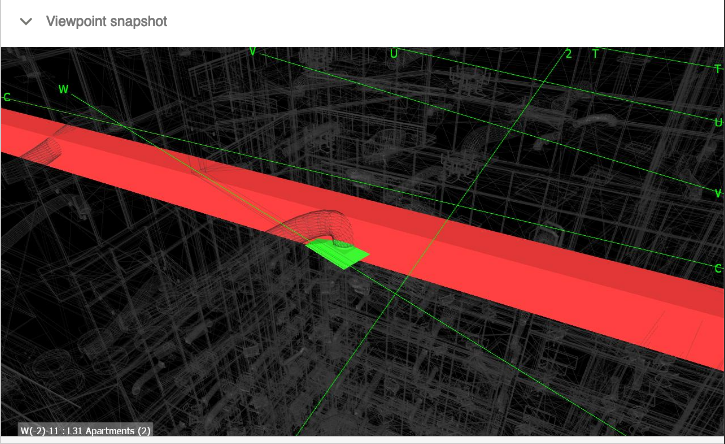
The Viewpoint snapshot and Model viewpoint panels can be closed as required. The Viewpoint snapshot only shows the issue, it cannot be manipulated in any way, and has no other functionality.
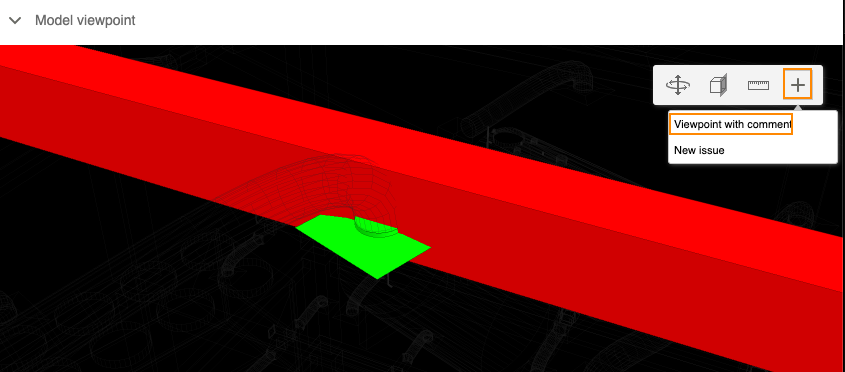
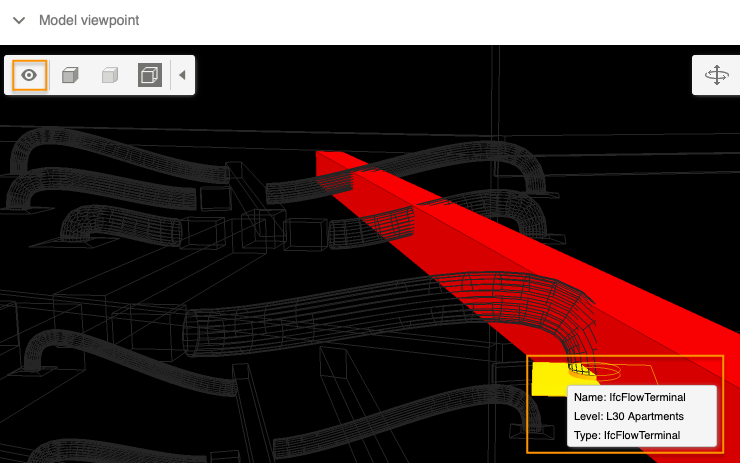
If you select the object in Model viewpoint, you can navigate it in the same way you would in the viewer including adding sections, measurements and adding a new comment with a viewpoint.
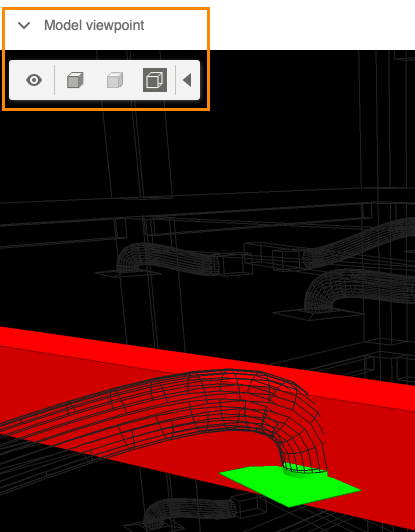
You can see an object's Name, Level and Type properties by clicking on the Eye icon. Note that if any of these haven’t been entered, it is shown as N/A. The other icons allow you to view the issue in opaque, transparent or wireframe modes.
One of the problems with viewing an issue's clashes is being able to see them clearly in the viewer. However you can change how you see issues by toggling the viewpoint. This means you can turn wire frame mode off to have a better view of the context of the clash. You can see clashes in solid, transparent and wireframe modes by clicking the eye icon in the Model Viewpoint pane.
If you're reviewing a design issue you can add additional context using Viewpoint with comment. To do this, select the plus sign in the menu on Model Viewpoint panel and select Viewpoint with comment.