Support Central
Decrypt your archive before you install it.
Aconex takes data protection very seriously. To ensure your information doesn't fall into the wrong hands during transit, we encrypt the archives or the hard drive that contains your archive.
Before you can start using your archive by installing the Archive Viewer, you need to decrypt your archive.
When you plug the archive hard drive into your computer, you may be prompted to format it. Do not format the drive. You need to follow these decryption instructions to open the Archive inside it.
If you are prompted to format the USB drive. STOP! This means the drive has been encrypted. Do not format the drive, otherwise, your data will be lost. Safely remove the USB from your device.
You need to follow these decryption instructions to open the Archive inside it.
To begin, you will need to download and install the decryption software called Veracrypt.
Download VeraCrypt from the documents attached to the Archive Instructions Mail, or from the VeraCrypt website.
Follow the installation wizard to set up the software.
To open VeraCrypt, double-click on the desktop icon that was created during installation.
Insert the USB or hard drive that contains your archive into your computer.
Veracrypt will show you an overview of the drives on your computer.
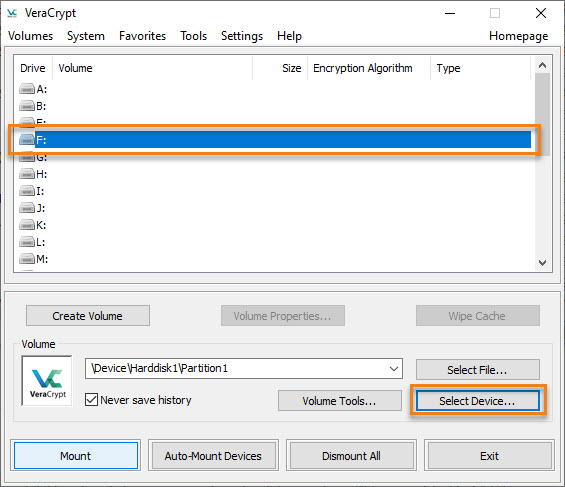
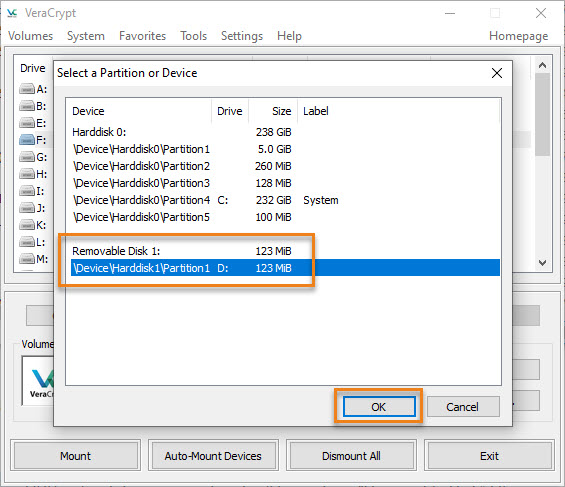
If you have trouble finding your Archive USB or hard drive, remember it will be under a “Removable Disk” title. Always select Device\Hardisk1\Partition under it.
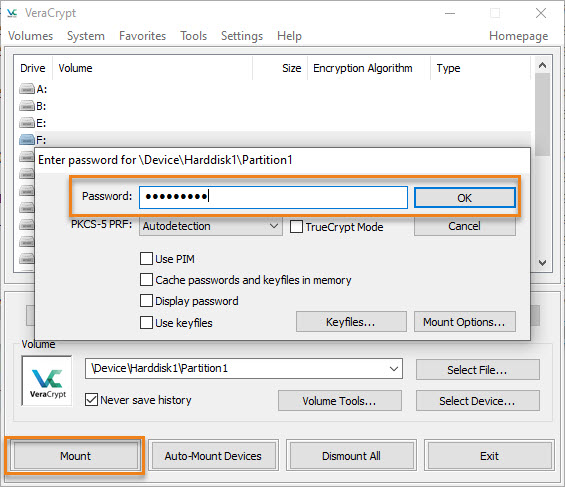
If the steps to manually mount are not working, you can also try clicking Auto-Mount Devices to allow veracrypt to mount the USB drive.
Once it’s mounted, the free drive you selected at Step 4 will appear in Windows like any other drive (in this example, it’s F: drive).
You can access the drive as you normally would via Windows, or by double-clicking the drive directly in VeraCrypt.
Your archive is now decrypted. Follow these instructions to install it, so you can view all your mail and documents and use the same search functionality you have in Aconex.
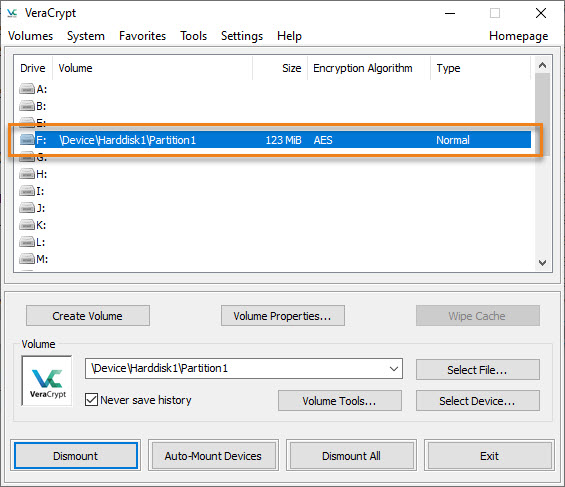
When you have installed the archive from the USB or hard drive, you will need to dismount the drive before you remove the USB or hard drive from your computer.
To do this, go back to the VeraCrypt window and select the drive you mounted the archive to (in this case, the F: drive), then click the Dismount button.
You can now safely remove the USB or hard drive from your computer.
When you plug the archive hard drive into your computer, rather than be prompted that the drive needs formatting, it will open as normal, and you’ll find the Archive Viewer installer which is a .exe file.
Double click on the installer and follow the instructions.
After the installation is complete, you will be prompted to enter a secure passphrase to commence the decryption process. The passphrase would have been sent via a secure transmittal in Aconex Mail.


