Adding user tips to configured fields

Using customized fields to show information and calculation tips.

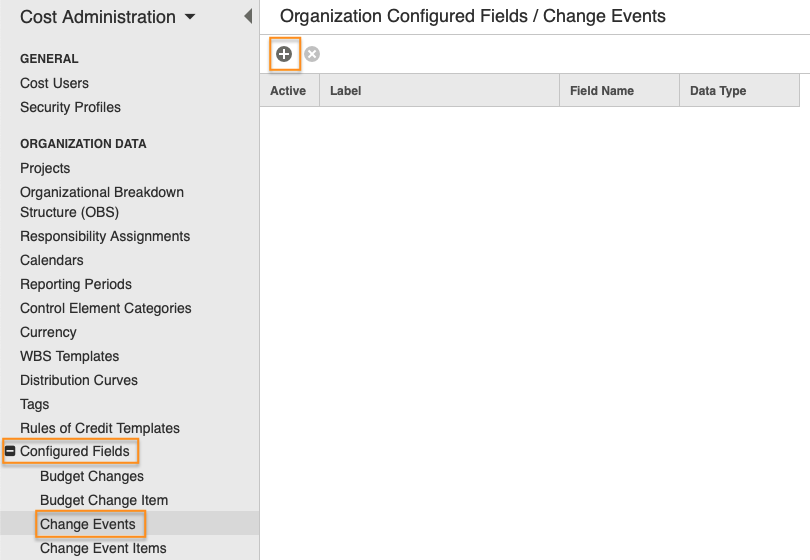
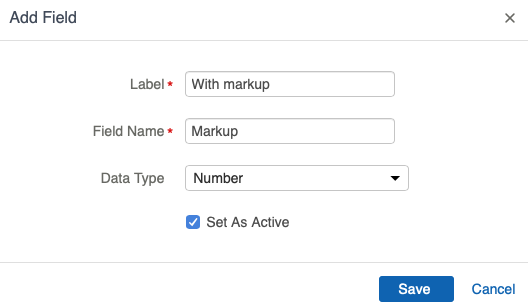
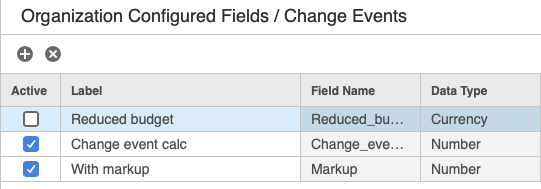
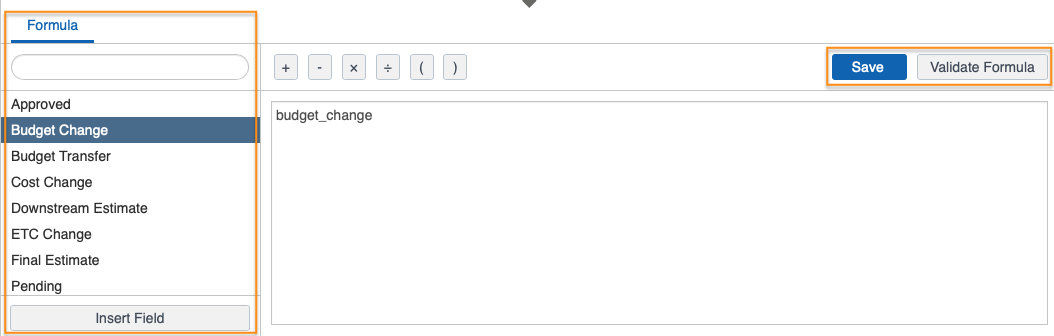
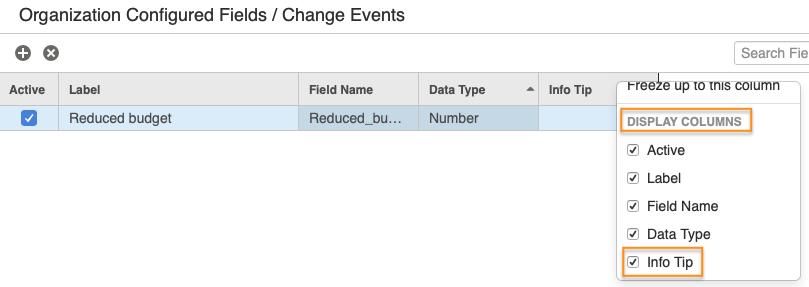
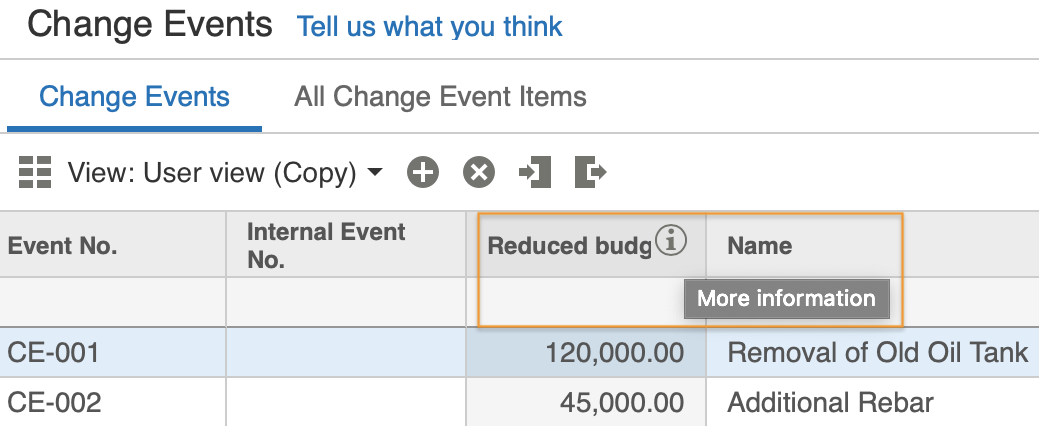
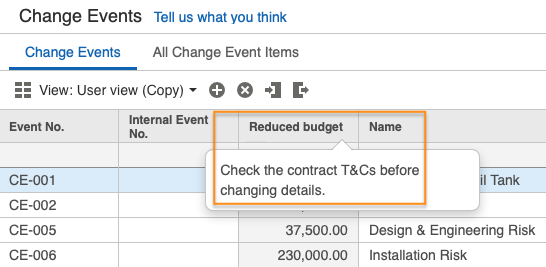
Users sometime want to see the calculation used in Cost that is displayed as a value of a custom field – called Info tip – in the Change Events grid. Once this has been set up users can add their own information in the form of a tip or calculation. This information can then be seen by all other users. 

Adding an Info tip

  1. To add a custom field, select Configured Fields under Cost Administration.
  2. Select the page you want to add a custom field from the list that opens.
  1. Select the add icon to open the Add Field window.
  1. Fill in the fields as required and press Save. This adds the new fields to the list of fields in the grid. The next step is to add the fields used in the calculation.
  1. Now go to the Formula pane below and add the system fields you want to use,.
  2. Then verify and then save the formula using Validate Formula and Save.
  1. Go back to the main grid above and right-click anywhere in the column header.
  2. Scroll down through the Display Columns list and select Info Tip. This adds the new column to the right of the grid.
  1. Double click in the cell, enter a short description for the tip, then click outside the cell to save it. This information is what users will see when they hover over the the Info icon.
  2. To review your tip, go to the page that you created your new field for and add the new column to the grid. In our example this is called Reduced Budget, and is in Cost Management/Change Management/Change Events.
  1. Hover over the title to see the Info icon, then select it.
  2. Click the icon to see the tip.