Create a mail template (auto-text)

Use the auto-text feature to easily add standard text that is often used in mail.

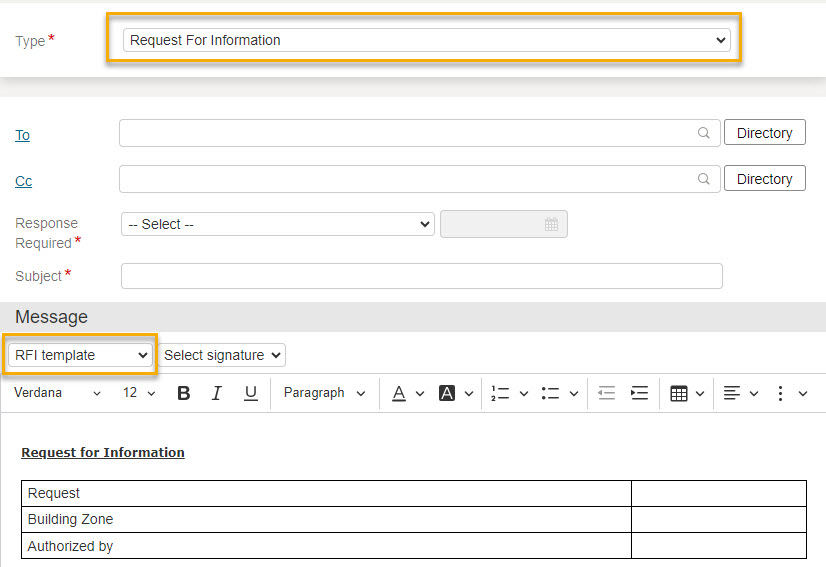
Each time you create a mail and select the mail type, your auto-text templates are available to add into your mail. You can also set the default template (auto-text) for a mail type.

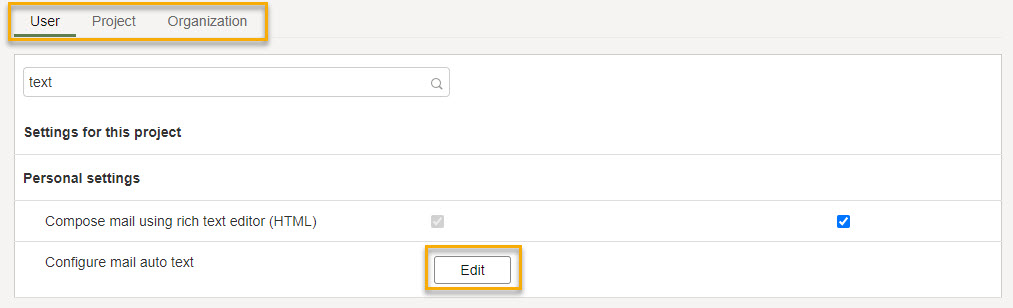
Auto-text can be set at the user, project or organization level. You'll need appropriate permission to set auto-text at the organization or project level:

  • Edit organization information provides access to the organization preferences tab. Typically the Org Admin role has this permission.
  • Edit project settings provides access to the project preferences tab. Typically the Project Admin role has this permission.

You can:

  • create a template for one particular mail type.
  • create a template for all mail types.

Tip!

If Mail and Document types for your project are locked, you won't be able to set default auto-text for mail types. Your Project Admin can temporarily unlock these for you. See How to enable the Edit button.

Who can create an auto-text template?

You can create a template for yourself.

Your Org Admin can create a template that will be available for everyone from your organization in your organization. They can do this per project, or build one that is available on all your organization’s projects.

Create an auto-text template

  1. Choose your project from the Project Selector at the top of the page.
  1. Click Setup.
  2. Under Configuration, click Preferences.
  1. To create a template only for your own use, select the User tab. If you have permission you can also create templates at the project or organization level.
  2. Scroll down to Personal settings, Mail, Configure mail auto text.
  3. Click Edit.
  1. Click either:
  • New - Plain Text to create text with no formatting.
  • New - HTML to apply layout formatting such a tables, as well as setting font and color and so on.
  1. Enter a name in the Auto Text Name field to identify this text. A meaningful name makes it clear when and how to use the auto text.
  2. Complete the Auto Text field. You can type directly into the field, or paste text from Microsoft Word or another application.
  1. If required, make this text available only for selected mail types:
  • To add mail types - double-click a mail type in the Available Mail Types list.
  • To remove mail types - double-click a mail type in the Selected Mail Types list.

Tip!

Leave the Selected Mail Types list empty to make this template available to all mail types.

  1. Click Save.
  2. You template will now be available to select from the appropriate mail types.