Create a workflow template

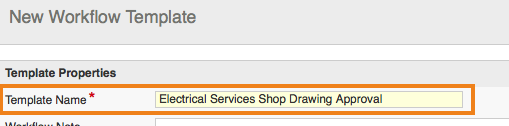
Configure a template for documents that go through a repeatable review and approval process.

Required permissions
Create/edit a workflow template

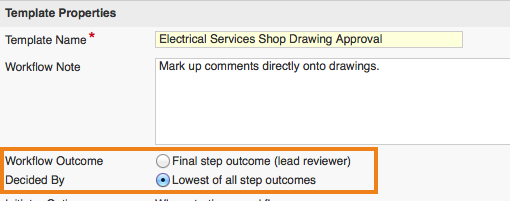
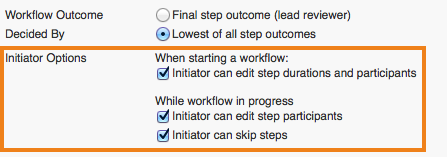
A workflow template sets out the rules for a workflow. These rules include:

  •     who needs to approve the documents.
  •     in what order people need to approve the documents.
  •     what happens when the final approval is given.

  1. Choose your project from the Project Selector at the top of the page.
  1. From the top navigation, click Workflows then select Template.

Tip!

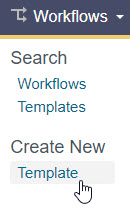
Don't see a Workflows button? The Workflows module may not be enabled on your project. Contact your Project Administrator to ask them to enable it.

  1. Enter a unique name for the Workflow Template.
  1. In the Workflow Note field, enter any notes or instructions that you want all reviewers to see when the documents are transmitted to them.

    This information will be displayed on screen for each reviewer. It will also appear in the workflow transmittal.
  1. Decide how the final workflow outcome is calculated using the Workflow Outcome Decided By options.

    A workflow's outcome is the final outcome of the entire review process; each step in a workflow also has its own step outcome. You can use these step and workflow outcomes to control the point at which a review process ends.
    • If you want the entire workflow to be followed through before it can be given an outcome, choose Final step outcome. This sets the workflow’s last step as its outcome. That step outcome can only be set by the final reviewer in the workflow, so they're the only person who can complete the workflow.
    • If you want the review process to stop if any reviewer, for example, rejects the documents, choose Lowest of all step outcomes. This means that the lowest step outcome will be the final workflow outcome. The lowest outcome is the one in the Review Status Labels list whose color is closest to red. That outcome can be selected by any reviewer at any point in the workflow.
  1. Under Initiator Options, select the changes you want the workflow’s initiator to be able to make to the workflow before it starts, and while it’s in progress. You can give them the option to:
  • change how long steps take.
  • change who’s involved in the step.
  • skip steps in the workflow..
  1. In Transmittal Settings, if all the workflow’s transmittals will be issued for a particular reason, you can set that, too.
  1. Decide if you want reviews initiated from this template to automatically flatten markups after the review completes. Choose to flatten annotations, stamps, or both.

Tip!

The final workflow transmittal includes the flattened version and the previously un-flattened version of the document in case further changes are required.
  1. In the Default Step Completion Rules section, set default completion rules for the workflow’s steps. You can change individual steps’ completion rules when you add steps to the draft workflow template.
  • Use the Parallel step completed when list to determine how the completion of parallel steps influence the workflow.
  • Use the On Rejection list to decide what will happen in the workflow if a step is rejected.
  1. In the Final Transmittal field, add the names of any people you want to have copied in on the workflow’s final transmittal.
  1. Build out the workflow steps by dragging and dropping. Steps can be linear or stacked on top of each other for parallel reviews.
  1. Click the arrow icon to add the details for each step:
  • Step Name: Add a unique and descriptive title for the step.
  • Participants: Choose the users who will review the documents.
  • CC: Choose the users who will be copied on the workflow transmittal to keep them in the loop.
  1. For each step within the workflow, you can adjust the completion rules. Click the arrow icon between the steps to change the completion rule that was set by default.
  1. Set the expected duration for each stage of the review. This is the number of days the participant(s) have to complete a step before it is overdue.
  1. Click Save To Draft to save the template and continue working on it later.
  2. Click Activate to make the template available to initiate workflows.

What's next?