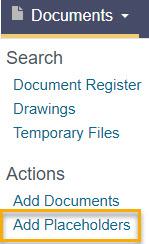
Add Placeholders

Create placeholders for your documents in seconds

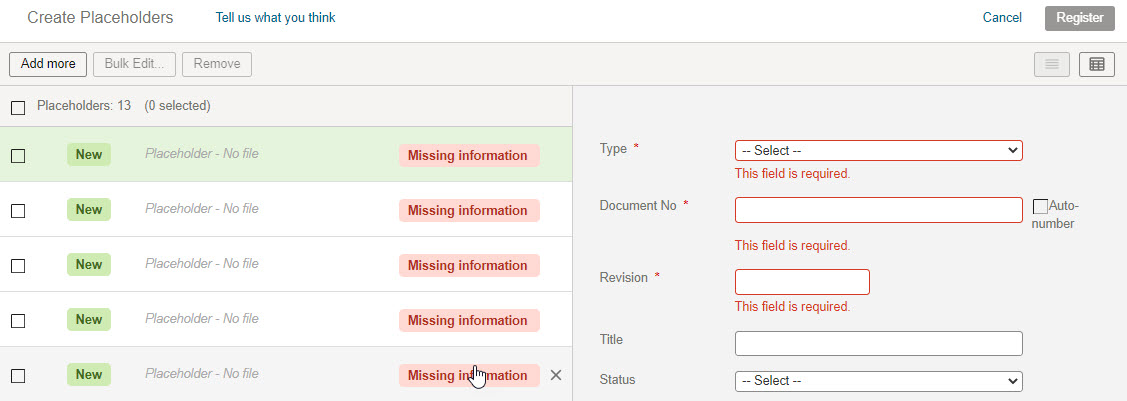
Follow these steps to register new placeholders.

  1. From the main navigation menu, click Documents and select Add Placeholders. You can also select Add Placeholders from the document register search screen.

Tip!

You need to be using the new upload experience to see this option.

  1. Choose from the following options:

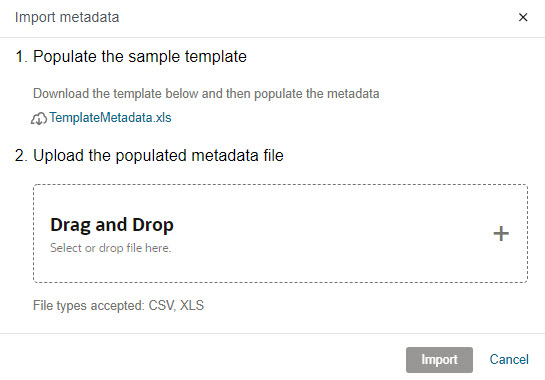
   From Excel - create placeholders from metadata contained in an excel spreadsheet. 

   Manually - enter metadata (Document Number, Title, Discipline) manually for the new placeholders. 

  1. If you selected Manually, enter the number of placeholders you want to create, then skip to step 11 below. You can always add more placeholders on the next screen if you need to.

    If you selected From Excel, follow the steps below to import metadata.

Import Metadata

  1. If you selected From Excel, download the template containing the document fields that need to be populated. Each project will have a unique template. Templates will change if document fields are changed on your project, so it's always best to start with a fresh template.
  2. Open your metadata template file in your spreadsheet application such as Excel.
  • You'll see a worksheet for each document type that helps you keep things organized. 
  • Single-select fields appear as a dropdown for faster, more accurate data entry.
  • You'll also find instructions in the first worksheet of the template to guide you through each step.
  • During the import process, worksheets are read from left to right. If a document is changing its document type from one version to the next, the order of the sheets can be changed to achieve the correct ordering of versions. Do not remove any of the worksheets otherwise the process may fail.
  • If auto numbering has been enabled for the document type you are creating placeholders for, you can leave the Document No. field blank on the metadata template. Aconex will auto-assign the next available document number for that document type.
  1. Complete all the mandatory fields. They're shown in bold in your file.
  2. Complete as many of the other fields in the template as you need to.
  3. Upload the populated metadata file by dragging and dropping the file, or click anywhere in the outlined space and choose files from your computer. 
  4. Click Next to create your placeholders.
  5. Click Download Metadata Logs after importing a metadata file. Check the result column for any errors with the imported file. If there are no errors you'll see an OK result.
  6. Check your placeholders have been created with the correct metadata.

Tip!

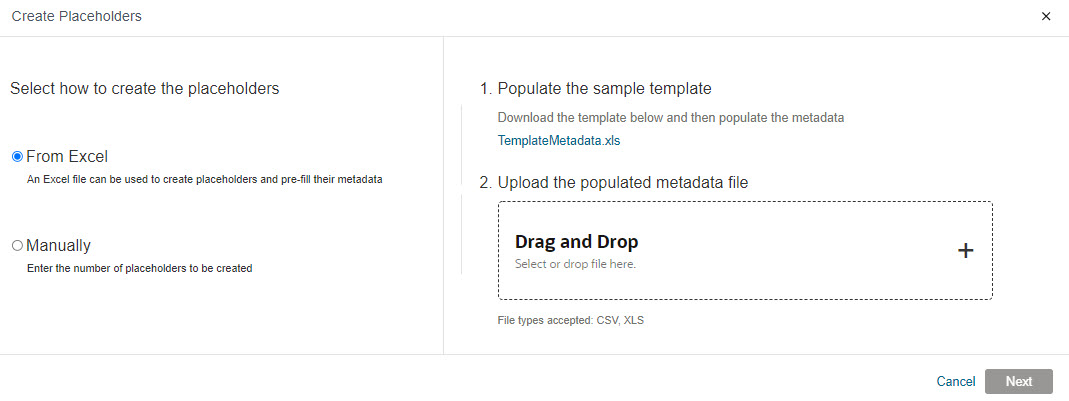
Once you are familiar with the process, you may choose to bulk upload all your documents in a single worksheet.

Finalize your placeholders

  1. Click each placeholder and complete the document information such as Title, Revision, or Status. Make sure all mandatory fields (highlighted in red) are completed.
  1. Select multiple placeholders and click Bulk edit to update metadata for all of them in one go. For example, you may want to set the Discipline as Electrical for all except one of them.
  2. If you need to add more placeholders, click Add more. If you need to remove a placeholder you no longer wish to create simply select it and click Remove. Alternatively hover over the document and click the X next to the status label.
  3. Once all mandatory fields are completed, the files will be labeled as Ready to Register.
  4. If you are ready to register the placeholders in Aconex click Register. You'll see a prompt that your placeholders have been created in your organization's Document Register.
  5. Choose to Transmit the document(s) so other organizations can access them and upload the corresponding files as required.

What's next?