Support Central
Register documents fast by automatically filling information from their filenames.
On most projects, filenames follow a strict naming convention and include many document properties. By using a upload profile with your filename convention, Aconex can extract and populate these properties for you.
Using a document upload profile is optional, but will help you save time.
In the classic document upload, you can find upload profiles under Documents > Multiple File Upload. You can also find them from Documents > Bulk Processing > Upload.
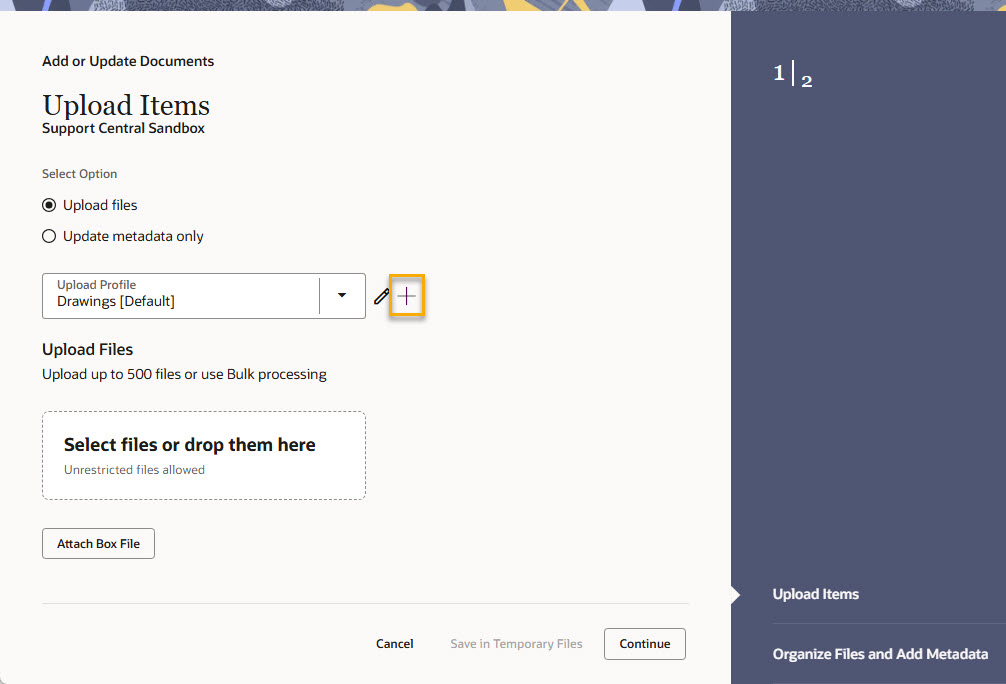
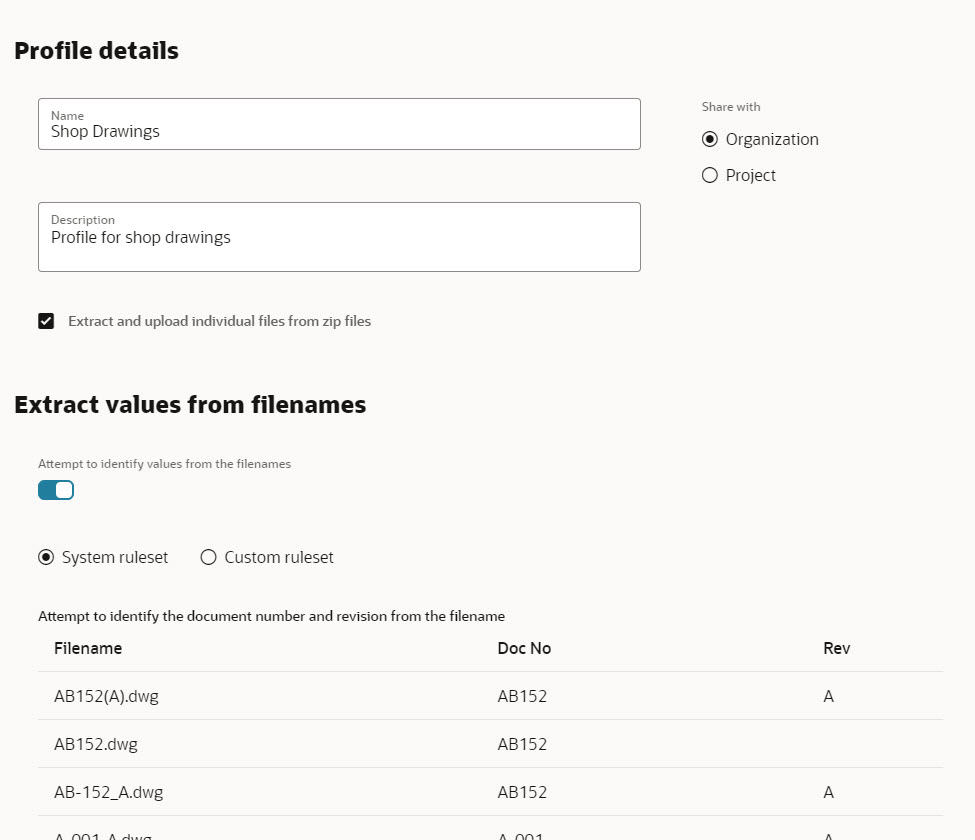
Fill in the details for your document upload profile.
| Field | Description |
|---|---|
| Name | This name will appear in the dropdown list on the previous screen for profile selection. |
| Description | Provide a description of this upload profile. |
|
|
Enables the Zip File Upload tab when uploading documents. Use this if you want to upload a zip file that will expand on upload. |
| Share with |
If your organization is the Aconex project-owning organization, you can share your upload profile with the entire project. Otherwise it will be shared with just your own organization. To share upload profiles with other organizations, you must have the Share upload profiles permission asset granted to your user role. Ask your Organisation Administrator to grant you permission. |
| Extract values from filenames | Allow Aconex to auto-populate document properties from filenames. Leave as System ruleset or select Custom ruleset to define your own for greater flexibility. |
System ruleset will detect the Document Number and Revision from the following filename schemes:
| Filename | Document Number | Revision |
|---|---|---|
| AB152(A).dwg | AB152 | A |
| AB152.dwg | AB152 | Next Revision Number |
| AB-152_A.dwg | AB-152 | A |
| A-001-A.dwg | A-001 | A |
| A-001.dwg | A-001 | |
| AB_MECH_152_A.dwg | AB_MECH_152 | A |
| AB-152_a.dwg | AB-152 | A |
| AB-152(a).dwg | AB-152 | A |
| AB-152[a].dwg | AB-152 | A |
Custom ruleset allows you to extract sections from the filename to populate document values. You can populate both Document Fields and Project Fields.
Supported Document Field types:
You'll only see fields (such as Disciplines) that are being used in your project. If you need more values added, ask your Project Administrator to configure them.
You'll use the following elements to build the ruleset:
Separators: Select which symbols (such as hyphen or underscore) are used as a separator for identifying values within your filename.
Skip parts of the filename: Skip parts of your filename that are not required to populate document fields. For example, you might be using a sequence number in your filename, which is not part of your document values. Select "Skip" for this part of the filename to ignore it and continue with the rest of the filename.
Use in Document Number: Tick this box for each value that will be used to define the Document Number.
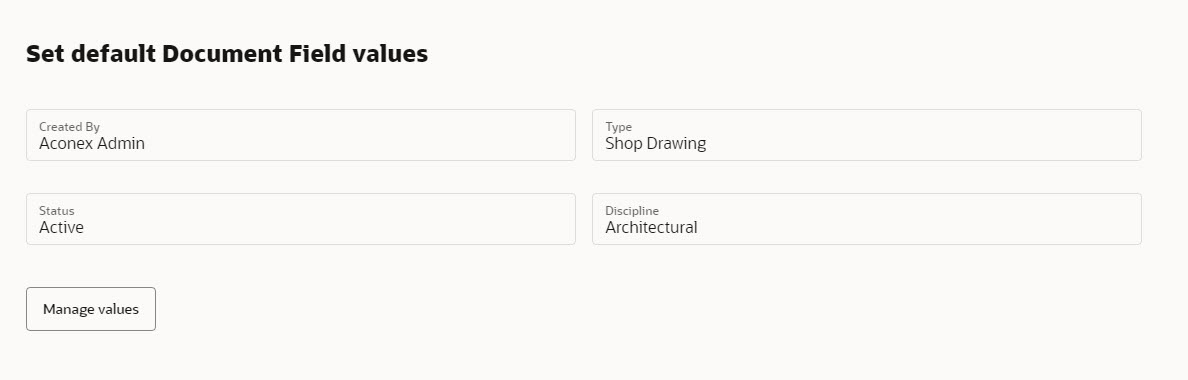
Extract document values from the filename vs. Default document values: Both of these features can work together in your upload profile. Default values are applied first, then if a custom ruleset exists for a given value, the system will overwrite it.
Take the following filename: AIR-1815-1-B-Approved-Ventilation Level 1.dwg
This filename contains the Document Number, Revision and many other important values that are separated with a hyphen (-).
For clarity, let's break the filename into sections at each hyphen, so we can see the fields that can be extracted and populated:
| Filename Section | Format/Document Field | |
|---|---|---|
| AIR | Use in Document Number | |
| 1815 | Use in Document Number | |
| 1 | Level | Use in Document Number |
| B | Revision | |
| Approved | Status | |
| Ventilation Level 1 | Title |
Aconex knows to ignore the file extension (in this case .dwg).
Now we are ready to build our custom ruleset per the following image:
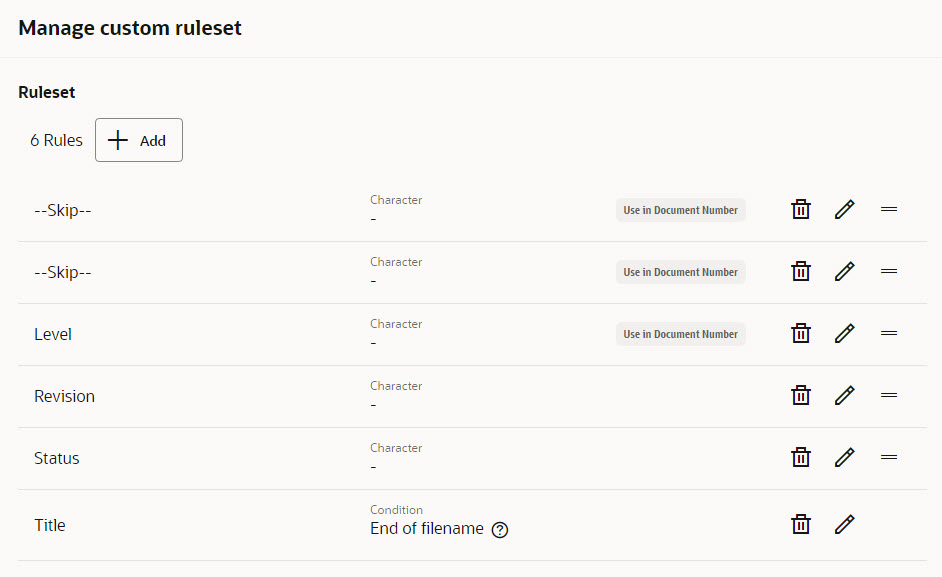
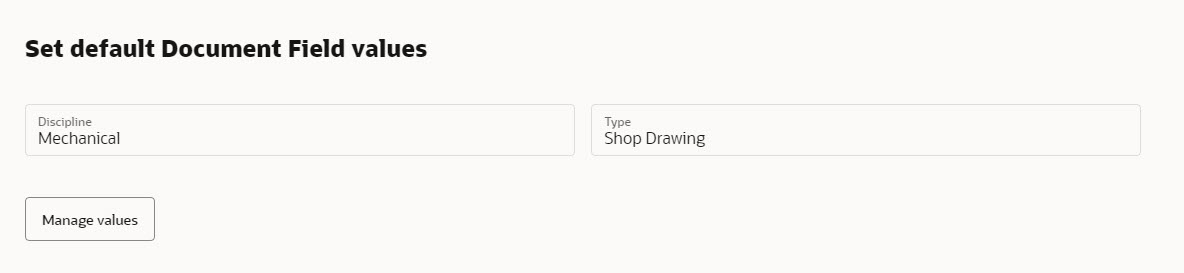
We have used a combination of the custom ruleset and default values, allowing for many values to be populated, and reduce time spent entering values manually.
Make sure you Save your profile!
Now that you have created and saved your Document Upload Profile you can use it when you add documents.
You can create many different combinations of rulesets, to accommodate many filename schemas.
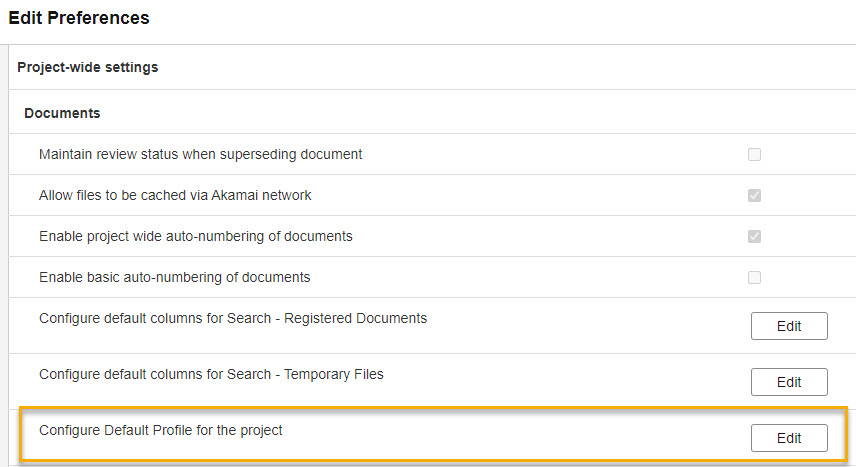
If you're a project admin (from the Aconex project-owning organization) you can set a default upload profile for your project. This helps uploaders apply the correct metadata. It's a project-wide setting and will apply to all users in all organizations. We recommend you communicate any changes to your project team.
Now when users on your project add documents, the default profile will be selected, but they can choose a different profile each time they upload.