Support Central
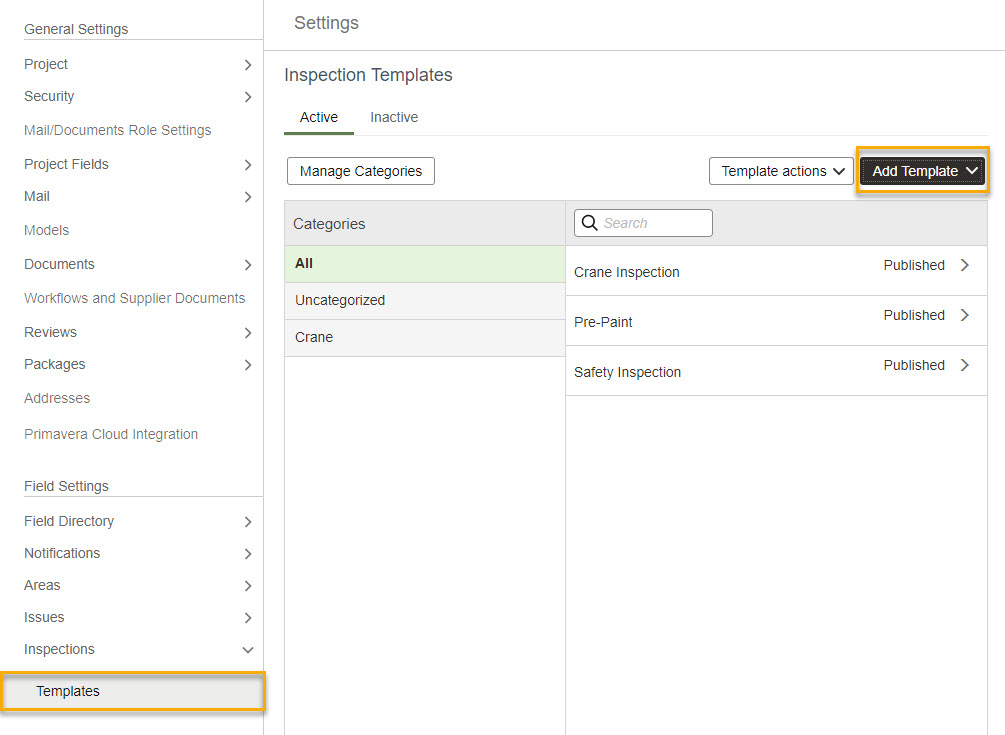
Create new templates for inspectors to use in structured inspections.
Create a new template from an existing one by hovering over it and clicking Copy.
Once you've completed these fields you can start adding and grouping the questions you want inspectors to answer.
If you have more than one set of questions, you should group them to make your template clearer and easier to use.
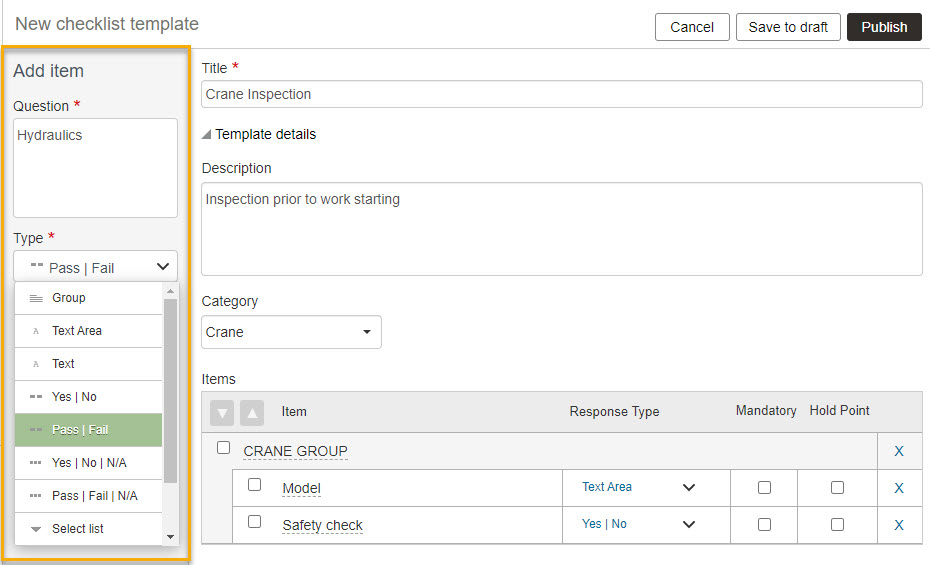
A maximum of 300 line items can be added to an inspection template.
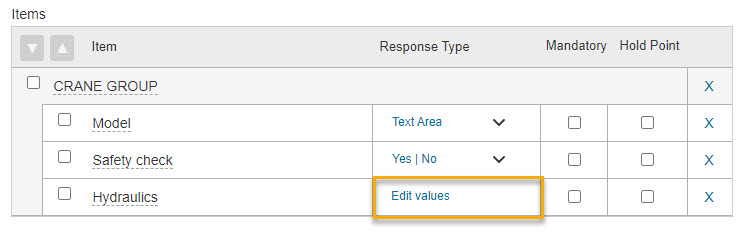
If you want to edit the options in a Select List question, select Edit Values in the Response Type column. Here you can edit, re-order and delete them as required.
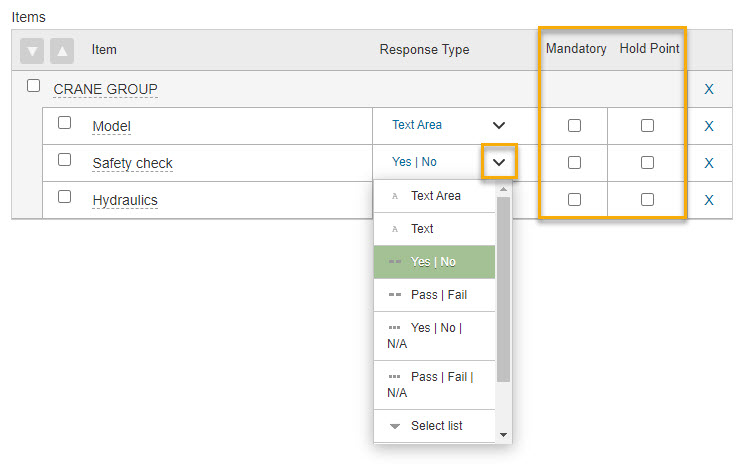
If you want to change a Response Type, for example from Yes/No to Pass/Fail click the down arrow, then choose an alternative from the drop-down list.
You can make questions mandatory by selecting the tick box in the Mandatory column.
Also, you can set a Hold Point if Inspectors need approval from an engineer or consultant before finishing the inspection.
| Option | Description |
|---|---|
| Group | Use this to create a set of questions and response types. |
| Text area | 5000-character limit. |
| Text | 256-character limit. |
| Yes/No | Boolean response. |
| Pass/Fail | Boolean response. |
| Yes/No/NA | Boolean response. |
| Pass/Fail/NA | Boolean response. |
| Select list | A select list is a list that can be configured to allow the selection of only one or multiple options. |
| Date | Choose a date from the calendar. |
| Signature | Signatories must first provide their name and can then add their signature. Aconex records the date and time they signed the inspection, which are also recorded in the Excel and PDF exports. To enable multiple signatures, add multiple signature responses to the checklist template. |
If you want to change the order of the groups, or the questions within the groups, you can do so using drag and drop, or by selecting the tick box next to the group or item’s name, and then use the up and down arrows to re-arrange them. You can also move items in and out of groups, or from one group to another, by dragging and dropping them.
Note that if you have any ungrouped items, these will always be moved above any grouped items, when you save your changes.
When you've finished adding questions and response types, click Save at the top of the screen. If you want to make it available to inspectors immediately, click Publish. The new template will be available to them when they next log into Field.
If you select Save to draft, your changes are saved but are not yet visible to inspectors.


