Add models

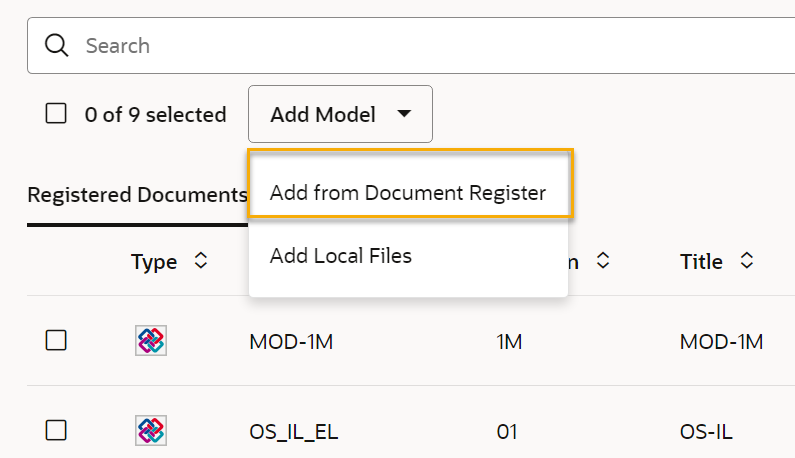
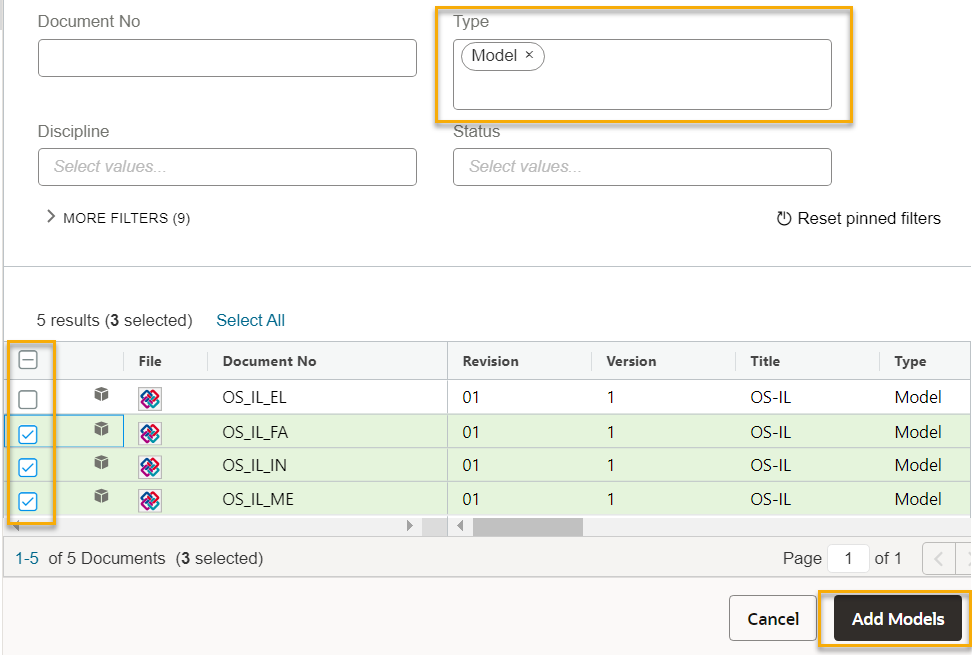
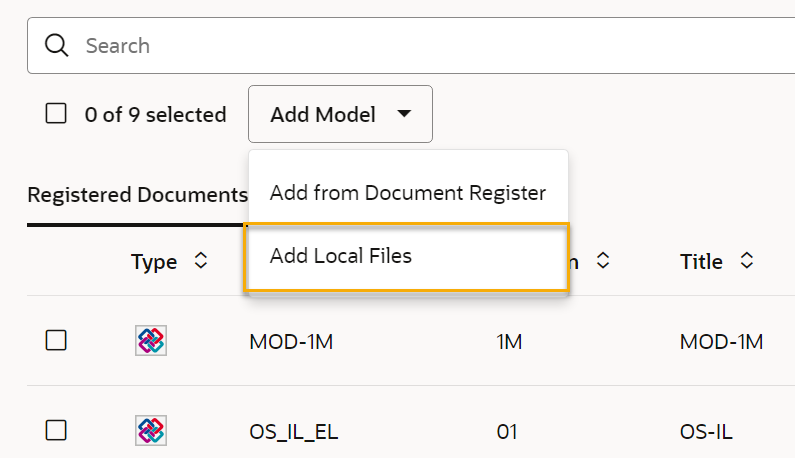
Add models to your models list from the Document Register or from a file on you computer.

Required permissions
Create Model Stack

​​​​​​​Supported file formats

Document register (recommended) Local file
IFC IFC
IFCZIP IFCZIP
ZIP ZIP and placeholders (no attached file)
RVT and placeholders  

Note: A zip file can only contain one IFC file.  Zipping an ifczip file or Revit file is not supported. Supported model formats are IFC 2x3, IFC 4 and IFC 4.1, as well as RVT (v2017 to v2023).

Benefits of using the Document Register

  • Integration with process support i.e. RFIs, Variations, Transmittals
  • Inclusion to Workflows, Work Packages, Document Processes - making it easier to track and control processes, from design and construction to signoff and completion.
  • Full Audit trail

Add from the Document Register

  1. From the models list click Add Model and select Add from Document Register.
  1. Search for your model file(s). The following example shows the register with search criteria already entered.
  2. Select multiple model files as required.
  3. Click Add Models.
  1. A confirmation screen lists the selected models. You will see a warning message if there is an unsupported file type in the list.
  2. Click Cancel to adjust your selection or click Continue to add the models. Large files may take a few seconds to process.

Tip!

If your model is unable to process you may see a message such as "Revision 1 is not displayed as part of the file is not readable. Unable to display any revision". Follow these troubleshooting steps.

Add using Local File

Note: Uploading models to the Document Register offers rich integration with Aconex processes as well as additional file format support (e.g. Revit). Project Admins can disable local file Model Stacks in the Model Project Settings so that it is not available on your project.

  1. Click Add Model and select Add Local Files.

Tip!

When you add a model stack, you automatically become its Administrator. This means you control the stack and can give upload privileges to others. Learn more about managing local files in Models.

  1. Enter a name for the model.
  2. Drag and Drop your file from your computer into the space provided. Alternatively, click anywhere in the outlined space and choose a file from your computer.
  3. Choose who should have access to the model.
  4. Click Add.