Support Central
Load, view and navigate your models.

You can view as many models as you need to. This is called federating, which means loading and overlaying, multiple models together. Generally you'd load the different disciplines for a model into one federated view of the entire building.
If you closed the model list, click here to reopen it again.
Note: This feature is available for Model Coordination projects only.
First, switch to the viewpoints list.
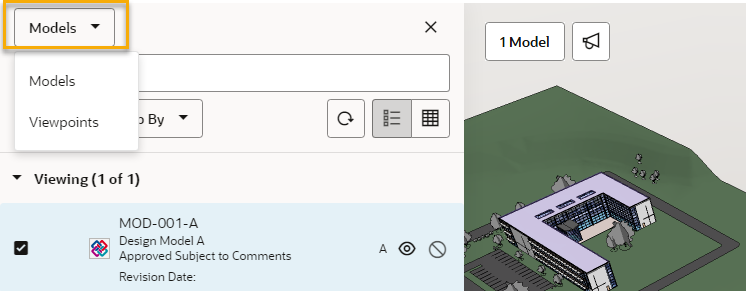
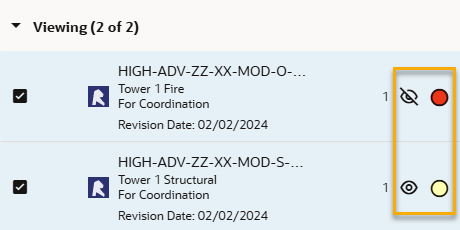
Click on a viewpoint to load it into the viewer. View its details by clicking the information icon in the bottom right corner of the card.
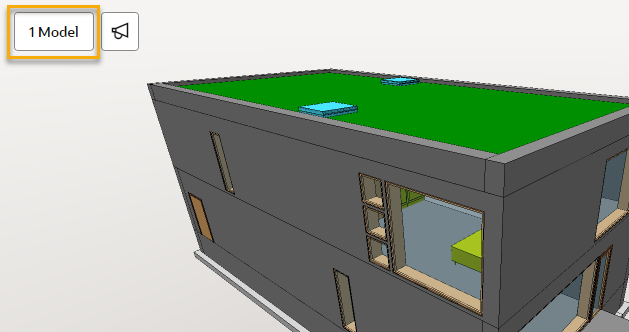
After loading a viewpoint, a small thumbnail will appear in the top left corner of the viewer. Clicking the thumbnail image will reload the viewpoint. You can click the information icon for details or you can close the thumbnail.
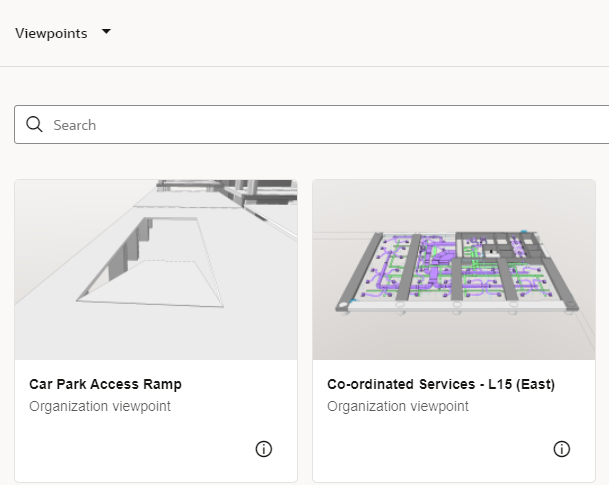
You can rename or delete the viewpoint if you have permission.
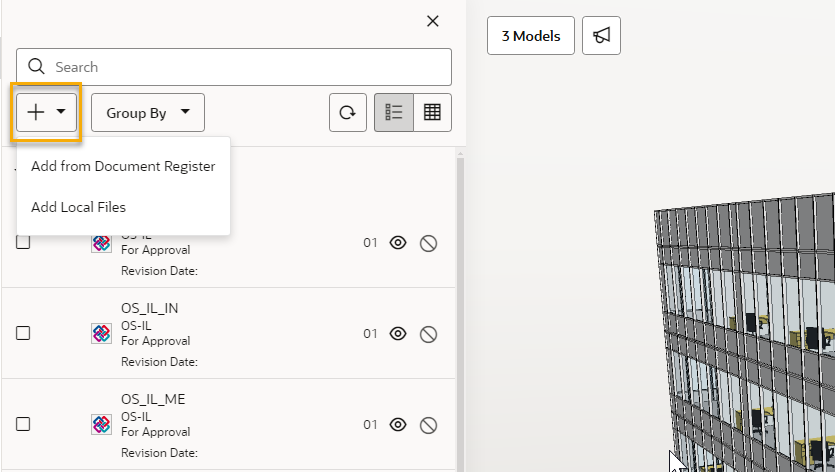
If you need to add more models to the list, click Add Model from the models list.
You can add a model from the Document Register, or from a file on your computer. Note: If you don't see the option to Add Local Files it means your Project Admin has switched off local files for the project.
Need to share a model, view its details, or remove it from the list?
While viewing your models, you'll enjoy the following features. Use the image below to match each feature to its icon in the toolbar. Note: Some features are only available for Model Coordination projects.

The model viewer displays object properties relative to the format of the model.
This means when you’re looking at the properties of an IFC object, they will be specific to IFC. Likewise, with a Revit object, they will be specific to Revit properties.
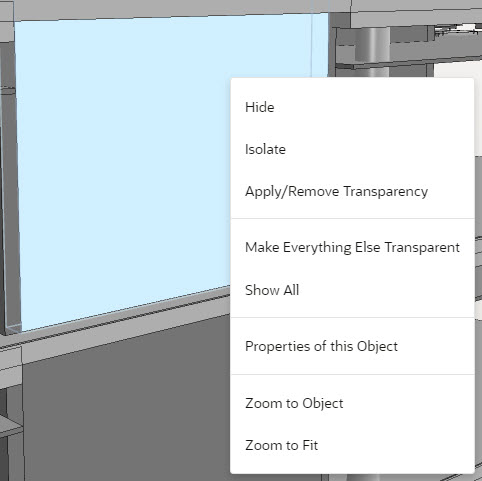
Left-click one or more objects to zoom to the selection or make visibility or visual styling actions on the selection.

Right-click on a single object for similar actions relating to just that object.
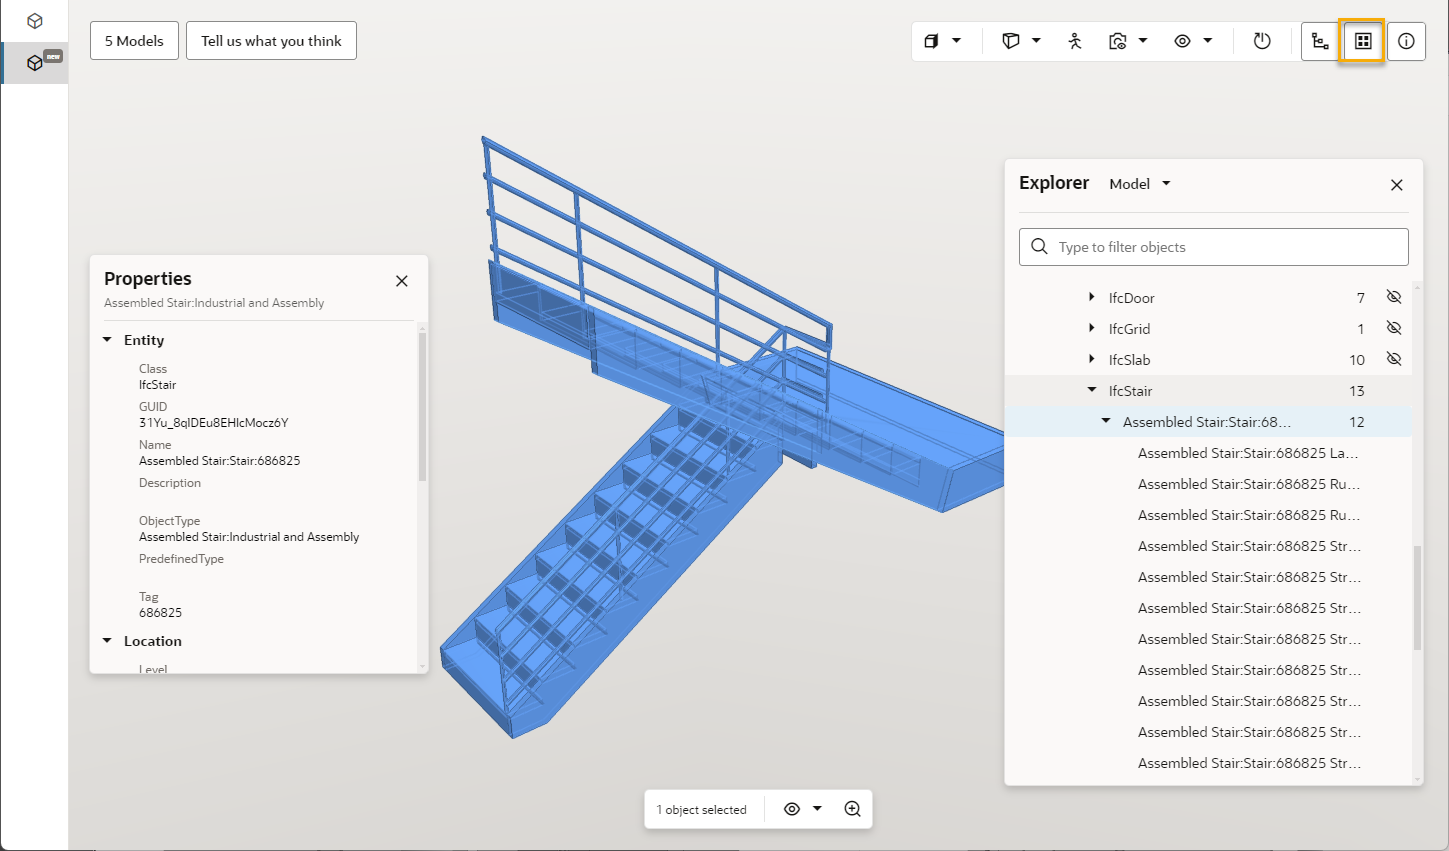
Composite objects are made up of individual part objects. The geometry of a composite object comes from the collection of its parts. By default, individual or part objects of composites/assemblies are selectable in the model.
For example, if you were to click the railing of a staircase in the model, only the railing is selected rather than the whole staircase. With composite selection toggled on, if you click the railing of the staircase, the entire staircase will be selected.
Once an object is selected, irrespective of being a composite or a part object, its properties can be viewed and its visibility and visual styling (such as transparency) can be adjusted. This makes it easier to view object properties or apply visibility or visual styling on a composite object or its component objects.
The feature is most effective on IFC models.
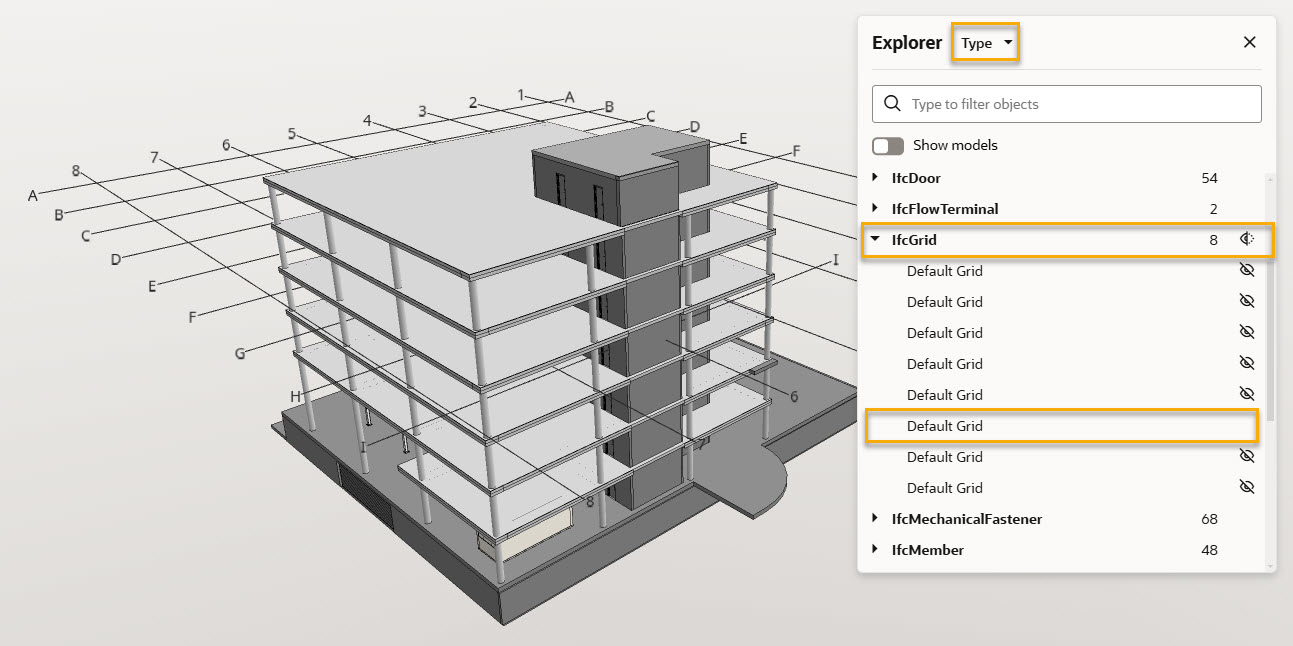
Grids are objects in the Explorer trees just like any other object with geometry. They are hidden by default and can be turned on or off. You can turn grid objects on per level or across the whole building. To see all grids in a model, change the tree from Model to Type. IFC models have the IfcGrid type and Revit models have the Grids type.
Note: This feature is available for Model Coordination projects only.
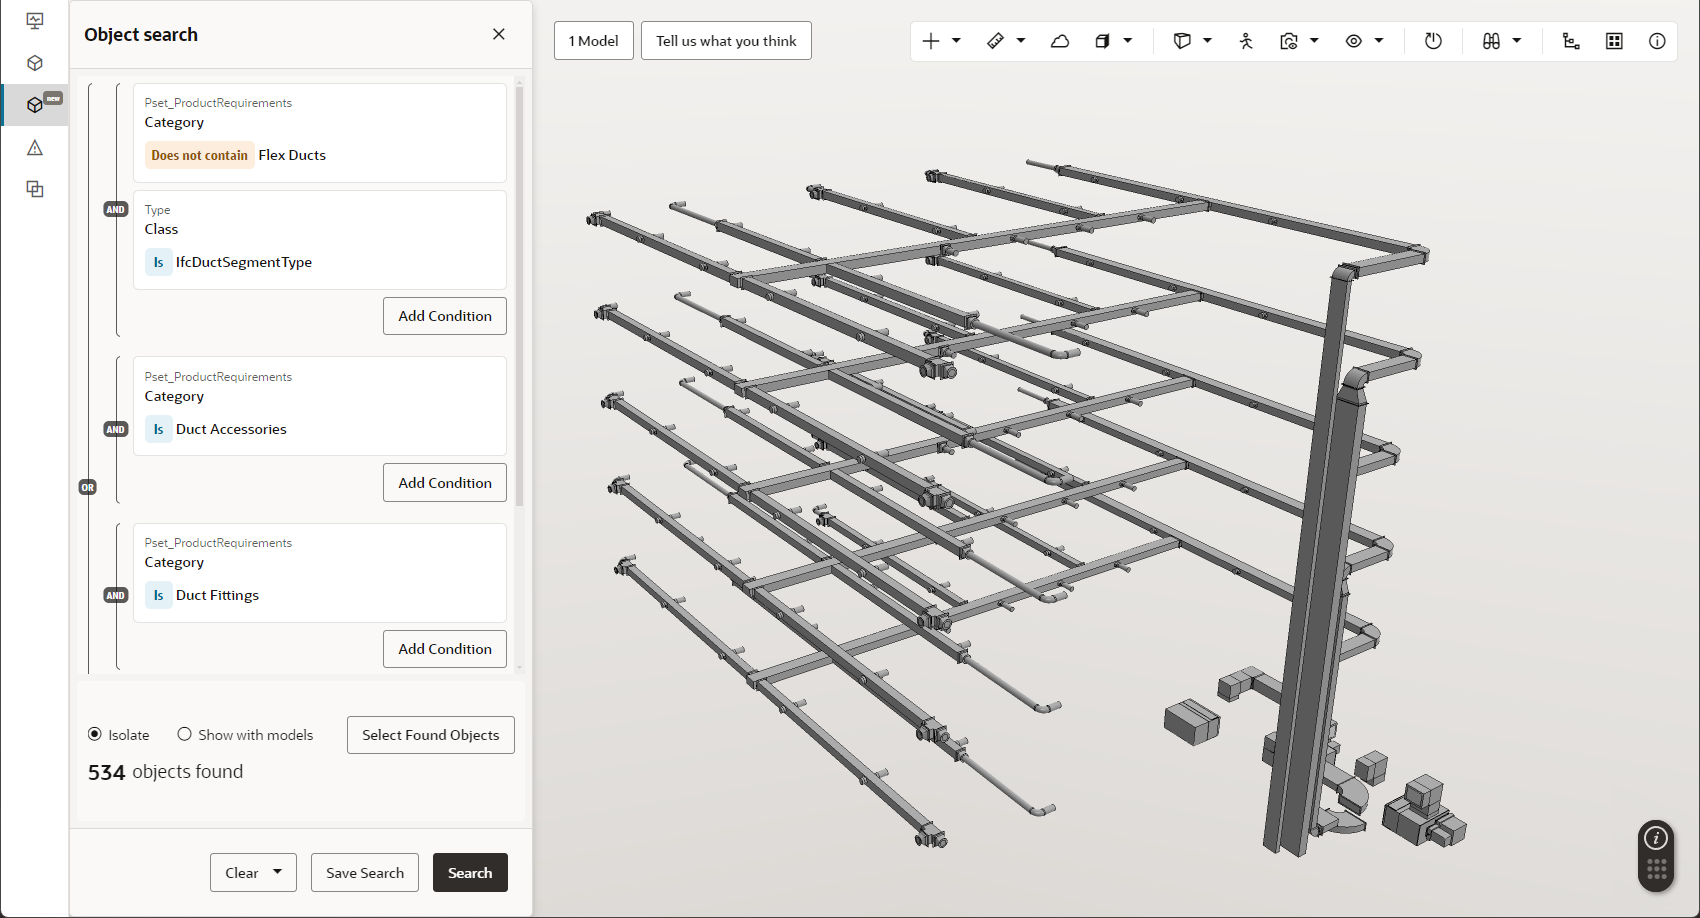
Object searching makes it easier to find specific objects in models based on their properties. Saved object searches that are shared with the project can be used downstream for Clash in the Cloud processes.
With Object Search, you can:
Object search supports IFC and Revit models.
Note: This feature is available for Model Coordination projects only.
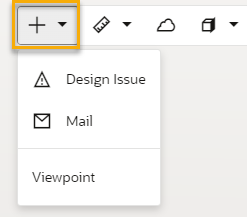
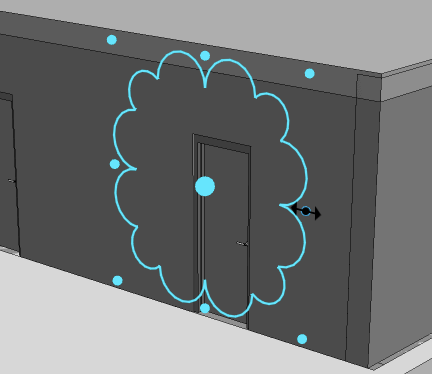
Use markups to highlight areas of the model. Once you've added a markup you can create an issue, mail, or viewpoint, with the markup displayed in the viewer (similar to measurements).
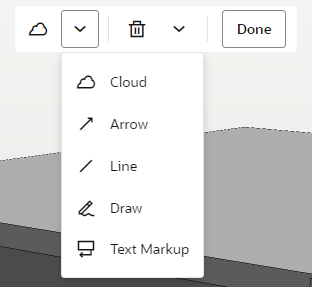
Click the Cloud icon in the toolbar to activate the markup tool.
When the tool is active, you'll see a dedicated markup toolbar. From there you can create new markups or select existing markups to resize, reposition, or delete them.
Create the last used markup or choose a markup from the dropdown menu.
Click Done in the markup toolbar to return to the normal viewer mode.
Tips on placing your markup:
Markups are placed on the surface of an object. They cannot be placed on empty space. The cloud and free draw markups can only be repositioned on the plane of the surface they are placed on. Line, arrow, and text markups can be drawn or extended within the bounds of the model’s geometry. Once a new markup has been placed, it will be selected so you can make adjustments.
Note: This feature is available for Model Coordination projects only.