Configure or add a process for dashboards

Create, edit, remove, and track processes defined by their individual mail types.

Required permissions
Manage Processes

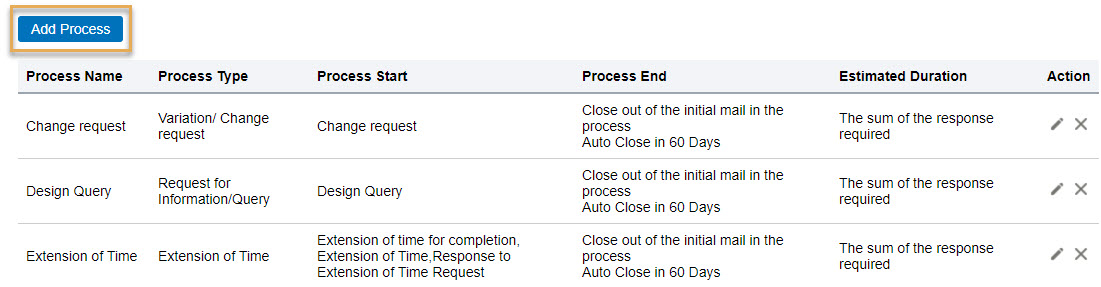
1. From the Process main page click Configure processes on the top right. You'll see a list of configured processes in the selected project.

Tip!

You can also select Configure Processes from the main portfolio screen, where you can select the project to configure. You may need to use this option if your project does not appear on the portfolio screen.

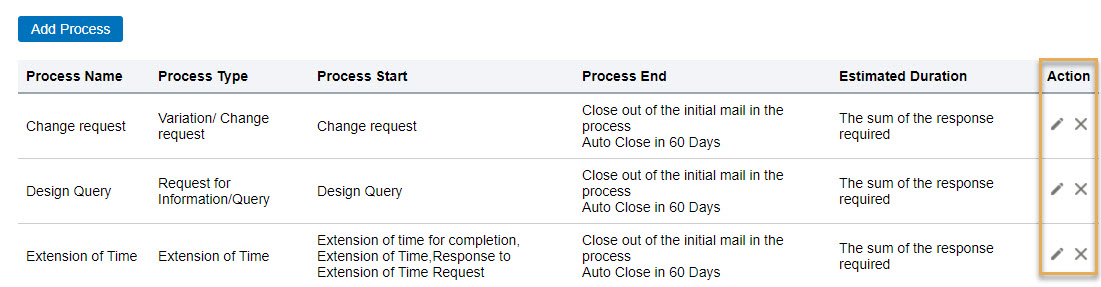
2. The Action column provides the options to edit or delete an existing process.

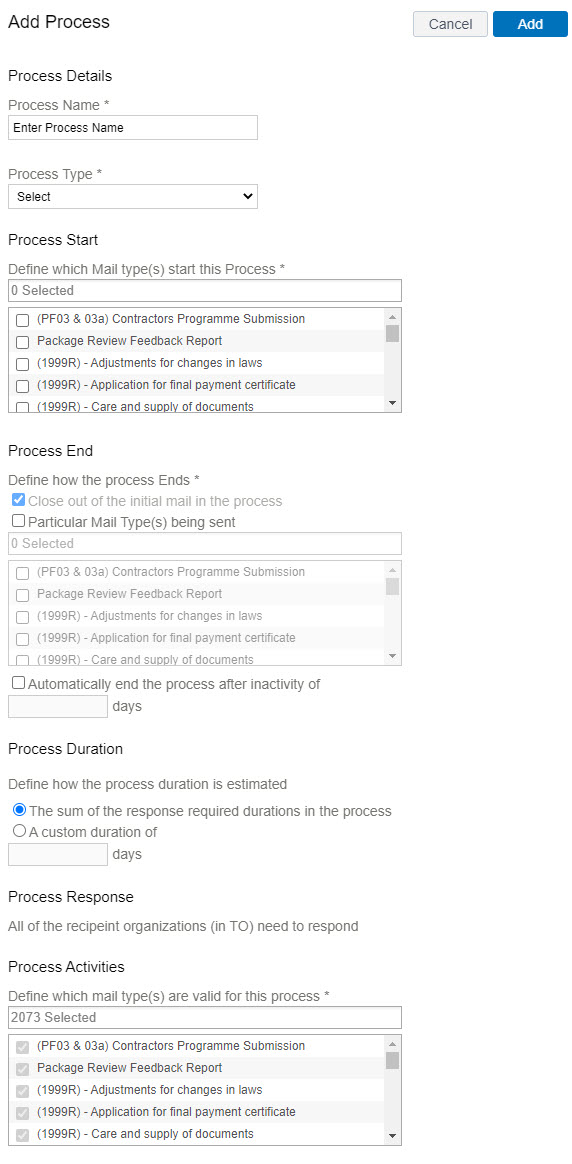
3. To create a new process click Add Process from the top left. 

Add a process

  1. Enter a Process Name.
  2. Choose a Process Type. This helps you group processes into meaningful categories. 
  3. Choose the mail type to Start the process. Multiple types can be selected.
  4. Define how the process will End. Either choose a mail type that ends the process, or whether the initiating mail needs to be closed out. You can also automatically end the process after a number of days of inactivity.
  5. Select a method to estimate the Process Duration. This is configurable as a fixed value or a calculated sum of response required durations in the process.
  6. The Process Response field sets the response criteria for the process. This cannot be changed.
  7. Process Activities lists the mail types that can be used in the process. All mail types for the project are selected by default. This also cannot be changed.
  8. Click Add on the top right corner of the screen.
  9. Your new process and associated data will be available in your dashboard after the next data refresh (approx 3-5 hours).