Reports for Workflows

Need to create Workflow reports? This is how you do it.

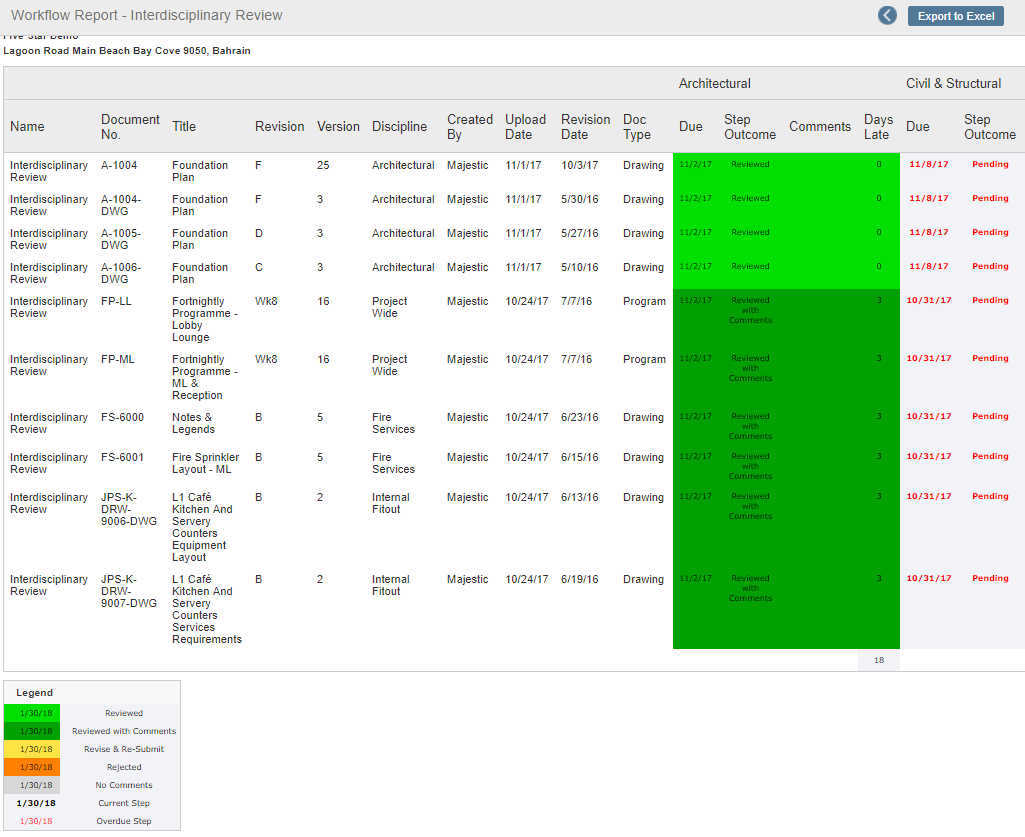
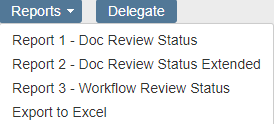
There are three kinds of reports you can apply to your workflows and their related documents:

  • Document Review Status - this creates a report showing only the columns already viewable.
  • Document Review Status Extended - this creates a report showing all the columns available.
  • Workflow Review Status.

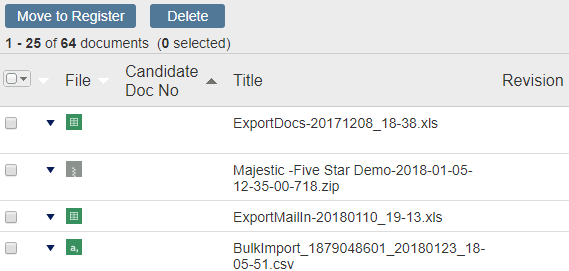
You can also export them to an Excel spreadsheet and move the files these create to your document register.

Creating a Workflow report

  1. Start by opening Workflows by double-clicking it in the Module toolbar.
  2. This opens the Search Workflows area where you can see all the workflows listed.
  3. Use the search fields to filter the workflows shown.
  1. Additionally you can also use Add/Remove Columns to change the ones that are used in the report.
  2. Now select the workflows you want to create a report for. If you do not select any, they will all be in the report.
  3. From Reports, select the report type you want to create.

Tip!

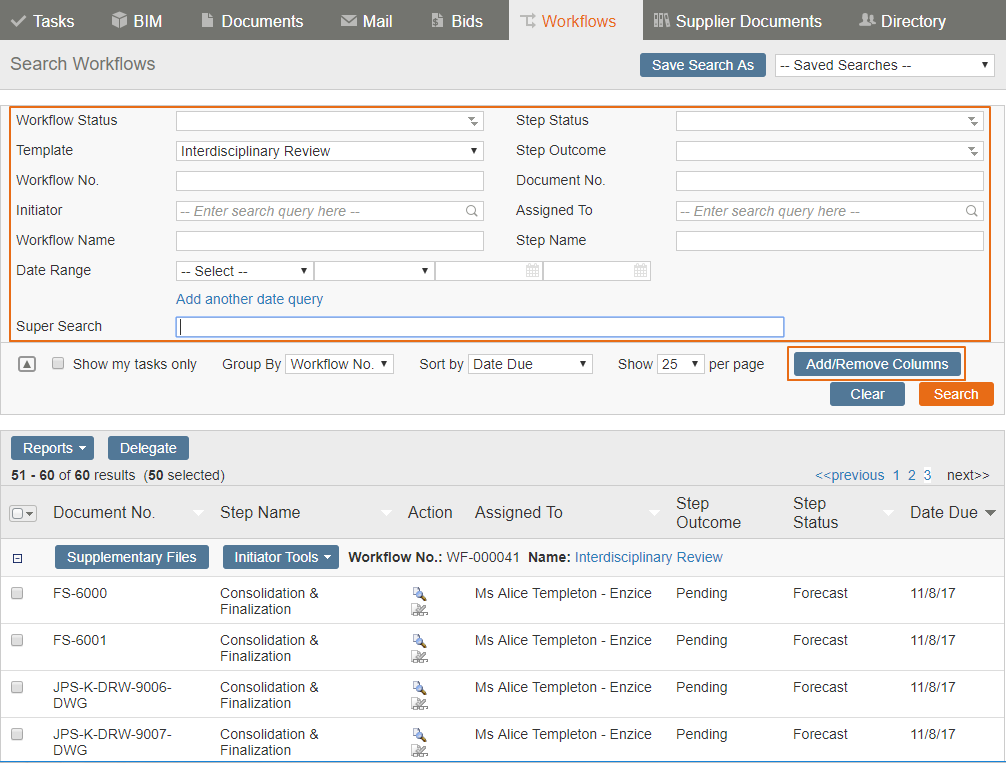
If you selected Report 1, 2 or 3, you'll be asked to select a Template to refine your results.

  1. When you do this the screen view changes to show the online version of the report.
  2. From here you can either go back to the main workflow list or use Export to Excel, which are in the top right corner.
  1. If you select Export to Excel, then the export process begins. You'll be notified when this has finished.
  2. If you want to either view or export the report, select Temporary Files.
  1. To find the most recent file, sort using the Date Uploaded column.
  2. To the left of the list in the File column you can see a down arrow. Click this and then select Open.
  1. When you do this it opens the file in Excel, where you can view the data if required.
  2. You can also copy the file to your documents register using Move to Register.