Schedule a report

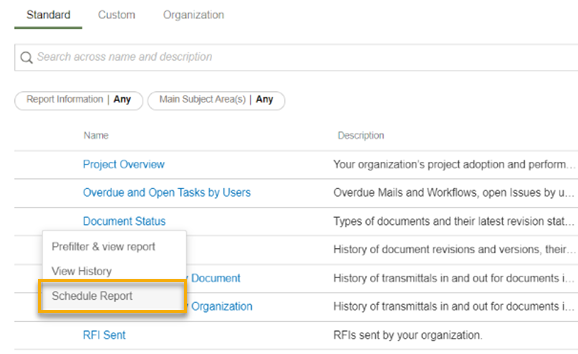
Schedule a report to run, so it's ready for your next meeting.

Things to note:

  • Schedules can be created on any standard or custom report. If you can run a report, then schedules can be created on that report. There is no additional permissions required.
  • You can schedule a report to run for up to 250 projects.
  • You can only view and edit schedules you created.
  • There is no limit on the number of schedules that can be created for a report or a project.
  • If you've scheduled a report that was shared with you, and the report owner stops sharing it with you, the schedule will be paused. You'll receive a notification that the schedule was paused. If you get access to the report again, you can edit and save the schedule to get it running once again.

View a report schedule

Each report has a separate schedule listing page.

  1. Hover over a report to see the ellipsis (three dots) menu, and click Schedule Report.
  1. You’ll see all schedules created on that report in the current project. The details include:
  • Schedule name
  • Start and end date 
  • Recurrence ( whether the schedule runs daily, weekly, or monthly).
  • Actions (edit or delete the schedule)

Note: You can only see schedules created by you on the selected report in the current project. 

Create a schedule

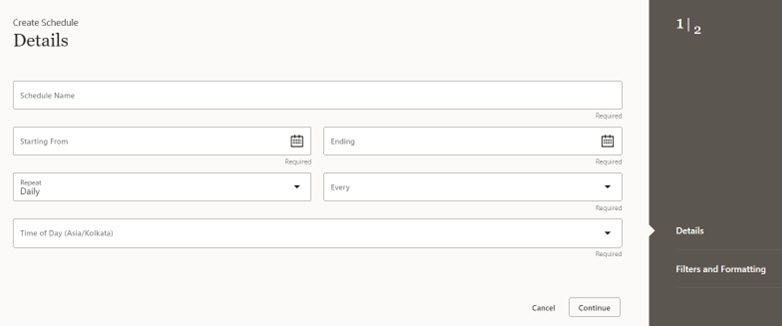
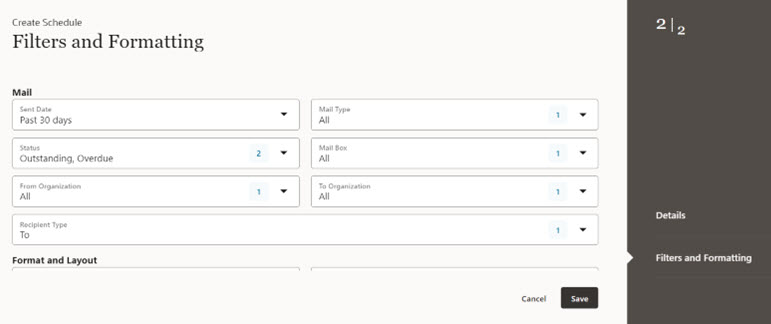
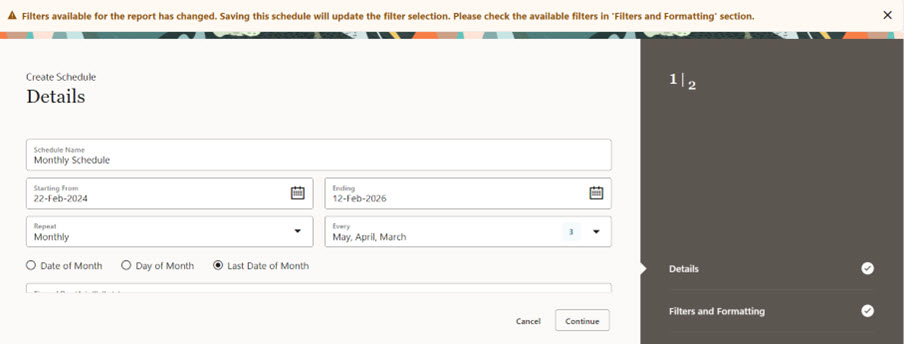
Schedule creation is a two-step process. In the first step, you specify details such as the start and end date, and recurrence. In the second step, you configure filters and formatting such as the layout to be used, and output format. You must complete both steps to create a schedule.

  1. Click Add Schedule.

    You'll see the details screen. All fields on this screen are mandatory.
  1. Give your schedule a name. Make it meaningful as it is used to identify the schedule in notifications and the history panel. 
  2. Select a start date. You can choose from the current date or later.
  3. Select an end date. To avoid endless schedules, please schedule less than 5 years.
  4. In the Repeat field, choose the recurrence (daily, weekly, or monthly). 
    • Daily (Default): Select the recurrence period in days. Choosing 1 from the Every field will run the schedule every day. You can select an interval of up to 6 days
    • Weekly: Specify whether the report should run every week or only on specific weeks in a month. For example, choosing 2 from the Every field will run the schedule every 2 weeks. You can also pick which days of the week the schedule should run. For example, you can schedule the report on Monday, Tuesday, and Thursday.
    • Monthly: Specify which months the report should run. You can further specify:
      • Date of the month: Choose up to 5 dates in a month
      • Day of the month: Choose a specific day of the month. For example the first Monday of the month
      • Last date of the month: For schedules to run on the last day of every month.
  5. Set the Time of day. There are 6 available timeslots. For example, if you need the report output by 9 AM, choose the slot from 4 AM to 8 AM. Time slots are based on your time zone preference. Note: Once saved, the schedule will continue on the set time zone even if you change your time zone preference later. 
  6. Click Continue.

    You'll see the filters and formatting screen. This screen is similar to the pre-filter screen when running a report. You can configure the filters available in the report, output format, and layout here.
  1. (Optional) Set your filters.
    • You'll see the available filters configured in the report data model if the prompt at run checkbox is enabled.
    • Filters are grouped by subject area.
    • Filters set in the schedule will override any filters set on the saved report.
    • If prompt at run is not enabled then the scheduled report will use the filters set on the saved report.
  2. Choose the report format.
  3. Choose the report layout.
  4. (Optional) If you need to change the schedule details on the previous screen, click Details on the right panel.
  5. Click Continue.
  6. Select the projects you want this report to run for.
  7. Click Save.

Tip!

You can schedule a report to run for up to 250 projects, and can manage the schedule from any of the included projects. Your reports will be exported into one or more zip files. You can open these from any of the selected projects. If a project report is missing from the ZIP file, you’ll see a failure reason in the project’s history panel.

Edit a schedule

  1. From the schedule listing page click the Edit icon.
  2. Change the details as required. 
  3. Click Save.
  4. You may see a warning that filters or layouts have changed in the saved report. You should check that the filters and layout are correct before saving the schedule.

View completed reports

After a scheduled report has run you'll need to view the output. 

You can either view the output from the notification or you can view from the report history.

Delete a schedule

From the schedule listing page click the Delete icon.

Note: When a report is deleted, all schedules created on that report will be deleted.