Support Central
Use our free Revit plugin to publish models direct from Revit to Aconex.
Note: When accessing Models via the Revit plugin, you’ll only see model stacks that you have permission to edit or administer.
Open up the model inside Revit and complete any modifications you need to make.
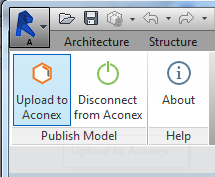
When you’re finished, click on the Aconex tab in the program’s menu ribbon.
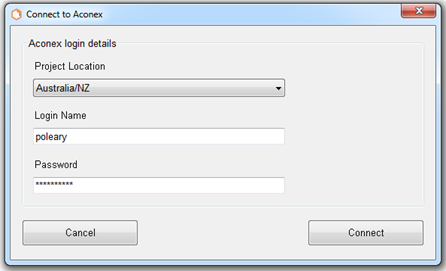
Under Publish Model, click on the Connect to Aconex button. You’ll see the login window.
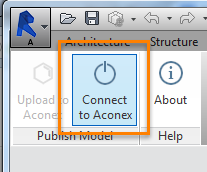
The Upload to Aconex button activates when you’re successfully connected. Click it. You’ll see the Publish to window.
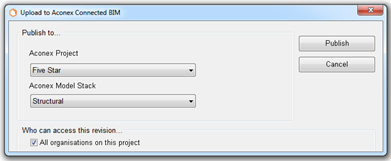
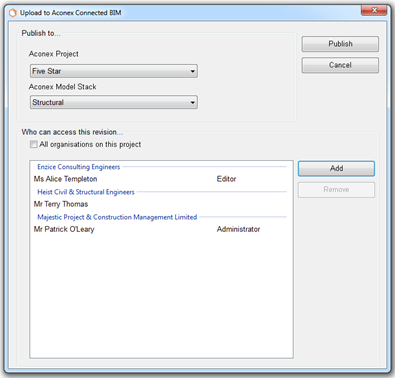
(i) When selecting a model stack, a list of people with access to the revision is displayed by default.
Note that, by default, the new version will be available to all members of the project. Follow step 7 to change who can see the version, otherwise go to step 8 to complete the upload.