Add documents / upload files (enhanced upload)

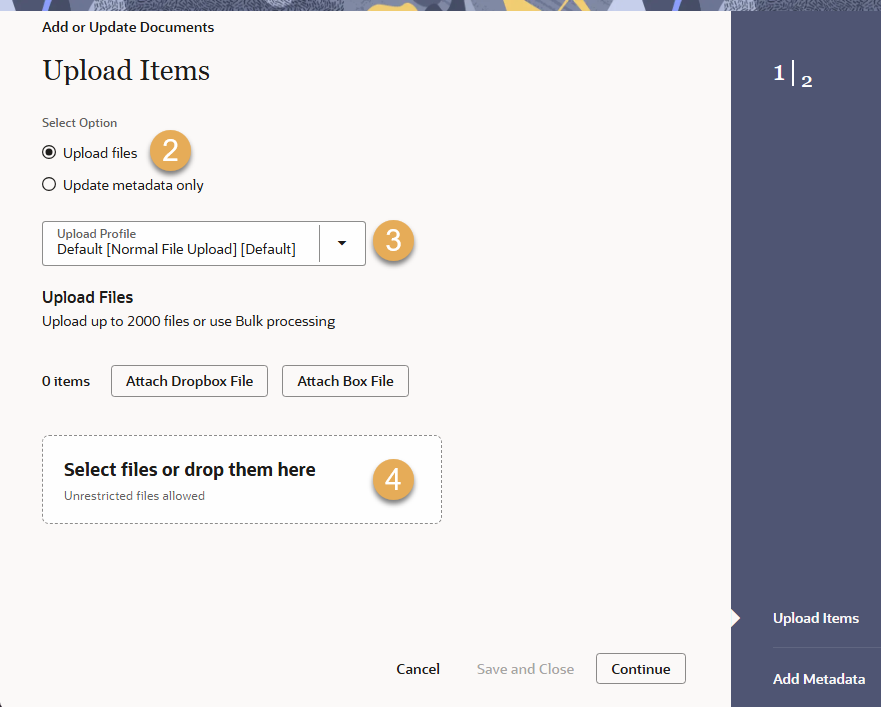
Upload new documents or update files for existing documents in your document register.

Erforderliche Berechtigungen
Upload new documents
Update a document
Create placeholders

Follow this guide to:

  • Upload and register up to 100 new documents to your organization's Document Register. 
  • Upload new files (updated revisions) for up to 100 documents in your organization's Document Register. If an existing document number is recognized from the file name you'll see an Update label during the process.

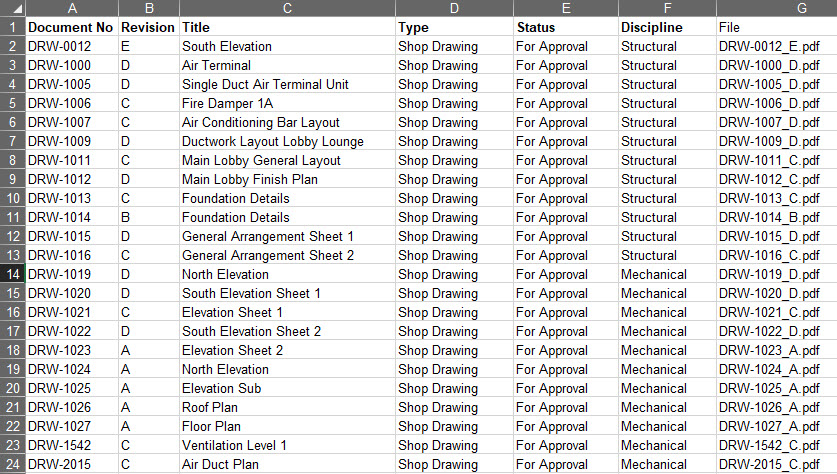
Before you start, it's a good idea to prepare your files with a consistent naming convention. We recommend including at least the Document number and Revision in the filename. This helps Aconex prefill information during the upload process; saving time.

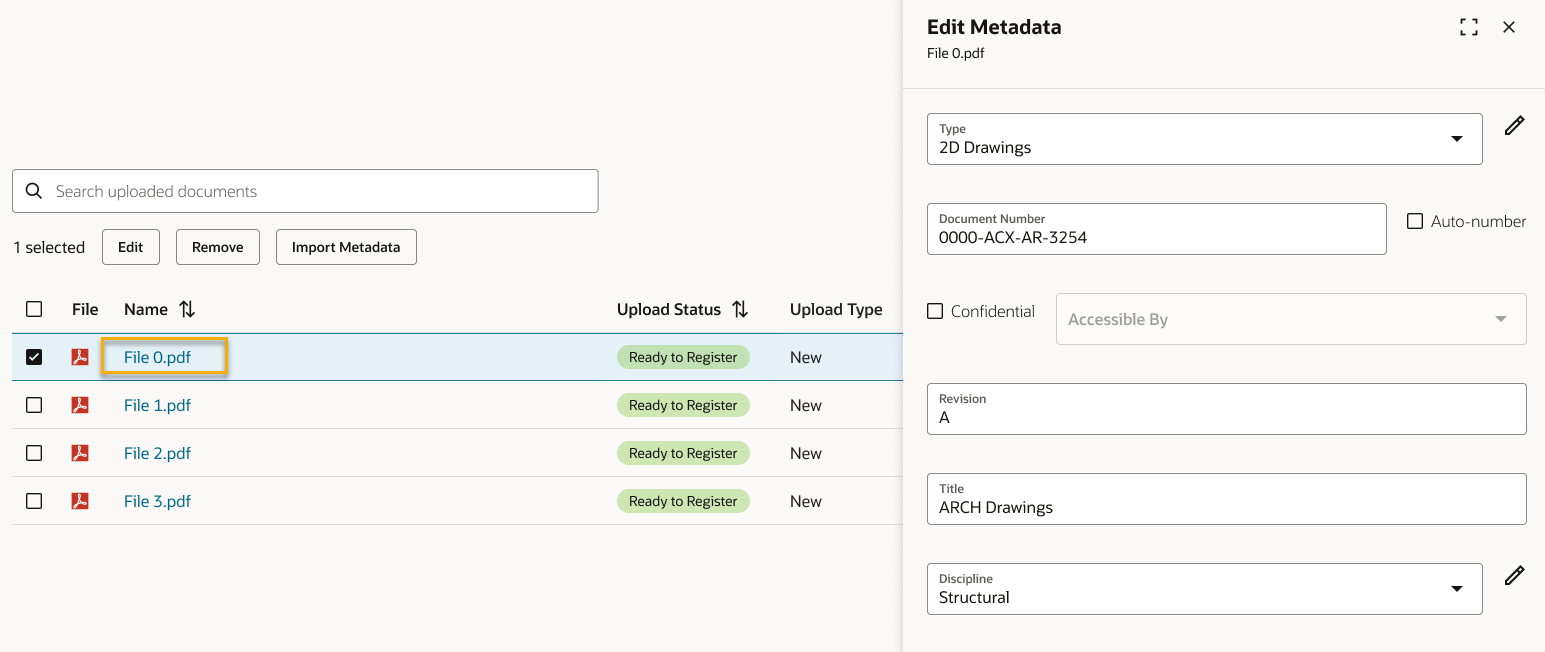
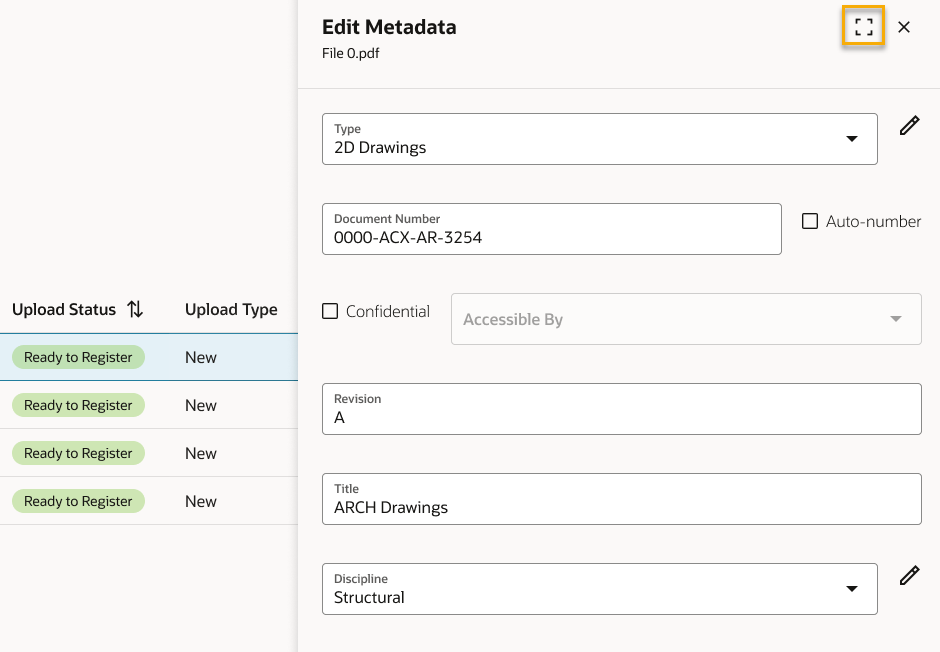
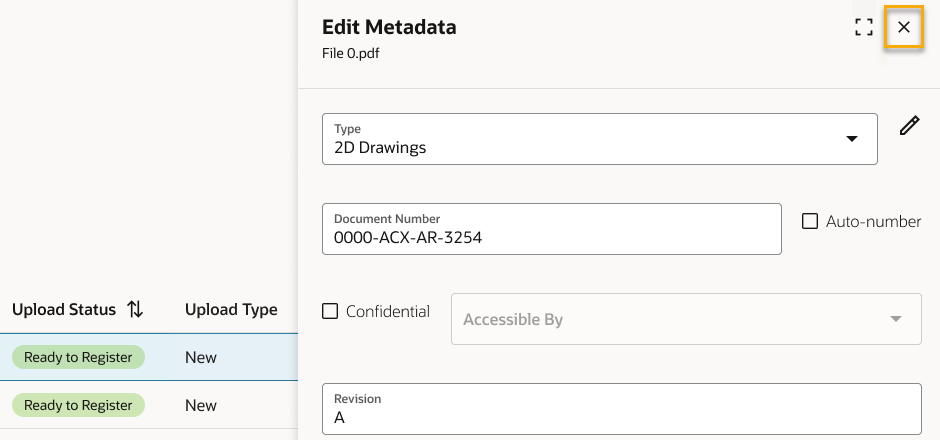
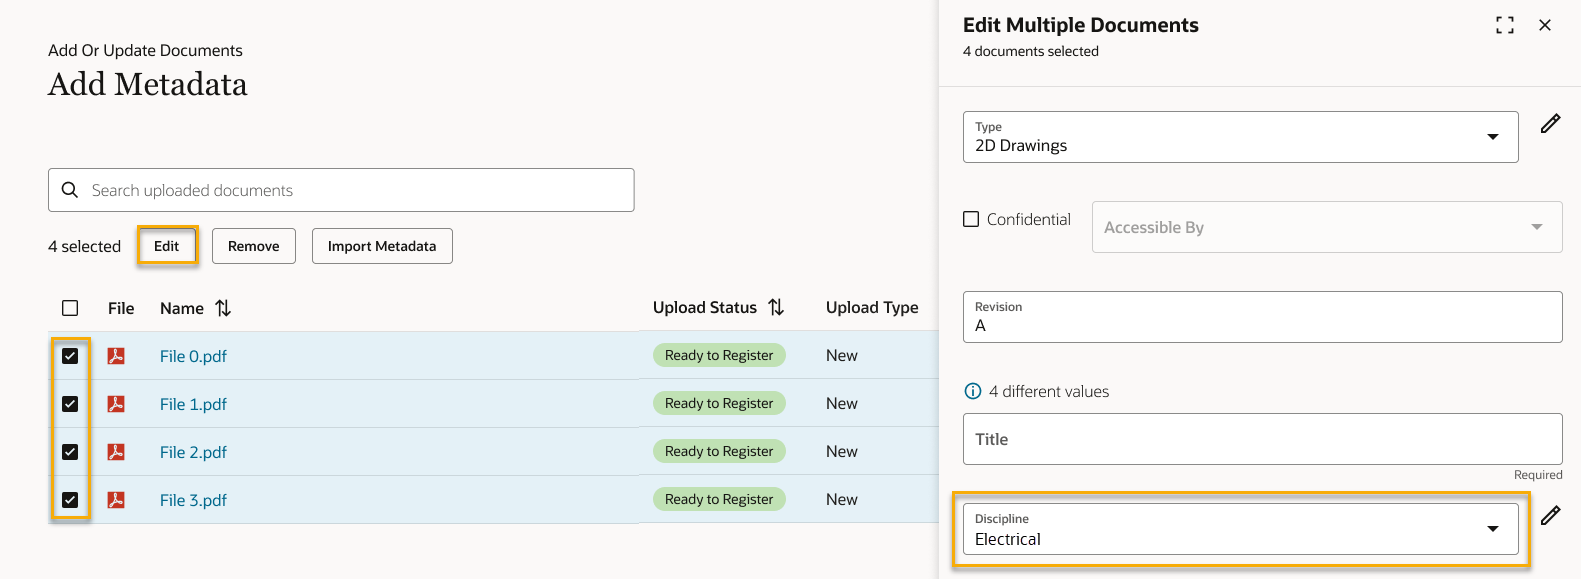
In Aconex, document information such as Title, Revision, or Status is called metadata. After uploading your files, you'll need to populate metadata for them, so they're easy to find when you need to review or send them.

Hinweis

Use Bulk Processing if: 

  • you need to upload or update more than 100 documents at once.
  • you need to upload multiple versions of your documents at once.
  • your project has a large document field cascade or project field hierarchy, and you need to upload more than 20 documents. 

Upload your files

  1. From the main navigation menu, click Documents and select Add or Update Documents. You can also Add Documents from the document register search screen.

Hinweis

If you see different menu options or your screen looks different, you may be using an older upload. We recommend you switch to the new enhanced upload.
  1. The Upload files option is selected by default. If you need to update document information without changing their files, follow the steps below to Update Metadata Only, or use Bulk Processing.
  2. (Optional) Select an Upload Profile from the dropdown (or just leave it as default). Document upload profiles save you time by automatically populating metadata (such as the Document Number and Revision) for you.
  3. Drag and drop your file(s) from your computer into the space provided. Alternatively, click anywhere in the outlined space and choose the files from your computer. You can also Upload from Dropbox or Box.
  1. You can add more files, or remove them. Click Continue to add metadata for your documents.

Hinweis

To save your work to temporary and return later click Save and Close. Note that other users in your organization can delete temporary files.
  1. You'll see the list of files you uploaded.
  2. If you selected an upload profile, the metadata for your documents may have been automatically populated for you. If all mandatory metadata has been filled in, those files will show an upload status of Ready to register.  If any files are marked as Missing information, you'll need to select them, and manually enter the required metadata.

Hinweis

If an existing document number was recognized from the file name you'll see the upload type displayed as Update. Otherwise, it will show New.

Input metadata

  1. Click on a file name (or its pencil icon) to add or change its metadata. Make sure all mandatory fields (highlighted in red) are completed. 

Hinweis

The input fields you see on your project may be different from the example shown here. Each project in Aconex is customized to suit different requirements. If you are unsure what you need to be entering in each field please contact your Document Controller or Project Administrator.
  1. You can click to expand the metadata panel to see more of the available fields. Click on each file to continue adding metadata until they are all ready to register. 

Hinweis

Avoid entering special characters such as < or >. See Invalid characters in Document and Project Fields
  1. (Optional) If you need to apply the same metadata to multiple documents, select them and click Edit. For example, you may want to set the discipline as Electrical for all except one of the files you just uploaded.
  1. If you have lots of files to update you can populate your metadata from an Excel spreadsheet

Finalize and register your documents

  1. (Optional) If there's a file you don't want to register, click the remove icon in the document's row. You can select multiple files and click the Remove button. 
  2. (Optional) If you need to add more documents, click Upload items to go back to the previous screen. From there, click the add button to choose files from your computer.
  3. Once all mandatory fields are completed, the files will be labeled as Ready to Register.
  4. If you want to save your work to temporary files and return later click Save and Close. Note that other users in your organization can delete temporary files.
  5. Click Register to add these documents to your organization's Document Register.

Hinweis

If you don't see the Register option, this means you do not have permission to upload new documents. Please ask your Organization Administrator to grant you permission.
  1. (Optional) Transmit the document(s) to send them to other organizations.
  2. (Optional) Select up to 50 documents, and add them to packages.

Update status and type definitions

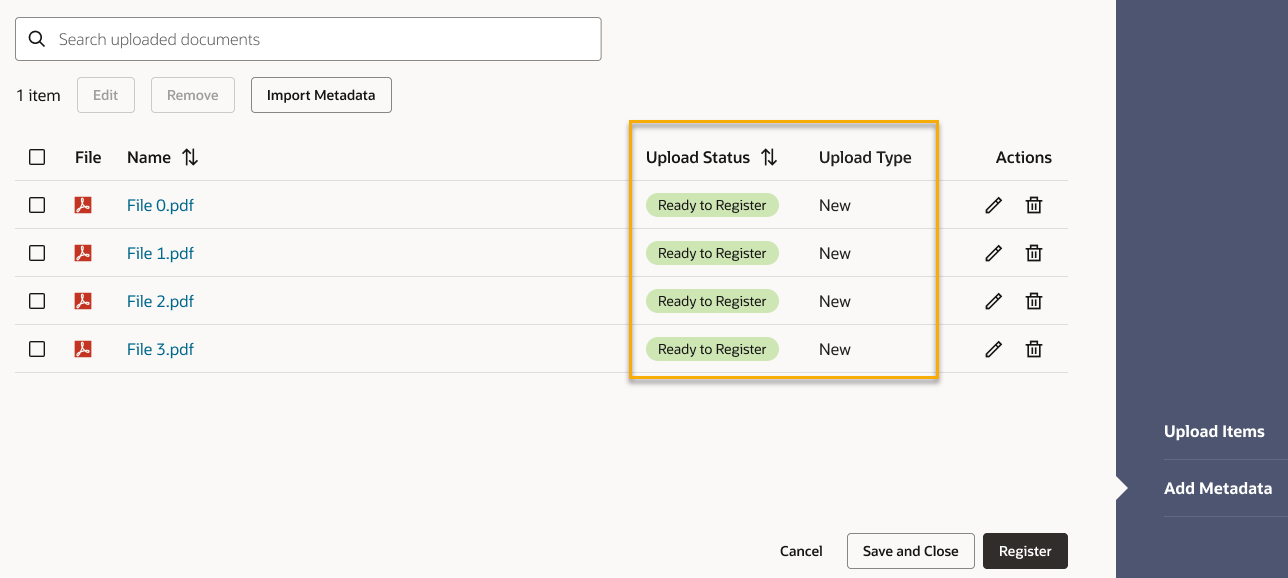
New: This is a new document that will be uploaded to your document register

Missing information: This document has missing mandatory metadata that must be completed

Ready to register: This document has all mandatory metadata completed and is ready to be upload to the document register

Placeholder: This document has no associated file and will be registered as a placeholder 

Update: A version of this document already exists and will be updated with this new file.

What's next?