Add or update documents using an Excel template (enhanced upload)

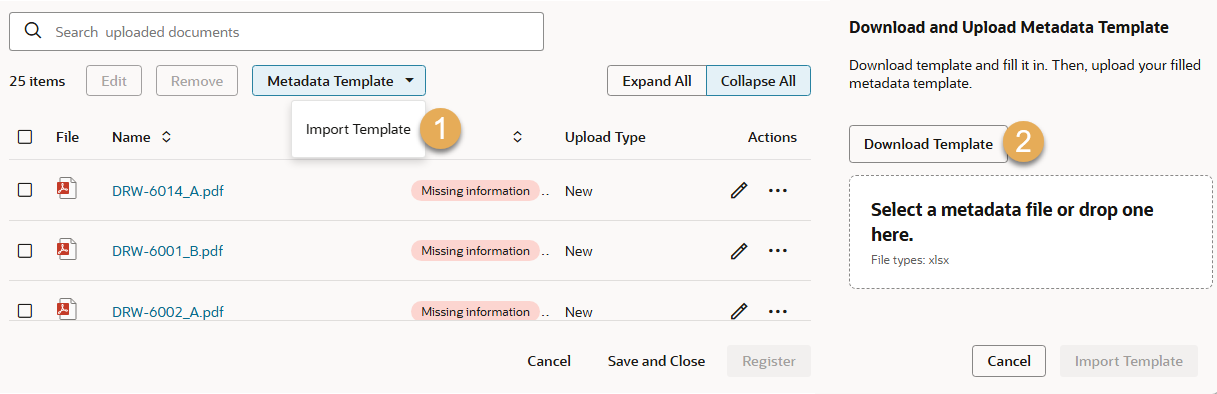
Import a metadata template to add or update up to 100 documents.

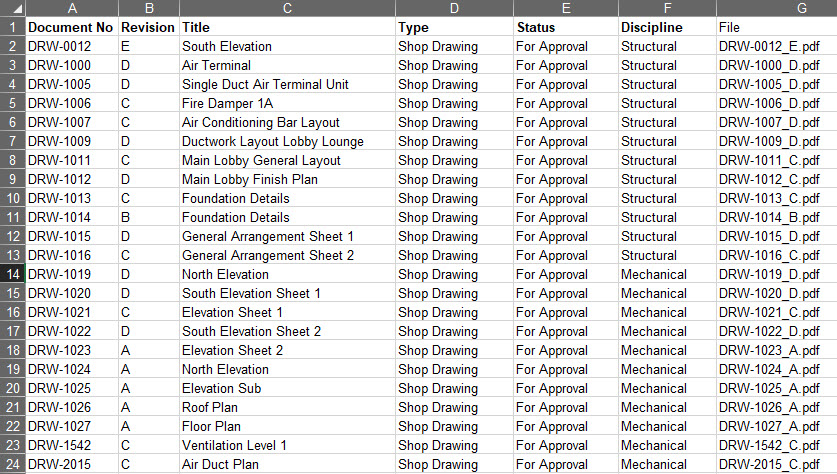
While adding or updating up to 100 documents, you can use an Excel template to complete the metadata. The template may be a combination of document fields and project fields and is unique for each project you work on. Note that the template will change if fields are changed by your Project Admin, so it's always best to start with a fresh template.

If auto numbering has been enabled for the document type you are adding new documents for, you can leave the Document No. field blank in the template. Aconex will auto-assign the next available document number for that document type. Note: We recommend adding auto-numbered documents in batches of 50 or less. This ensures your documents are registered in the same order as they are listed in your metadata template.

Before you begin

Import metadata

  1. Click Metadata Template and select Import Template.
  2. Click Download Template.
  1. Open the template file in your spreadsheet application (such as Excel). You'll find instructions in the first worksheet to guide you through each step.
  2. Check the template for your filenames:
  • If your project is configured to use a multi-sheet template, you'll see a worksheet for each document type. You'll also find a worksheet containing your filenames. Copy these to the relevant worksheet for each document type. Note: During the import process, the system reads worksheets from left to right. If a document is changing its document type from one version to the next, the order of the sheets can be changed to achieve the correct ordering of versions. Do not remove any of the worksheets otherwise the process may fail.
  • If your project is configured to use a single-sheet template, you'll find the filenames in the file column.

Tip!

Your Project Admin configures whether your project uses a single-sheet template or multi-sheet template.
  1. Make sure you enter the correct document numbers and other metadata against the correct files.
  2. Complete all mandatory fields. They're shown in bold in your file.
  3. Complete project fields as required. They're displayed in blue font.
  4. Single-select fields appear as a dropdown for fast, accurate data entry. For multi select fields, type the relevant values and use commas to separate them. The values entered must match the system values exactly.
  5. Complete as many of the other fields in the template as you need to. 
  1. Save the completed metadata file and upload it by dragging and dropping it into the space provided. Alternatively, click anywhere in the outlined space and choose the file from your computer. 
  2. Click Import Template.
  3. If there's an error with the import, you'll see a message on screen. For example, you may have entered an incorrect filename. Update the template and try the import again.
  4. Once the import is successful, the list of documents on your screen are updated with the metadata you entered.
  5. Check your documents are correct and proceed to register or update them into your organizations document register. 
  6. When you're ready, transmit the document(s) to send them to other organizations.

What's next?