Create an Integration ID for Basic Auth

Basic Authentication (also known as Basic Auth) involves sending the credentials of a user account (username and password) with every API request.

If you want to use API's you'll need either an OAuth Client (for OAuth) or an Integration ID (for Basic Auth). Oracle strongly recommends the use of OAuth as it provides a higher level of security. See Implement OAuth for implementing OAuth to connect to Aconex APIs.

Basic Auth does not support Two-Step Verification (2SV) or Single Sign-On (SSO) user accounts. Only Oracle Aconex Customers can use Basic Auth. Oracle Technology Partners (software vendors) must use OAuth.

Follow these steps to request an Integration ID for use with Basic Authentication:

  1. Visit the Oracle Construction and Engineering Support Portal.
  2. If you have a support portal account click Sign In/Sign Up and Sign In. We recommend you create an account so you can track your requests, but you can choose to skip this.
  3. Click Ask a Question.
  4. From the Product dropdown, select Aconex.
  5. From the Service Type dropdown, select Fulfillment Request.
  6. From the Fulfillment Sub Type dropdown, select Integration ID.
  7. From the Severity dropdown, select 4 - Low.
  8. Enter a Subject similar to "Registration of a Basic Auth integration".
  9. Enter the following into What is your question? "I require an Integration ID for my Basic Auth integration".
  10. Provide as much detail as possible in Provide a Description of the Integration, including the system or application you're integrating with
  11. From the Are you an Independent Software Vendor or Integrator? options, select No.
  12. From the Instance dropdown, select one or more Aconex instances to which your integration will connect.
  13. Read the Terms of Use and select the I acknowledge and agree to the above on behalf of the Customer checkbox.
  14. Enter your Aconex Organization Name and Aconex Organization ID.
  15. Enter your Contact Information and any Additional Contacts for this request
  16. Click Submit Request.
  17. Your request will be processed and updates provided via that request.

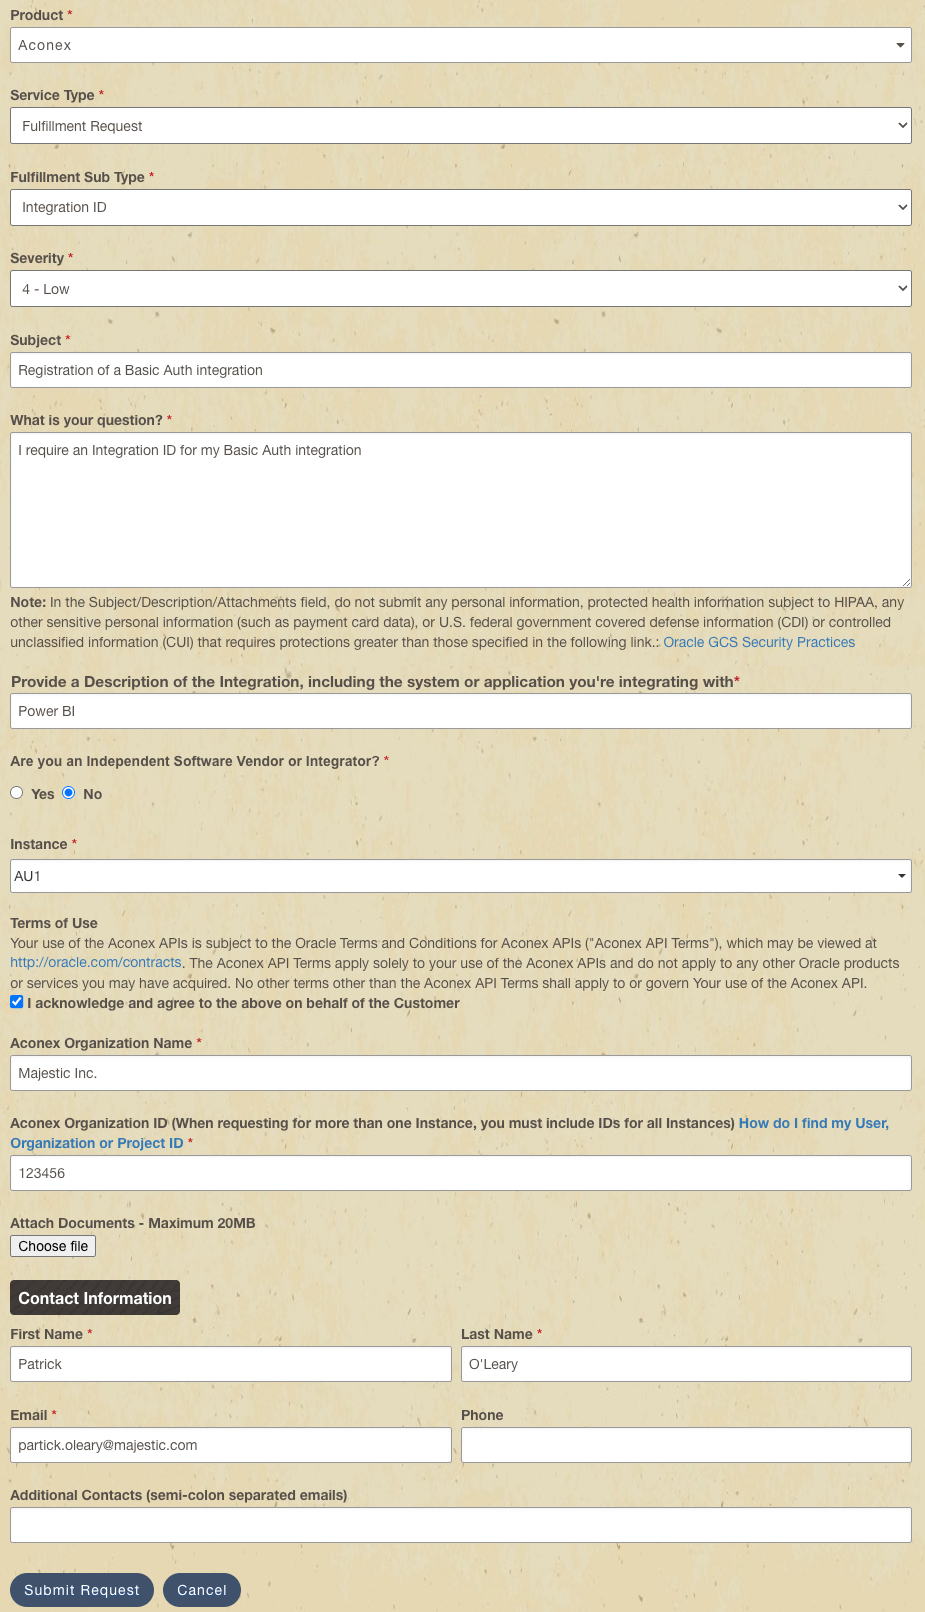
The below image shows an example request: