Create an OAuth Client

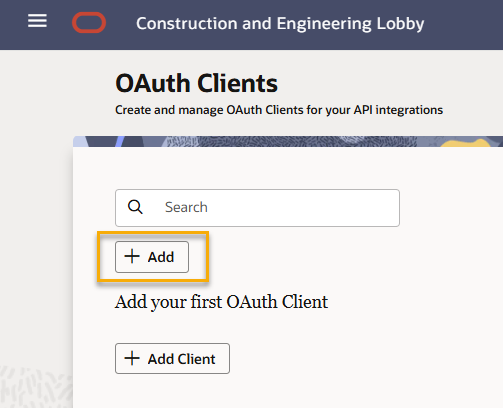
If you're a Lobby Admin, you can create an OAuth Client directly from the Lobby. Your OAuth Client will be ready to use in minutes.

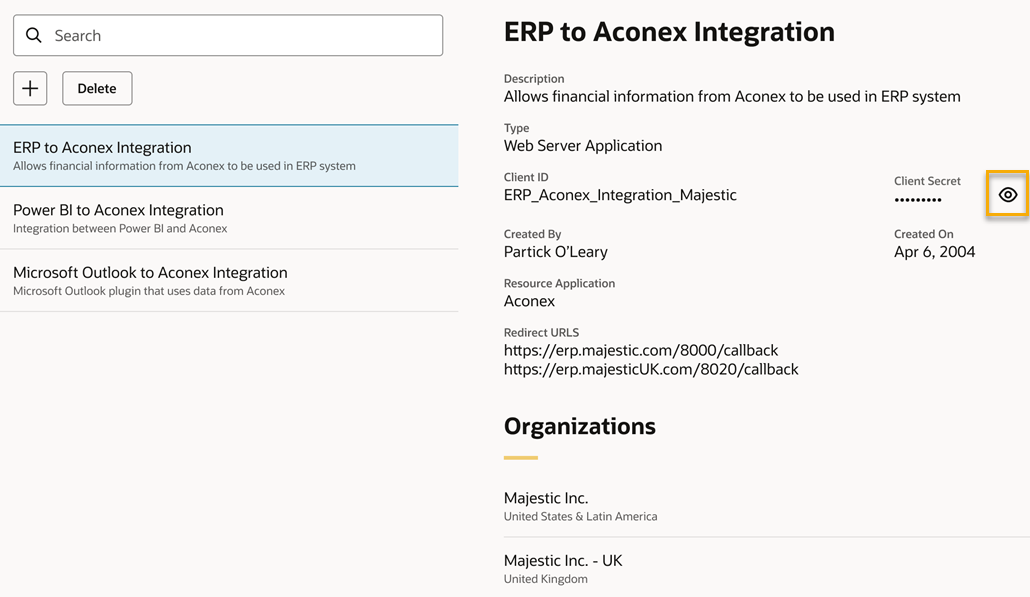
Every integration with Aconex APIs must be registered with Oracle and you will receive credentials that will be used to uniquely identify the integration. Every one of your integrations must be registered individually.

You can only create an OAuth Client for your organization(s).

Oracle Technology Partners must create their OAuth Clients on Early Access (EA) Lobby and after completing testing there, must Publish the OAuth Client for their customers to access.

Step 1: Add an OAuth Client

  1. Sign in to the LobbyNote: There's a separate Lobby for the AU2 instance and a separate Lobby for Early Access (EA).
  2. Choose OAuth Clients from the main menu. You'll see any existing OAuth Clients that your organization has created.
  3. Click Add.
  1. Enter a unique and meaningful Name for your OAuth Client.
  • If you will only ever have one integration with Aconex, you can use your organization name. For example: Majestic Inc.
  • If you intend to build multiple integrations, consider a name that describes the purpose of the integration. For example: Majestic Inc. Package Builder.
  1. Enter a meaningful Description. For example: Connects Majestic's Package Builder with Aconex.
  2. Select the Resource Application you want to connect to. Choose if you want to access Aconex APIs (this is the default selection) or Lobby APIs. 
  3. Choose the Type of integration you want to register. As described in Implement OAuth, the following types of integration are supported:
  • Web Server Application: A server-side user application delivering a user interface in a web browser
  • Installed Application: An application that a user installs onto their device, such as a Windows app, macOS app, mobile app, or a single-page app (SPA) running entirely in a web browser
  • Non-Interactive Integration: An integration that has no user interaction.  Only available for Oracle Customers.
  • User-Bound Integration: An integration that has no user interaction and is bound to a specified Lobby user account. This option is only available if you selected Aconex as your resource application.  Only available for Oracle Customers.

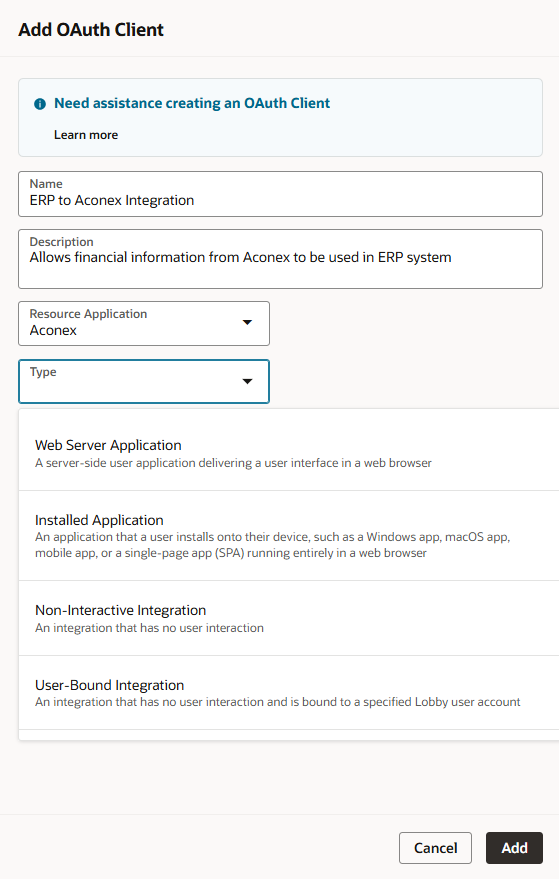
Determine which one of these is most applicable to your integration.  If you are unsure see What type of OAuth Integration should I register?

  1. After selecting the integration type you will need to provide additional information. The fields you need to complete will be different depending on the type you selected.

    The fields are:

User Account

If you are registering a User-Bound Integration select the Lobby user account to bind to the integration from the User account drop-down list. Every call made to an Aconex API by this integration will be performed in the context of the bound user account. You'll only be able to select Lobby accounts from your organization(s).

Redirect URL(s) 

If you are registering a Web Server Application or Installed Application you must provide an endpoint (redirect URL) that the Lobby will call with the authorization code as part of the OAuth flow.

You may register a single redirect URL or multiple.

Check with your technical team for what redirect URL(s) need to be registered for your integration.

If you are registering an Installed ApplicationRFC 8252 states that should use either a Private-user URI scheme redirect or a Loopback redirect URI, each of which are described below.

Private-user URI scheme redirect uses a custom URI scheme that has been registered on the device for your application, taking the form:

scheme:/path

Here's an example:

com.example.app:/oauth2/callback

Loopback redirect URI uses the "http" scheme with the loopback IP literal and whatever port the application is listening on, taking the form:

http://127.0.0.1:{port}/{path}

Here's an example:

http://127.0.0.1:54001/oauth2/callback

If your Installed Application loops through a number of ports to find an available port for binding the callback, you may register a single loopback redirect URI with a wildcard (*) port identifier, rather than registering multiple redirect URIs.

Organizations

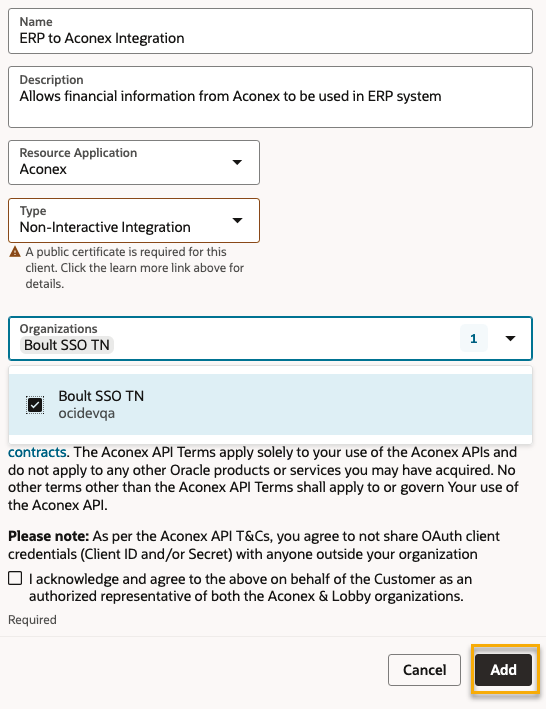
Select the organization(s) that will use this integration. You'll only see organizations listed where you are a Lobby Admin.

Trusted Issuer Public Certificate

If you are registering a Non-Interactive Integration, you must upload the public certificate of the Trusted Issuer that will sign the User Assertion used to identify the user on behalf of whom your integration will access Aconex APIs.

  • You must send us the public certificate of the Trusted Issuer separately by raising a Service Request.
    • If you are receiving the User Assertion from an external Identity Provider (IdP), the public certificate should be downloaded from that IdP. Otherwise, the Oracle Java Key and Certificate Management Tool can be used to generate a self-signing key pair.
    • If not already, convert the public certificate into a PEM file (.pem) and create a ZIP file (.zip) containing only the PEM file.
  • Alternatively if your organization manages its own Identity Domain, you can upload it directly.

Terms of Use

If you chose Aconex as the Resource Application you must check the box to accept the terms of use.


  1. Click Add to create the OAuth Client.

Step 2: Find the client secret

  1. Your new OAuth Client will display in the list of available clients.
  2. Click the eye icon to see the Client Secret.  Note: Installed applications do not have a Client Secret.

Step 3: Update your IdP Policy

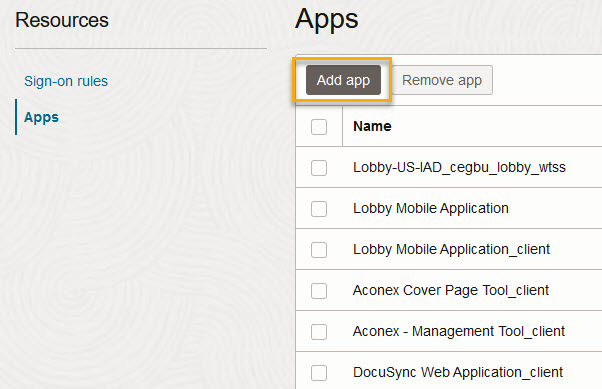
If you've configured SSO in your own Identity Domain, you must add the integration to your IdP policy. Learn more about adding apps.

  1. Navigate to the Security screen in your Identity Domain and click IdP Policies.
  2. Select the Idp Policy you created when you configured SSO for Aconex.
  3. Click Apps from the left menu.
  4. Click Add app.
  5. Search for the OAuth Client you created and check the box to select it.
  6. Click Add app.

Step 4: Update your Sign-on policy

If you've configured 2SV in your own Identity Domain, you must add the integration to your Sign-on policy. Learn more about configuring 2SV policies.

  1. Navigate to the Security screen in your Identity Domain and click MFA.
  2. Click Sign-on policies
  3. Select your organization's Sign-on policy.
  4. Click Add app.
  5. Search for the OAuth Client you created and check the box to select it.
  6. Click Add app.

What's next?