Support Central
Plan, create, and apply mail forms and restricted fields to your project.
Mail forms and restricted fields make mail much more customizable. Using Project FIelds, you can customize the data entry fields on each mail type, and decide whether they apply to all organizations or just your own.
Mail forms:
Restricted Fields:
Note: Mail attributes are multi-select fields that can also be used, but are visible on all mail types and cannot be relabelled.
The first step in creating useful mail forms and restricted fields is to plan them.
First, review your project’s reporting requirements. These will give you insights into the kinds of fields you’ll need to have available to report on.

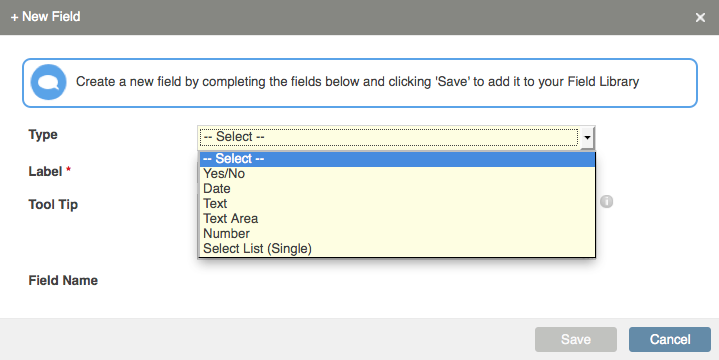
There are six different types of fields in mail forms and restricted fields: Yes/No, Date, Text, Text area, Number, and Single Select List. You’ll need to choose the appropriate field in each case, and structure it to suit your project’s needs. So it’s important to think about the information you need to capture, and the best way to capture it.
You can apply a given field to as many mail types as you like. As part of your planning, think about whether you want to reuse and report on fields across different mail types.

You can put limitations on each field to shape the way project participants enter information.
As the project progresses, your mail forms will help you capture important project data, so it’s important to consider your project’s searching and reporting needs before you create the fields.
To plan your mail forms and restricted fields:
Look at the mail types you’ve set for the project. Which mail types are likely to include particular data as standard?
Make a list of this information for each mail type.
Consider how project participants will need to use each of those pieces of information in their reporting. What limitations or specifications (e.g. units of length, dates, currencies, confidentiality etc.) will you need to put on the data to support those reporting needs?
Make a note of those specifications next to each piece of information.
Look for pieces of information that serve the same purpose and have the same (or very similar) specifications. Could you create a single field to capture this information, and use it across a range of mail types?
Split your list of fields into single-use and reusable fields, if that’s appropriate for your project, noting which mail types each one will apply to.
Create a separate list for restricted fields, which will remain confidential within your organization.
The character limits on Mail Forms fields and tooltips are as follows:
It’s important to choose your field labels very carefully.
When you come to type your label into the New Field window, you’ll see the Field Name is created for you automatically.
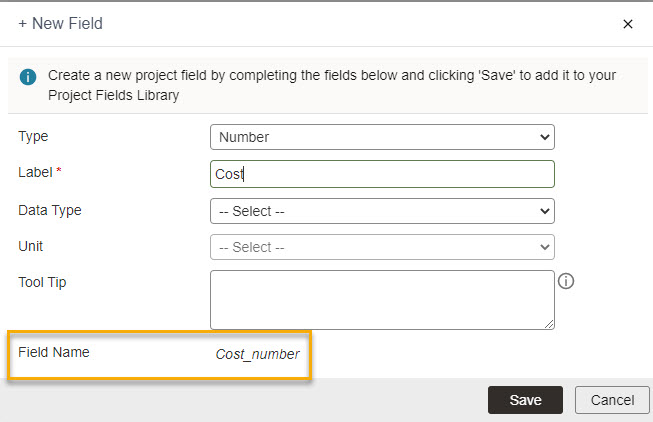
While the field label, which displays for your project’s participants, can be changed, this field name can’t. Once you save the field, that field name will be set—you won’t ever be able to change it.
This ensures that the Project Admin always knows what the original purpose of a field was, and can make sure it’s labeled appropriately.
For example, if you create fields named “Cost net” and “Cost gross”, changing the label of one to simply “Cost” would likely cause confusion when it comes to reporting for the project.
As you can see, it’s important to choose your field labels in the planning phase, before you begin to create the fields in Aconex.
Choose a name that reflects the intent of the field. For example, if the field is to be used to record costs, include that in the field name.
To make sure you can reuse the field across mail types, more generic names might be best (for example, Cost implication, rather than RFI cost implication).
Balance your need to reuse the field against your needs to track and report on specific elements of the project.
Remember that if you change the field label once it’s created, the new label will be applied to all the mail types in which that field is used on that project.
Now you know what each of your fields is for, and what they’ll be called.
Next, decide how you’ll shape the information that project participants can enter for each one.
You can choose from six types of fields:
Yes/No
Date
Text
Text area
Number
Single Select List.
For each one, you can set a tooltip that gives users more information on how to complete the field.

For the text field, you can set minimum and maximum lengths. The default maximum is 60 characters, but you can set a maximum limit below that, and a minimum limit of one or more.
For the number field, you can set a data type and choose the units you’ll use.

Note that the number of characters you can use in the Text and Text Area fields is different.
For a single select field, you’ll need to add the options from which users can select. You can paste these in from other programs, like Word or Excel, if you wish.


