Configure password and 2SV policies for your organization

Some organizations have specific requirements to manage passwords and two-step verification (2SV).

By default, passwords have a standard expiry and users are prompted to set up 2SV when they first sign in. If you're a Lobby Admin you can reset passwords and 2SV for users in your organization.

Some organizations prefer to have a different password expiry for their users. Some want to configure additional methods for two-step verification. And some organizations prefer their users are not prompted to configure 2SV at all.

To achieve this, your organization must create and manage its own Identity Domain. The steps to get an Identity Domain are technical. You may need assistance from your organization's IT department.


Who needs to be involved?

  • Oracle
  • Your technical contact (typically your organization's Aconex Administrator) 
  • You may also need assistance from your organization's IT department

Requirements:

  • All users in your organization must have Lobby accounts. Your Org Admin can use the batch onboarding tool to create Lobby accounts for all your users.
  • Your organization must have an Identity Domain. 

Step 1: Create an Identity Domain

An Identity Domain is required to either configure SSO for your organization, or configure authentication policies without using SSO. To get an Identity Domain you need an Oracle Cloud account.

Different processes apply for each paying and non-paying organizations. Your organization may already have an Oracle Cloud account and Identity Domain if you use other Oracle products, such as P6, OPC, Unifier, ERP etc.


For Paying Organizations

  1. Your technical contact must identify:
  • If your organization uses other Oracle products, such as P6, OPC, Unifier, ERP, etc.
  • If you have users in your organization that will not be included in your SSO system.
  • If your organization uses the AU2 instance of Aconex.

If so, please contact us to discuss your requirements. You may need to follow a different process.

  1. All users in your organization must have Lobby accounts. Your Org Admin can use the batch onboarding tool to create Lobby accounts for all your users.
  2. Your technical contact completes the configuration checklist and attaches it to a support request ticket. You may need help from your Oracle Representative.
  3. Oracle creates an Oracle Cloud account (if required, as you may already have one). Your technical contact will be notified by email when this is completed.
  4. Your technical contact activates the account. They will receive an email with details on how to do this.
  5. Your Identity Domain has been created. 


For Non-Paying Organizations

  1. Your technical contact must identify:
  • If you have users in your organization that will not be included in your SSO system.
  • If your organization uses the AU2 instance of Aconex.

If so, please contact us to discuss your requirements. You may need to follow a different process.

  1. All users in your organization must have Lobby accounts. Your Org Admin can use the batch onboarding tool to create Lobby accounts for all your users.
  2. Your technical contact signs up for an Oracle Cloud Free Tier.
  3. Your technical contact activates your organization's Oracle Cloud account.
  4. Your Identity Domain has been created. 

Step 2: Configure the Lobby to use your Identity Domain

  1. Your technical contact replies to the support request ticket created when your Identity Domain was created, and provides the ID for the account. The easiest way to do this is to paste your Domain URL into the ticket.
    The URL will look something like this: https://idcs-<ID>.identity.oraclecloud.com/ui/v1/myconsole
    You can find your Domain URL in the overview screen. Learn more
  2. Oracle will configure the Lobby to use your Identity Domain. Your technical contact will be notified via the support request ticket when this is completed.

Step 3: Create a password policy

Follow the instructions to create a password policy in your Identity Domain.

Step 4: Configure two-step verification

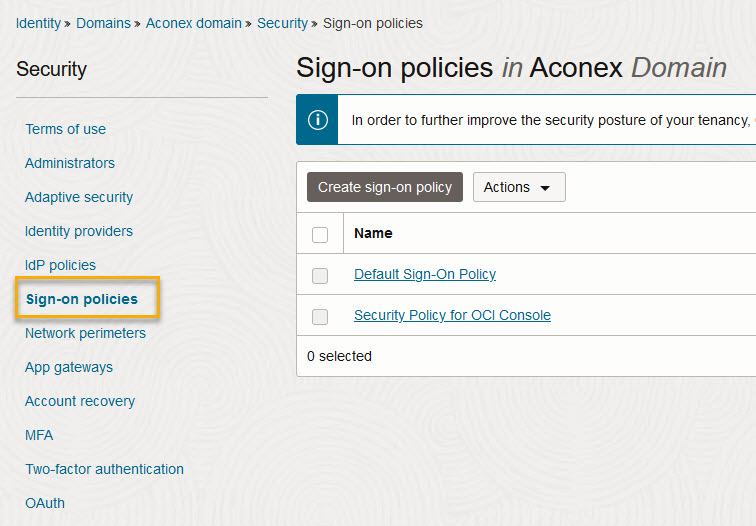
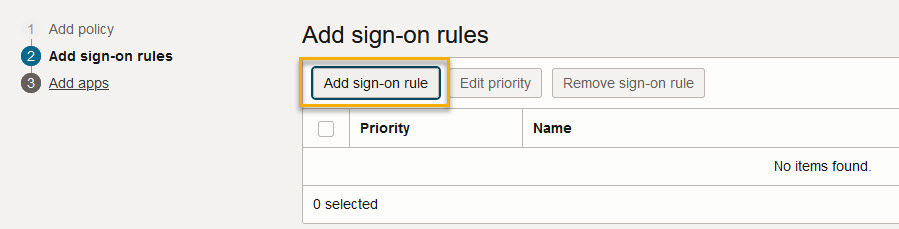
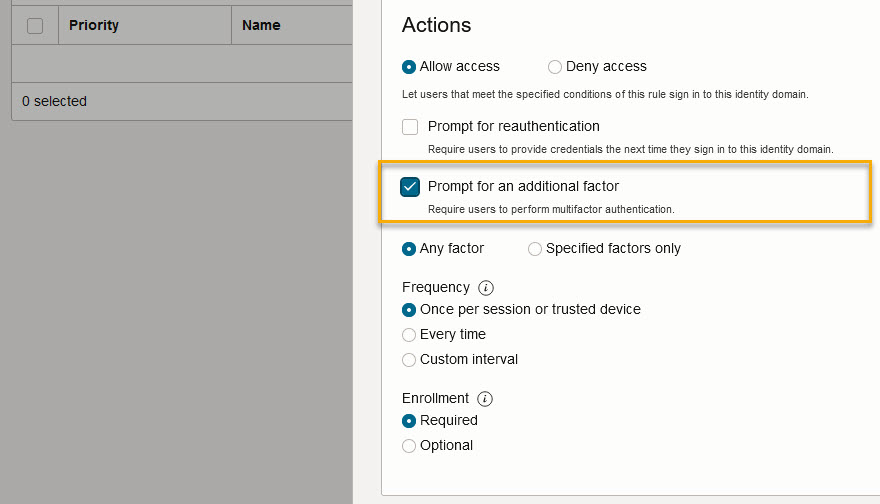
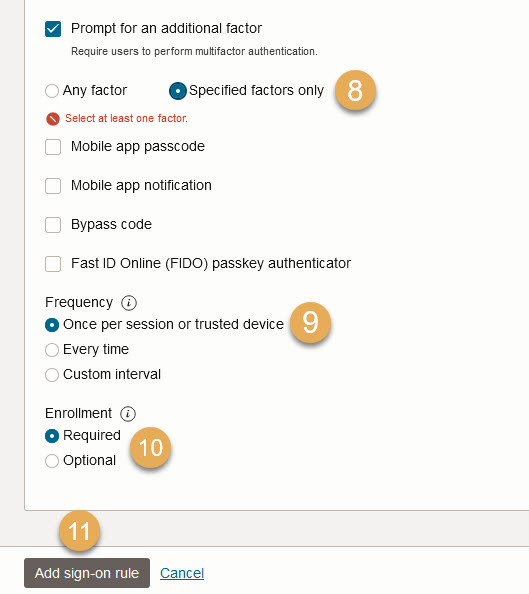
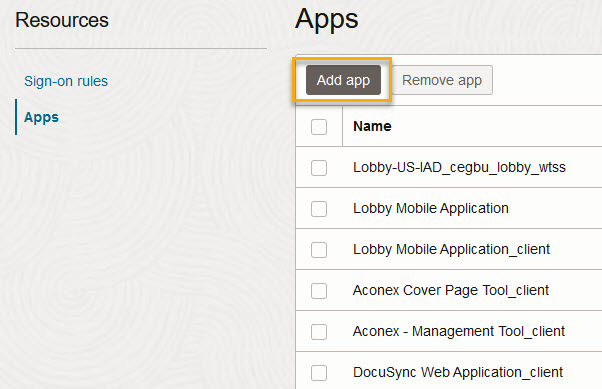
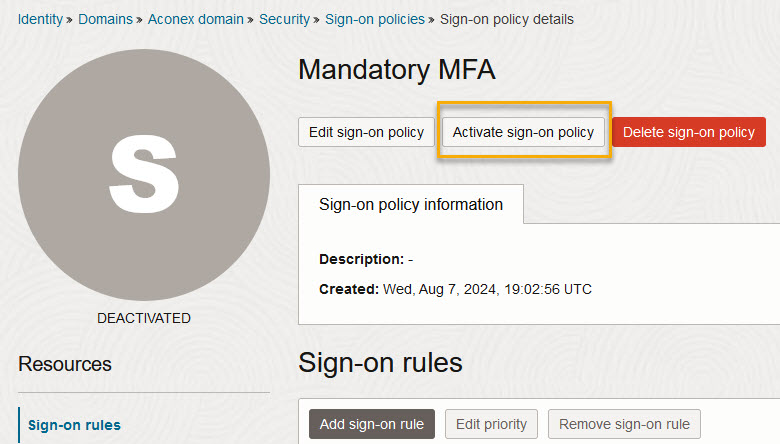
Follow these steps to configure which 2SV methods are available to users in your organization. Note: If you don't want users in your organization to use two-step verification at all, then do not complete these steps and do not create a sign on policy. 

  1. Navigate to the Security screen in your Identity Domain and click MFA.

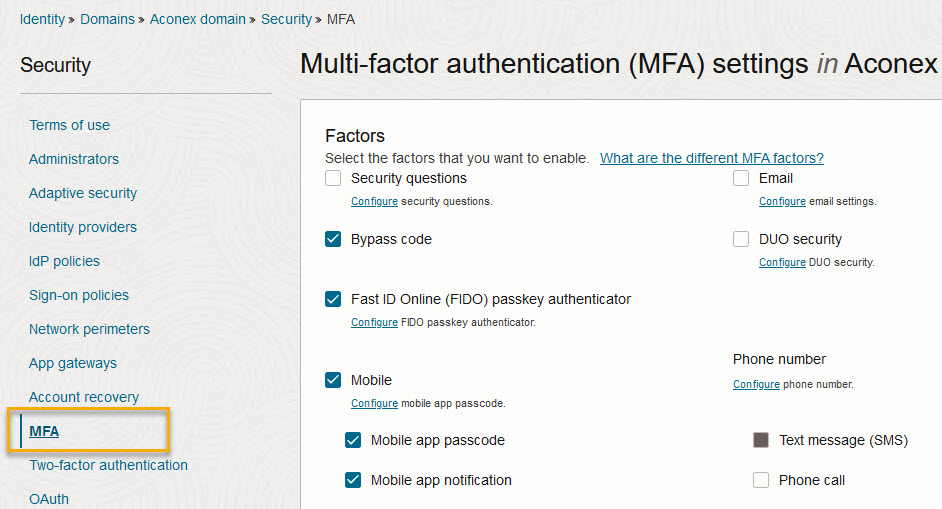
Here, you can select the two-step verification methods you want to use. Several may have been enabled for you by Oracle. You can uncheck those you do not wish to use, and check additional ones. For detailed instructions see Configuring Multifactor Authentication Settings.

Also see Configuring Authentication Factors for details about the available methods.

Note: Fast ID Online (FIDO) is not supported by the Lobby. If this is enabled and your users see an empty screen after entering their password, then you will need to remove this method. 

  1. After configuring the 2SV methods, you need to set a Sign On Policy. 
  2. Click Sign-on policies, then click Create Sign-on policy. For more details about sign-on policies see Creating a Sign-On Policy.
  1. Enter a name for the policy and click Add policy.
  1. Click Add sign-on rule.
  1. Enter a rule name.
  1. Scroll down to the Actions section and check Prompt for an additional factor.
  1. Select Any factor if you want users to choose from any of the enabled 2SV methods, or select Specified factor only to limit their choices. You will need to select at least one. 

    Note: Fast ID Online (FIDO) is not supported by the Lobby. If this is enabled and your users see an empty screen after entering their password, then you will need to remove this method from each sign on rule you created.
  2. Set the frequency (or how often) the user should be asked to authenticate with 2SV.
  3. Under Enrollment, decide if the user is required to setup 2SV on their first login or if it should be optional.
  4. Click Add sign-on rule.
  1. Next you need to associate the policy with access to Aconex and the Lobby. Click the Add Apps menu item on the left.
  2. Click Add app.
  1. Search for each of the following apps and click Add app:
  • Lobby-US-IAD_cegbu_lobby_wtss
  • Oracle SCP Aconex Mobile to Aconex integration_client
  • Oracle SCP Outlook to Aconex integration_client
  • Oracle SCP Aconex Sales Automation to Aconex integration_client
  • Oracle SCP Aconex Archives to Aconex integration_client
  • Oracle SCP Navisworks to Aconex integration_client
  • Oracle SCP Revit to Aconex integration_client
  • Oracle SCP Primavera Cloud to Aconex integration_client (Only available to your organization if you have access to Primavera Cloud)
  1. If your organization has registered any OAuth clients for APIs, you'll also need to add them here. You'll also need to add any partner integrations that your organization uses.
  2. Click Close.
  3. Activate the policy by clicking Activate sign-on policy.

What's next?