Using autonumbering for package types

Use auto-numbering to avoid human error and to reduce the time you spend validating and confirming package numbers.

Numbering conventions are used between organizations to ensure all parties understand which document is which, and to keep order in a project's structure. Auto-numbering can be enabled (or disabled) by package type in the Package Type settings. If a package has been created using auto-numbering, the package number can't be changed. 

When you define your numbering scheme, you'll have a sequence number. For example, if your package type code is DES, and you use this for your numbering scheme, this may start with DES-00001. You can choose the length of this sequence number - from 4-6 digits - and with which number it will start with.

Auto-numbering can be disabled and re-enabled as needed.

Tip!

Only users who can create package types, so have the permission Edit project settings, can set up auto numbering. You can't edit the package number for packages that have been created using auto-numbering.
Setting up auto-numbering

  1. Go to Setup, and select Project Settings. Then click Packages and select Package Types.
  2. You can either create a new package type or select an existing one.
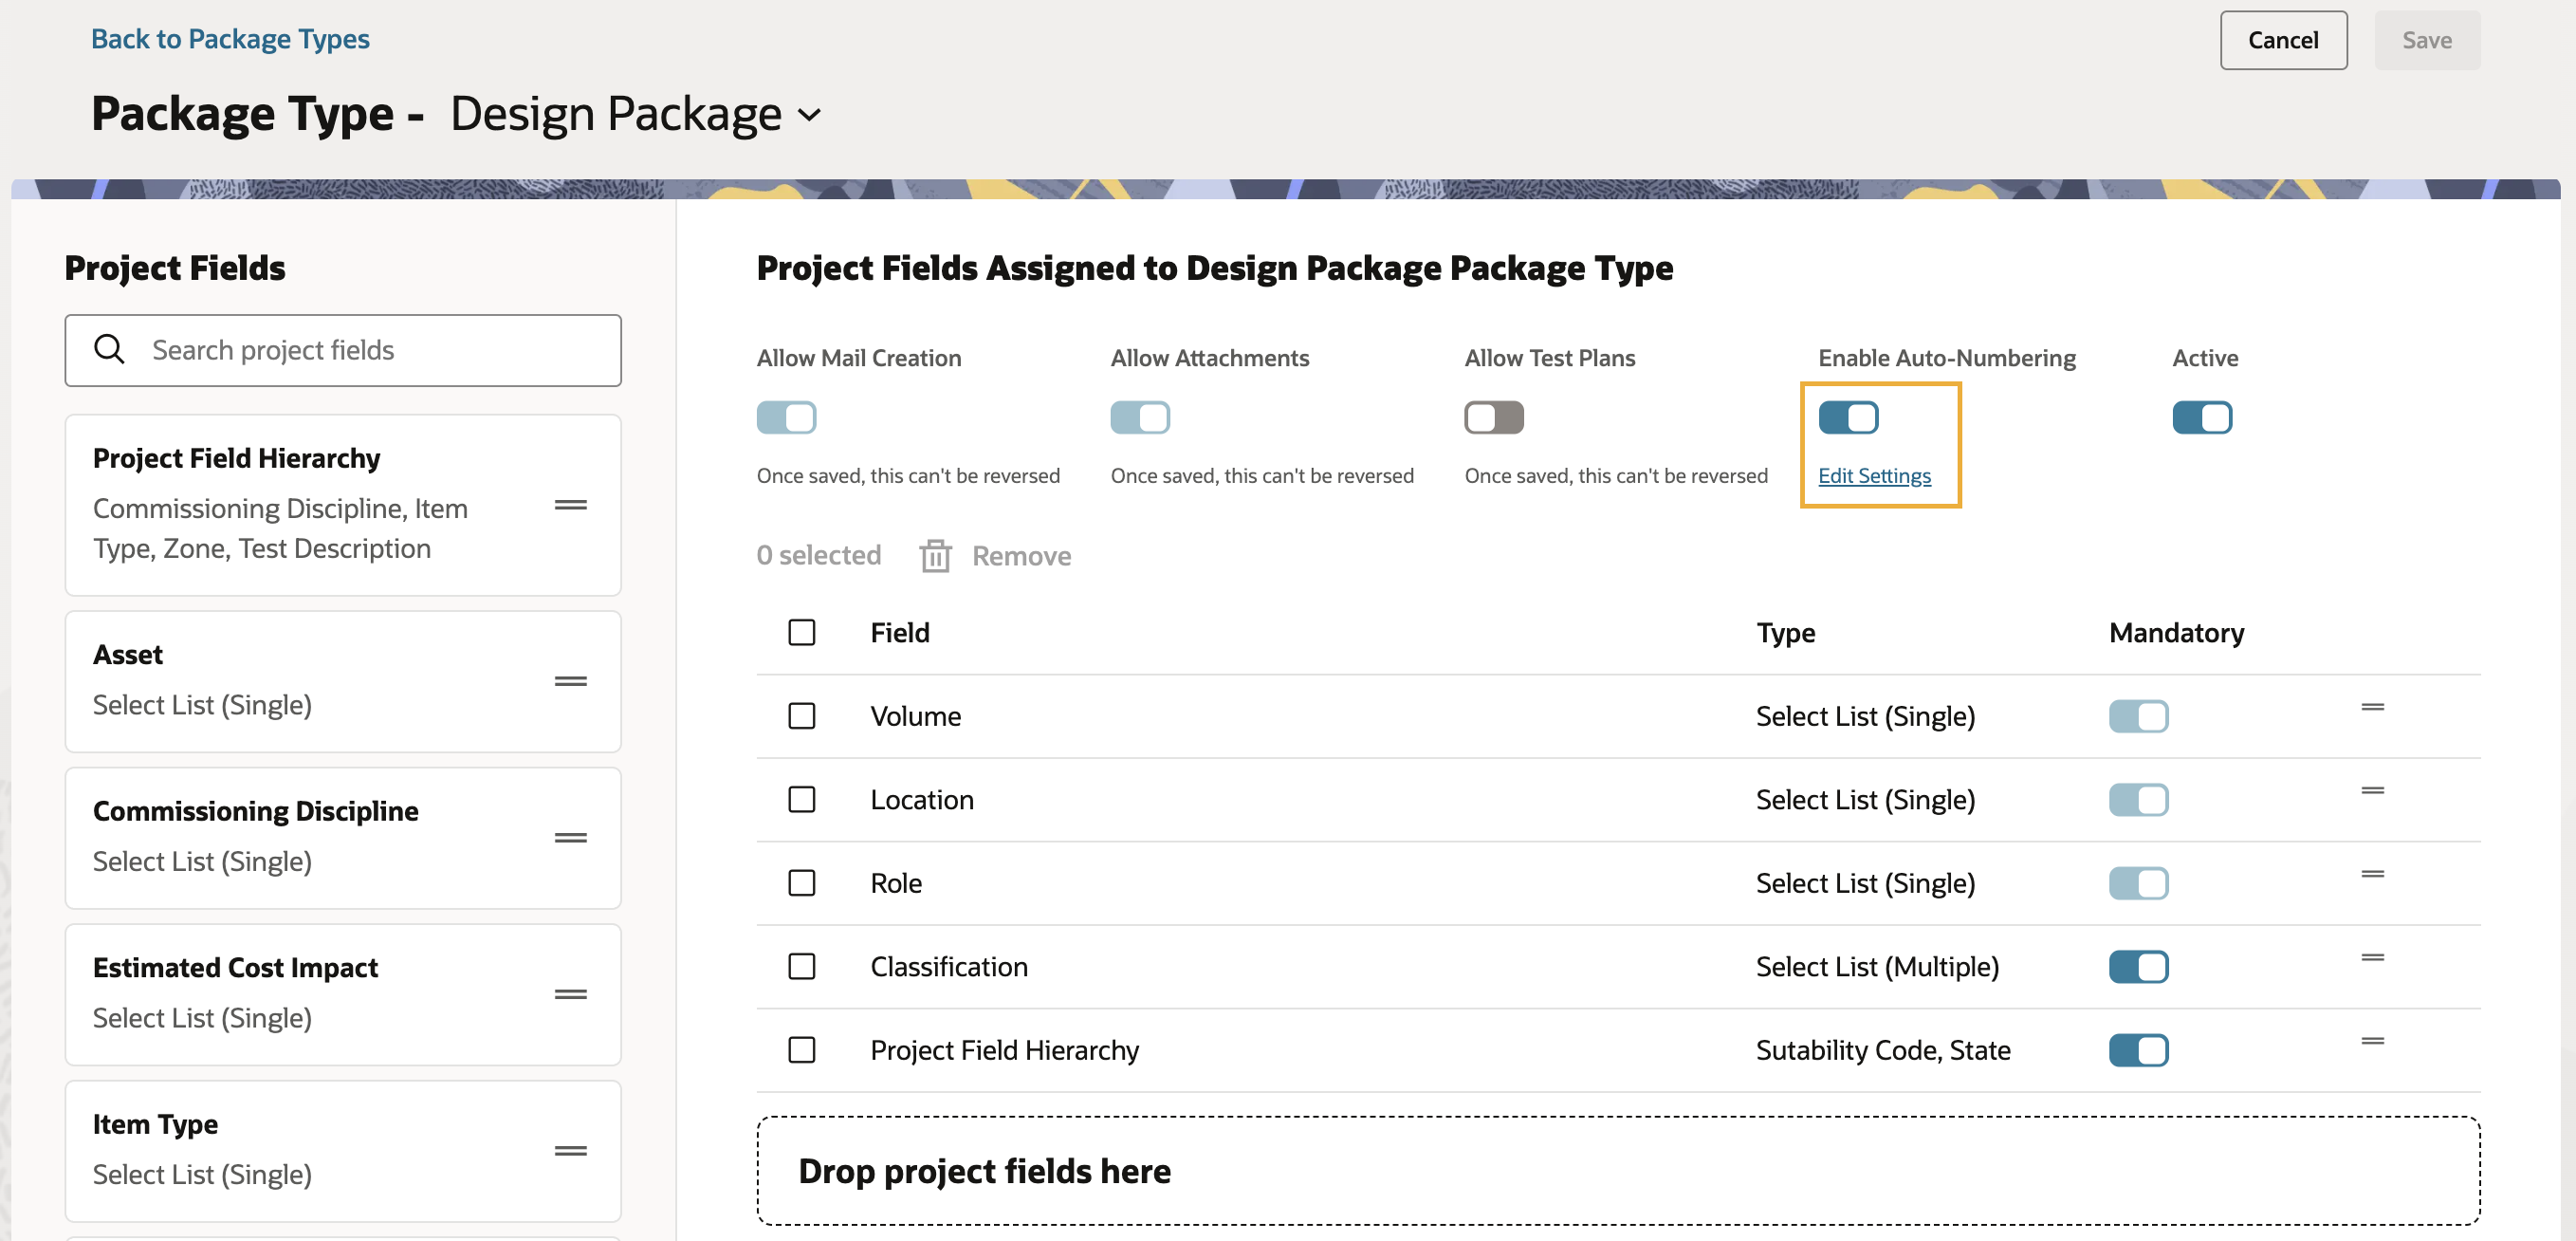
  3. Turn on Enable Auto-Numbering.
  4. Click on Edit Settings below the toggle to open the Auto Numbering Settings window.
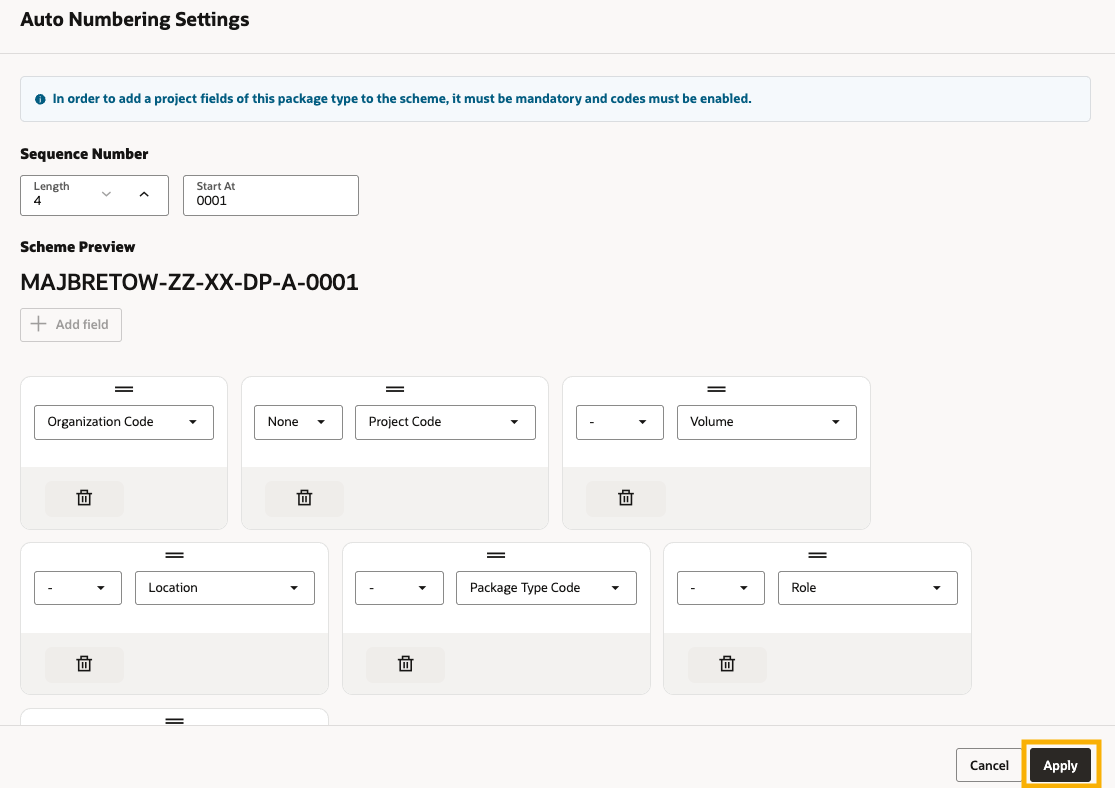
  1. You can see several options that allow you to create and arrange the scheme sequence.
  2. Set the sequence number Length and Start At value.
  3. Build your numbering scheme using the available fields. The Scheme Preview updates as you make changes.
  4. Add, reorder, or remove fields as required. See Adding, re-ordering and removing scheme options below for more information.
  5. Click on Apply to save the auto-numbering settings, then click on Save on the package type page.

Adding, re-ordering and removing scheme options

  1. To add a field to the numbering scheme, click on the Add field button. The new option appears next to the existing ones.
  2. On the drop-down menu, select the field you want to use. You can choose from:

    • Package Type Code

    • Project Code

    • Organization Code

    • Project Fields of the type Select List (Single).

  3. If required, select a separator to use between fields.
  4. To reorder a field, use the drag handle at the top of the field and drag it to the required position.
  5. To remove a field, click on the Delete icon.
  6. Review the Scheme Preview to confirm the numbering sequence.

Note: To add a Project Field to the numbering scheme, it must be mandatory for the Package Type and have codes enabled. See Enabling codes for Project Fields below for more information.

Enabling codes for Project Fields

  1. Go to Setup, and select Project Settings. Then click Project Fields and select Fields.
  2. Open the Project Field you want to add to a numbering scheme to.
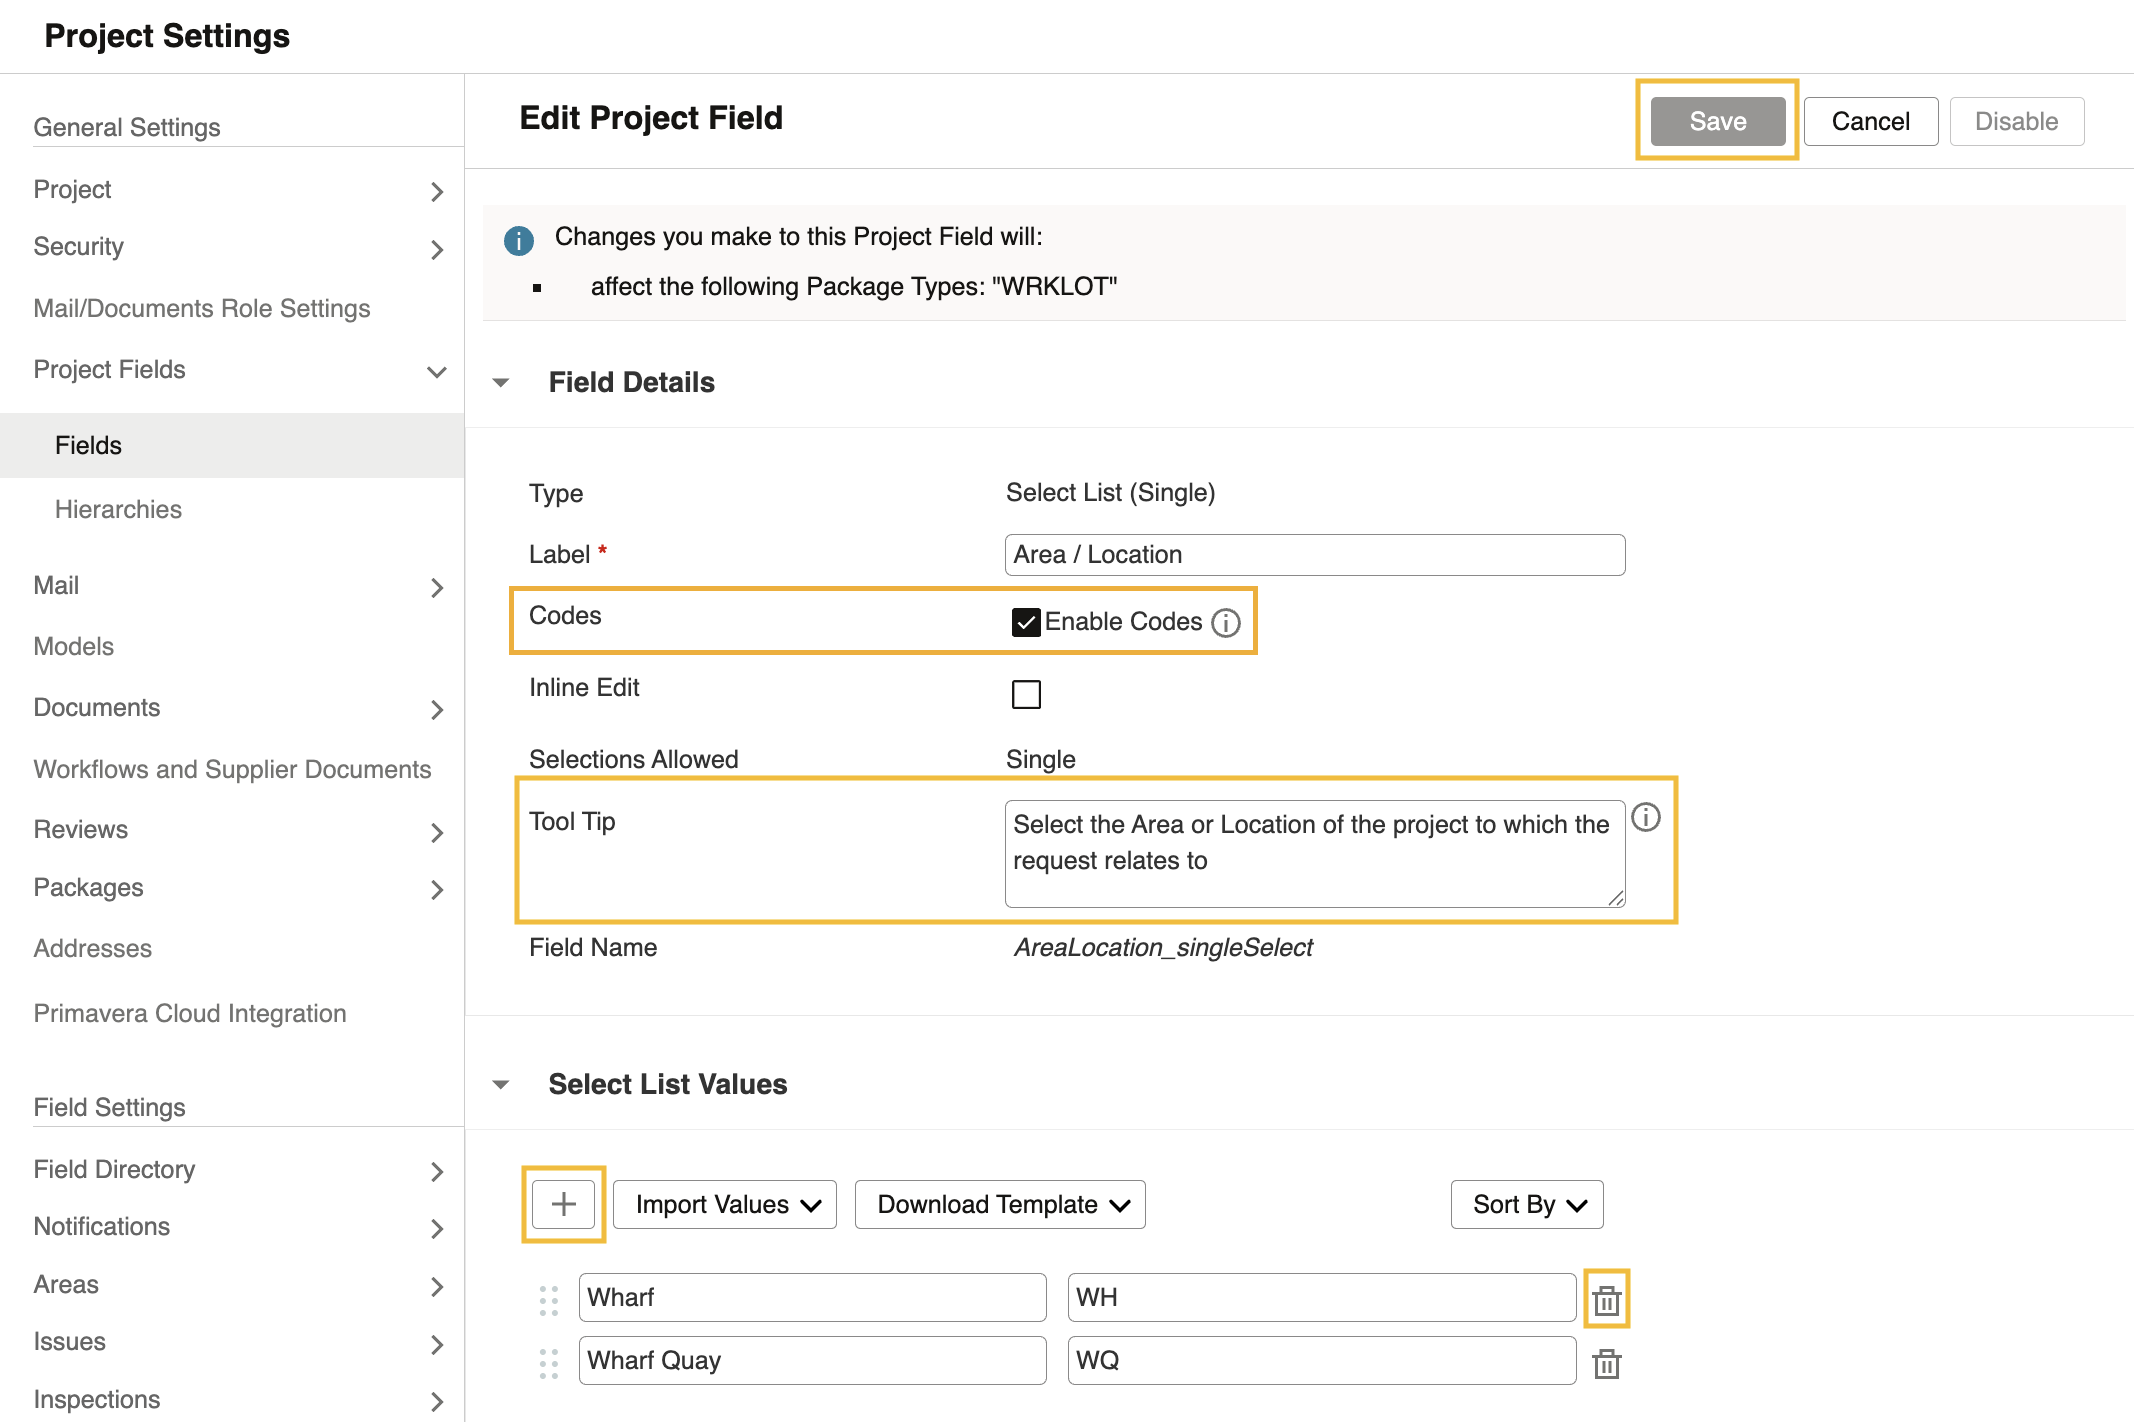
  3. In the Edit Project Field window, select Enable Codes.
  4. In the Select List Values section you can:
    • Add a new option.
    • Delete any of the existing ones 
  5. Add the Codes for the Single Select options. Note:
    • You MUST add a code for any option that doesn’t have one to enable the Save button.
    • Add information in the Tool Tip field to give users details about how the code should be used with your mail type.
  6. When you’ve finished, click Save to close the window.