Create groups for project roles (User Management)

Assign a role to a group of people across different organizations

Required permissions
Edit project settings

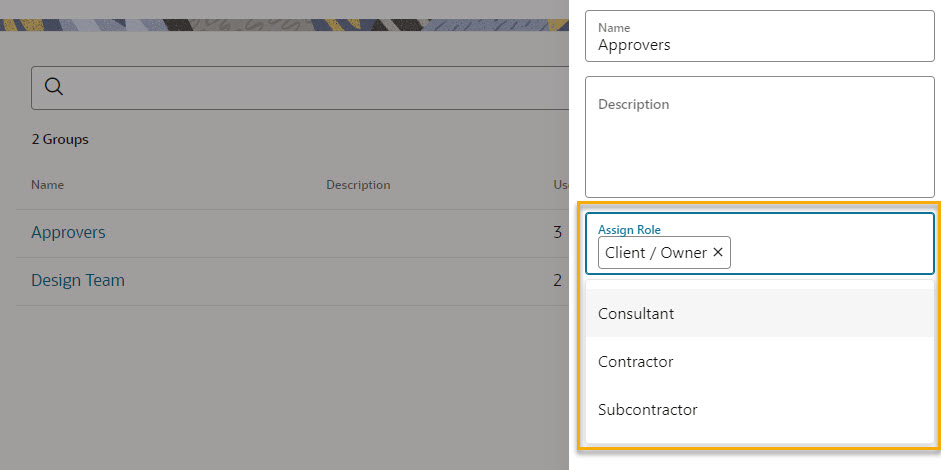
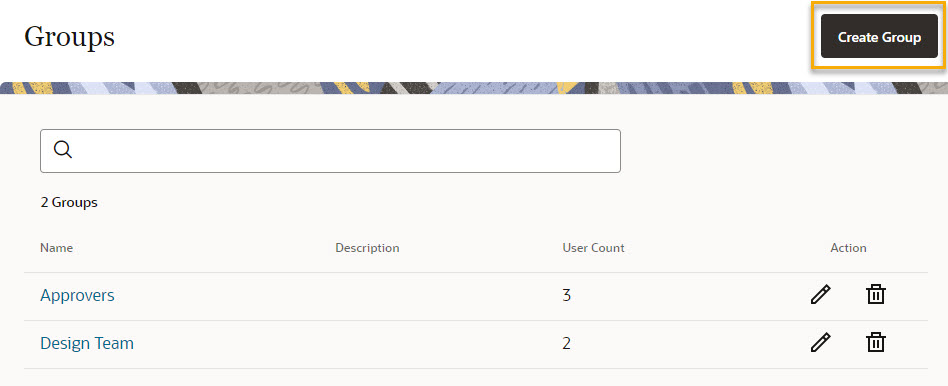
In User Management, Project Admins can create groups that contain people from different organizations and assign a project role (with specific access for that role) to the group. This allows you to assign specific mail types, document types, document statuses, and review statuses to those users.

Create a group

  1. Go to Setup for your project and select User Management.
  1. Click Create Group.
  1. Give the group a name and a description if required.
  2. Click Save.

Add members to the group

  1. Once saved, you will see the group listed in Groups.
  2. Click on the name of the group to add users. As you type the name of invited members, you will see a list of names to choose from.
  3. Click on the name of the person you wish to add and they will be added to the group.

Assign project roles to a group

  1. Click on the pencil icon to add or remove roles.

Tip!

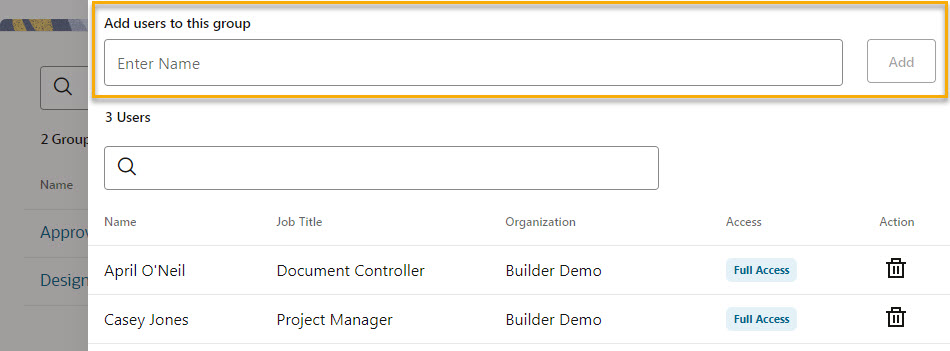
You can add a person to more than one group, and you can assign more than one role to a group.

  1. Select roles from the Assign Role field and click Update.
  2. Your group now has access associated with that role.