Create hierarchies for project fields

Create relationships between project fields to make it easier to capture accurate data

Required permissions
Manage Cascading Metadata

Project Field hierarchies help the project owner set relationships between dropdown lists so that only relevant values are shown after each selection. For example, selecting a country gives a list of the states or provinces in that country. 

Hierarchies can apply when uploading documents (similar to Cascading Metadata) and/or when completing a mail form.

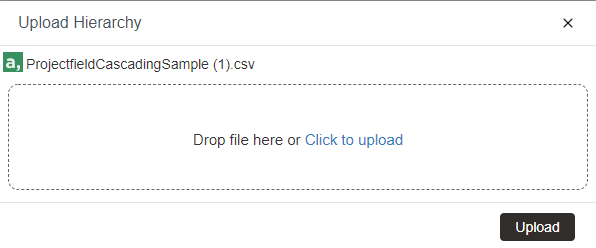
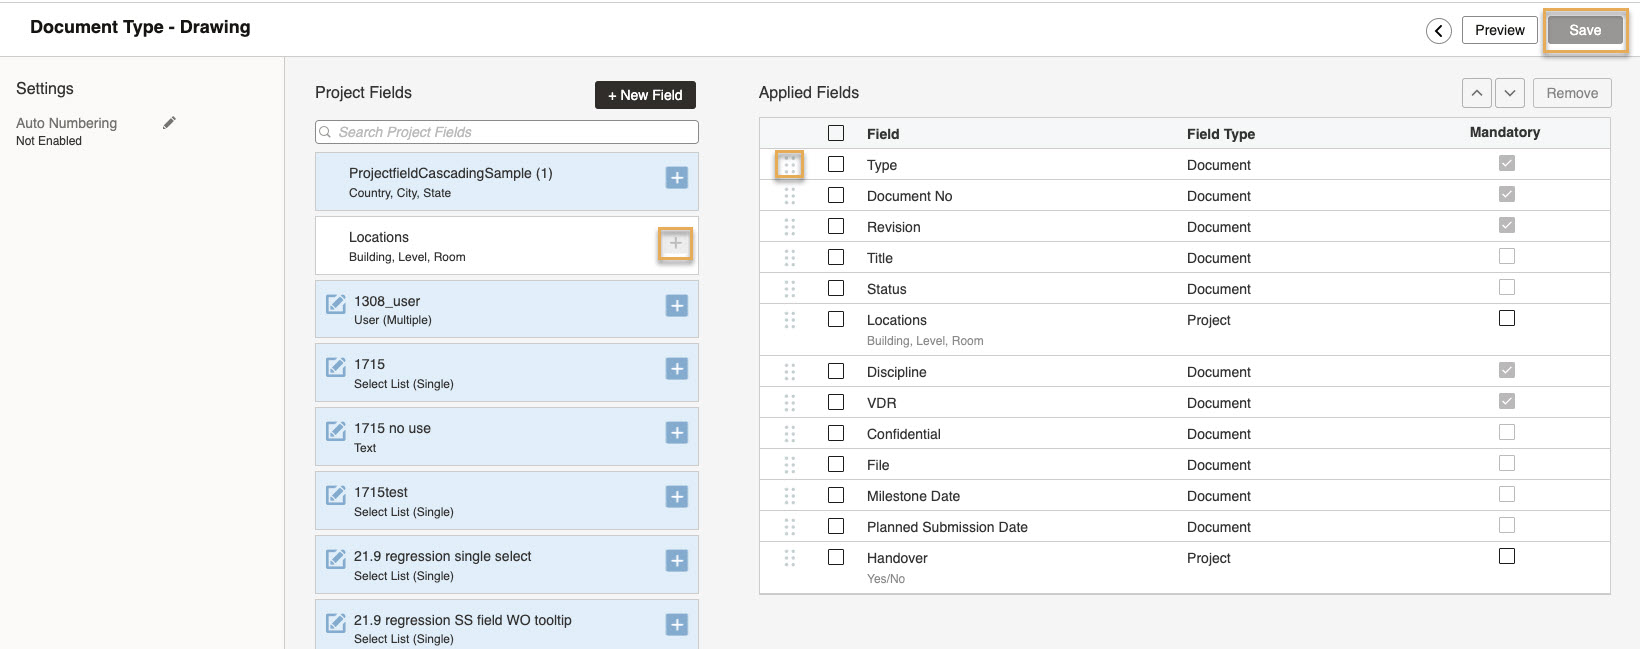
Applying project field hierarchies is a two-step process. First, you’ll need to create and upload your hierarchy via a spreadsheet. Then you need to apply it to the required types.

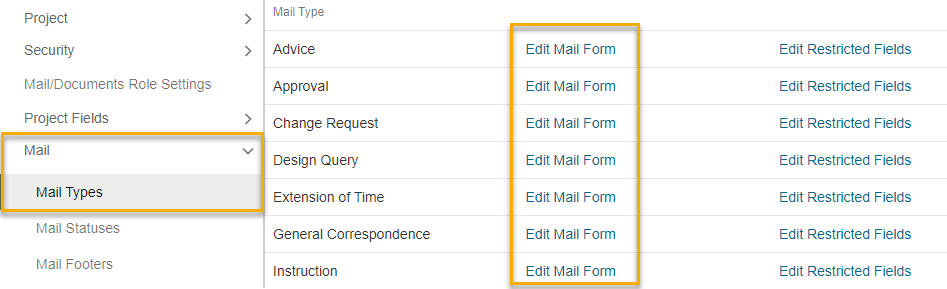
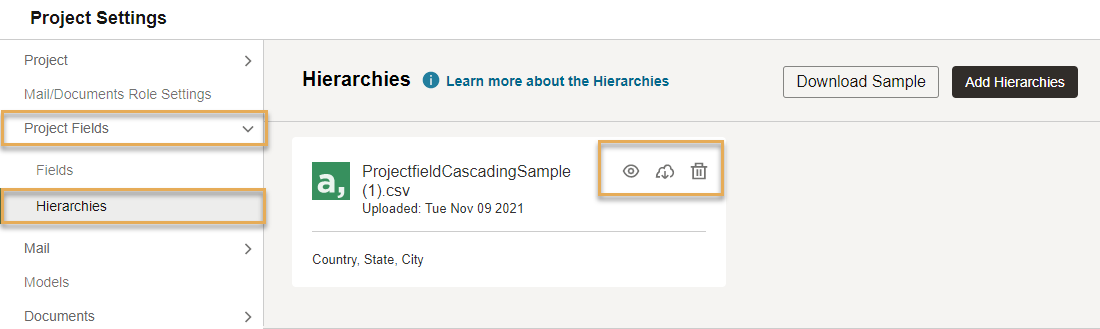
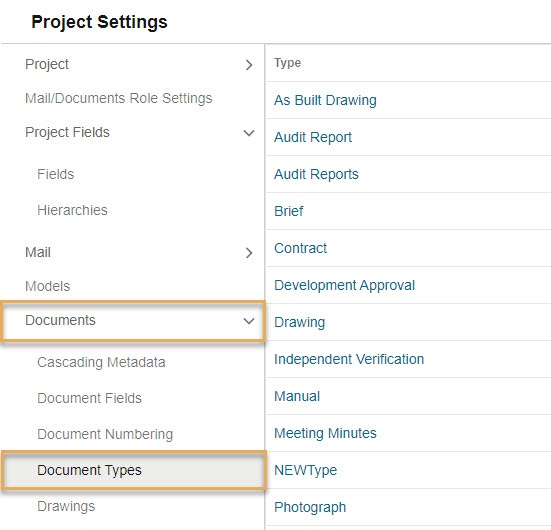
Once you've created a hierarchy you can apply it to document types or mail types or both.

Things to note: 

  • Only Select List (Single) project fields can be used in a hierarchy.
  • A project field cannot be used in multiple hierarchies on a project. The same hierarchy can be applied to multiple document types.
  • The table view in the upload screen will be unavailable for all users if your project has project field hierarchies applied.
  • There is no limit to the number of hierarchies allowed on a document type.
  • Drag and drop hierarchies and other fields to make a custom metadata flow that's easiest for you.
  • Only available for the new upload experience.

Tip!

You must be a project administrator of the Aconex project-owning organization to apply Project Field hierarchies.

Example

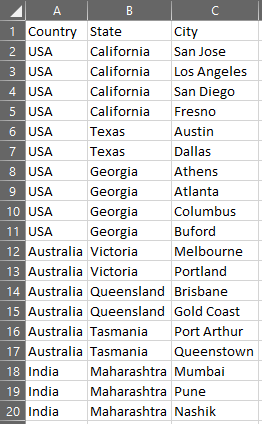
To use Project Field hierarchies on your project, you’ll need to create a hierarchy template: a spreadsheet saved in .csv format. The column headers in the csv file reflect the project field names that you want to use. The rows show the values that will become available with each attribute selection.

In the example csv file below, if you chose USA in the first project field, you'll be able to choose California, Texas or Georgia in the second project field.

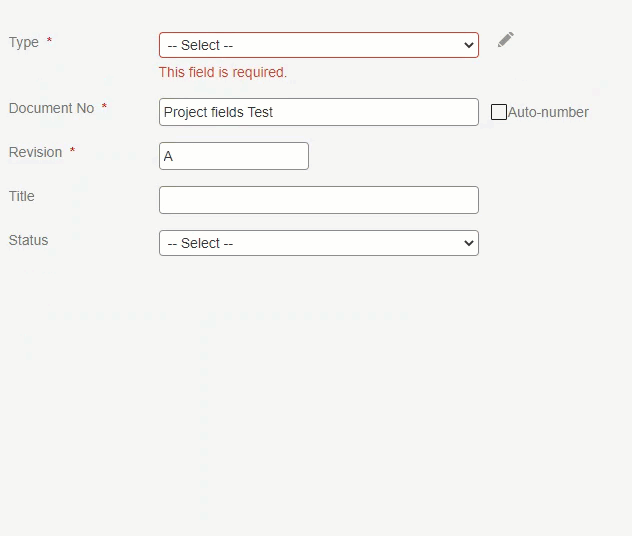
An example upload screen with the above hierarchy applied:

Create Project Field hierarchies

  1. Work out how you want a user’s selection in each project field to impact the options available in other fields.
  2. Create a spreadsheet like the one shown above, with a column for each field. Enter the values that will be available in each field in the rows.
  3. Make sure the spelling and formatting exactly matches the values entered in Aconex.
  4. Save the spreadsheet in .csv format. Click on File > Save As... and in the Format field choose Comma Separated Values (.csv).

Make sure:

  • values you enter into your spreadsheet match the values in use on the project exactly.
  • you repeat the parent values (shown on the left in the image above) for every child value (shown on the right).
  • you create one file for each hierarchy.
  • you do not use the same project field in more than one hierarchy.

Tip!

Need to apply an existing hierarchy to another project? Download the hierarchy and upload it to the other project, This is useful for newly copied projects.

Upload Project Field hierarchies

  1. From the navigation menu click Setup and select Project Settings.
  2. Click Project Fields and select Hierarchies.
  3. If hierarchies have already been created, you'll see them listed here. Each hierarchy has options to Preview, Download, and Delete.
  1. Click, Add Hierarchies and select the .csv file for your project field hierarchy.
  2. Click Upload.
  1. You’ll see a confirmation that your file was uploaded successfully. If you receive an error you’ll need to correct it and try again. 
  2. Repeat steps 4 and 5 to upload multiple hierarchies to your project as required. Note if you are uploading multiple hierarchies, you do not need to remove the existing ones.

Add hierarchies to document types

  1. From the navigation menu click Setup and select Project Settings.
  2. Click Documents and select Document Types.
  1. Select the Document Type you wish to apply a project field hierarchy to.
  2. Available hierarchies appear at the top of the list of project fields. Click the add button to apply the hierarchy to the Document Type.
  3. The hierarchy will be added to the bottom of the list of available fields. Click the button with six dots and drag it where you want it in the list.
  4. Click Save.
  1. Click Preview to see the fields in place without having to navigate to the document upload area.

Refresh Cascades/Hierarchies

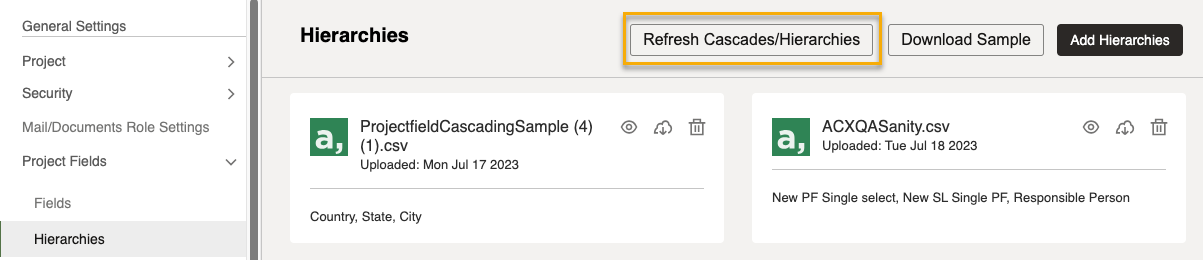
Click Refresh Cascades/Hierarchies to run an optimization process for all cascading and hierarchy templates on your project. This helps your cascades/hierarchies load faster while uploading documents. We recommend using this option if you have large cascade/hierarchy templates that contain over 20,000 rows. All cascade/hierarchy templates uploaded after September 2023 will automatically refresh, but you can click this option to refresh your existing templates.

Add hierarchies to mail forms

  1. From the navigation menu click Setup and select Project Settings.
  2. Click Mail and select Mail Types.
  3. Find the mail type you want to add a hierarchy to, and click Edit Mail Form.
  1. Available hierarchies appear at the top of the list of project fields. Click and drag the move icon to drop a field in place. Fields can be dropped in the exact order you want them to appear.
  2. (Optional) Reorder dropped fields using the move icon.
  3. Click Save.