Create new users for your organization

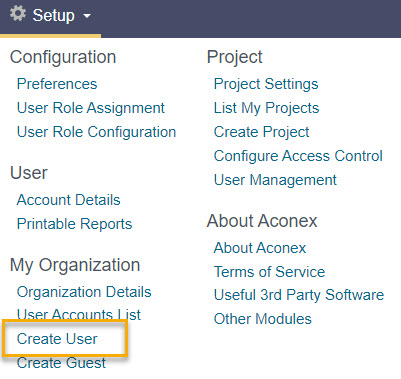
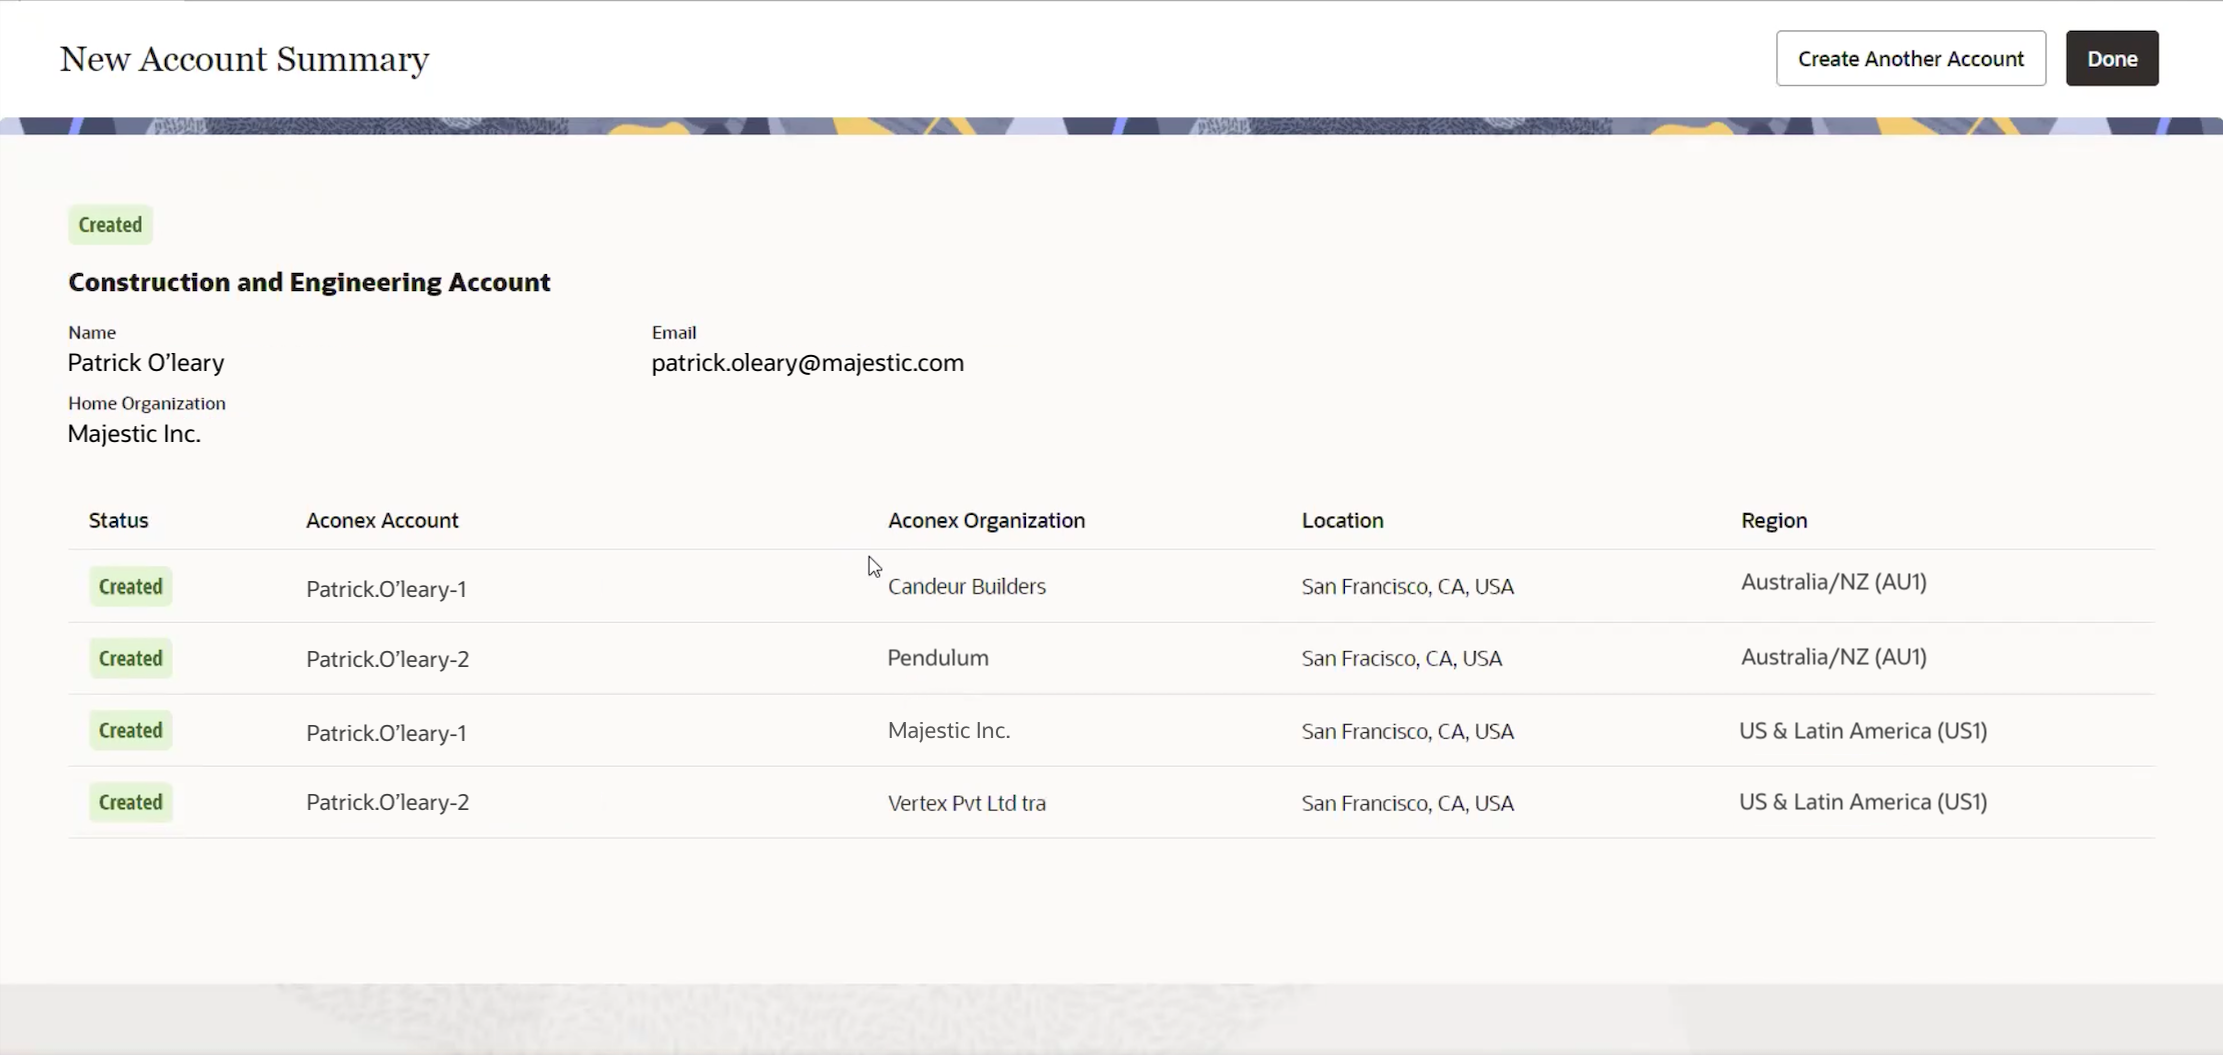
As the Org Admin (and Lobby Admin), you can create new user accounts.

Required permissions
Create a new user
Lobby Admin

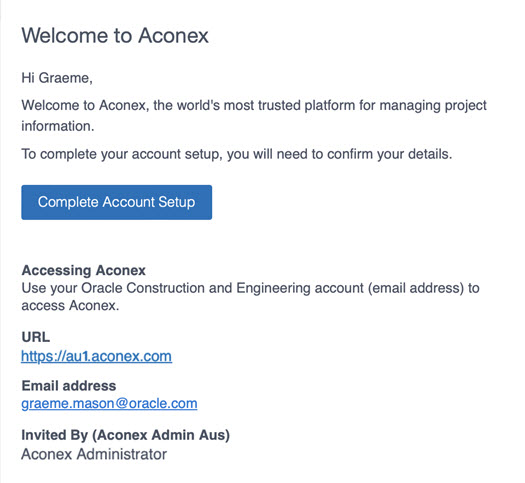
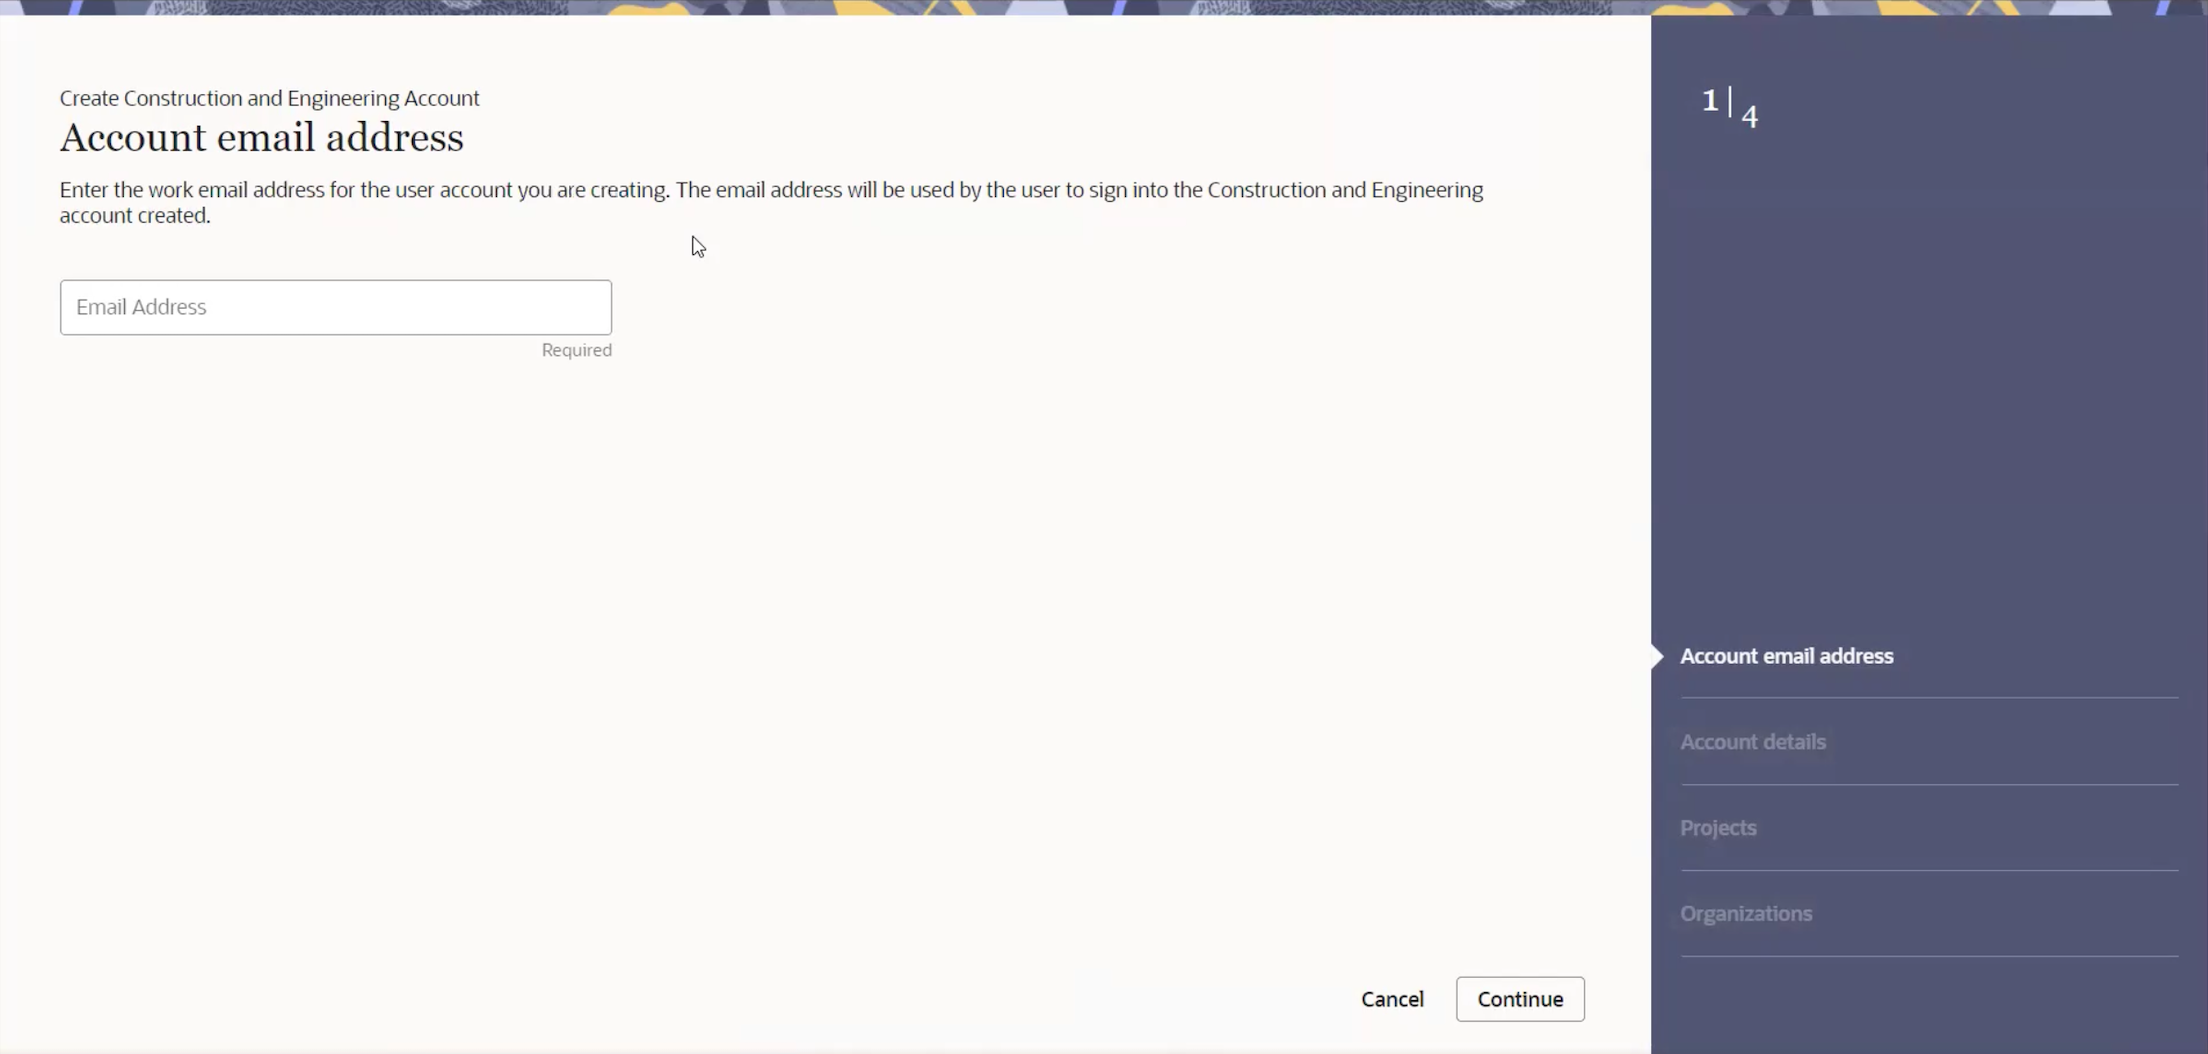
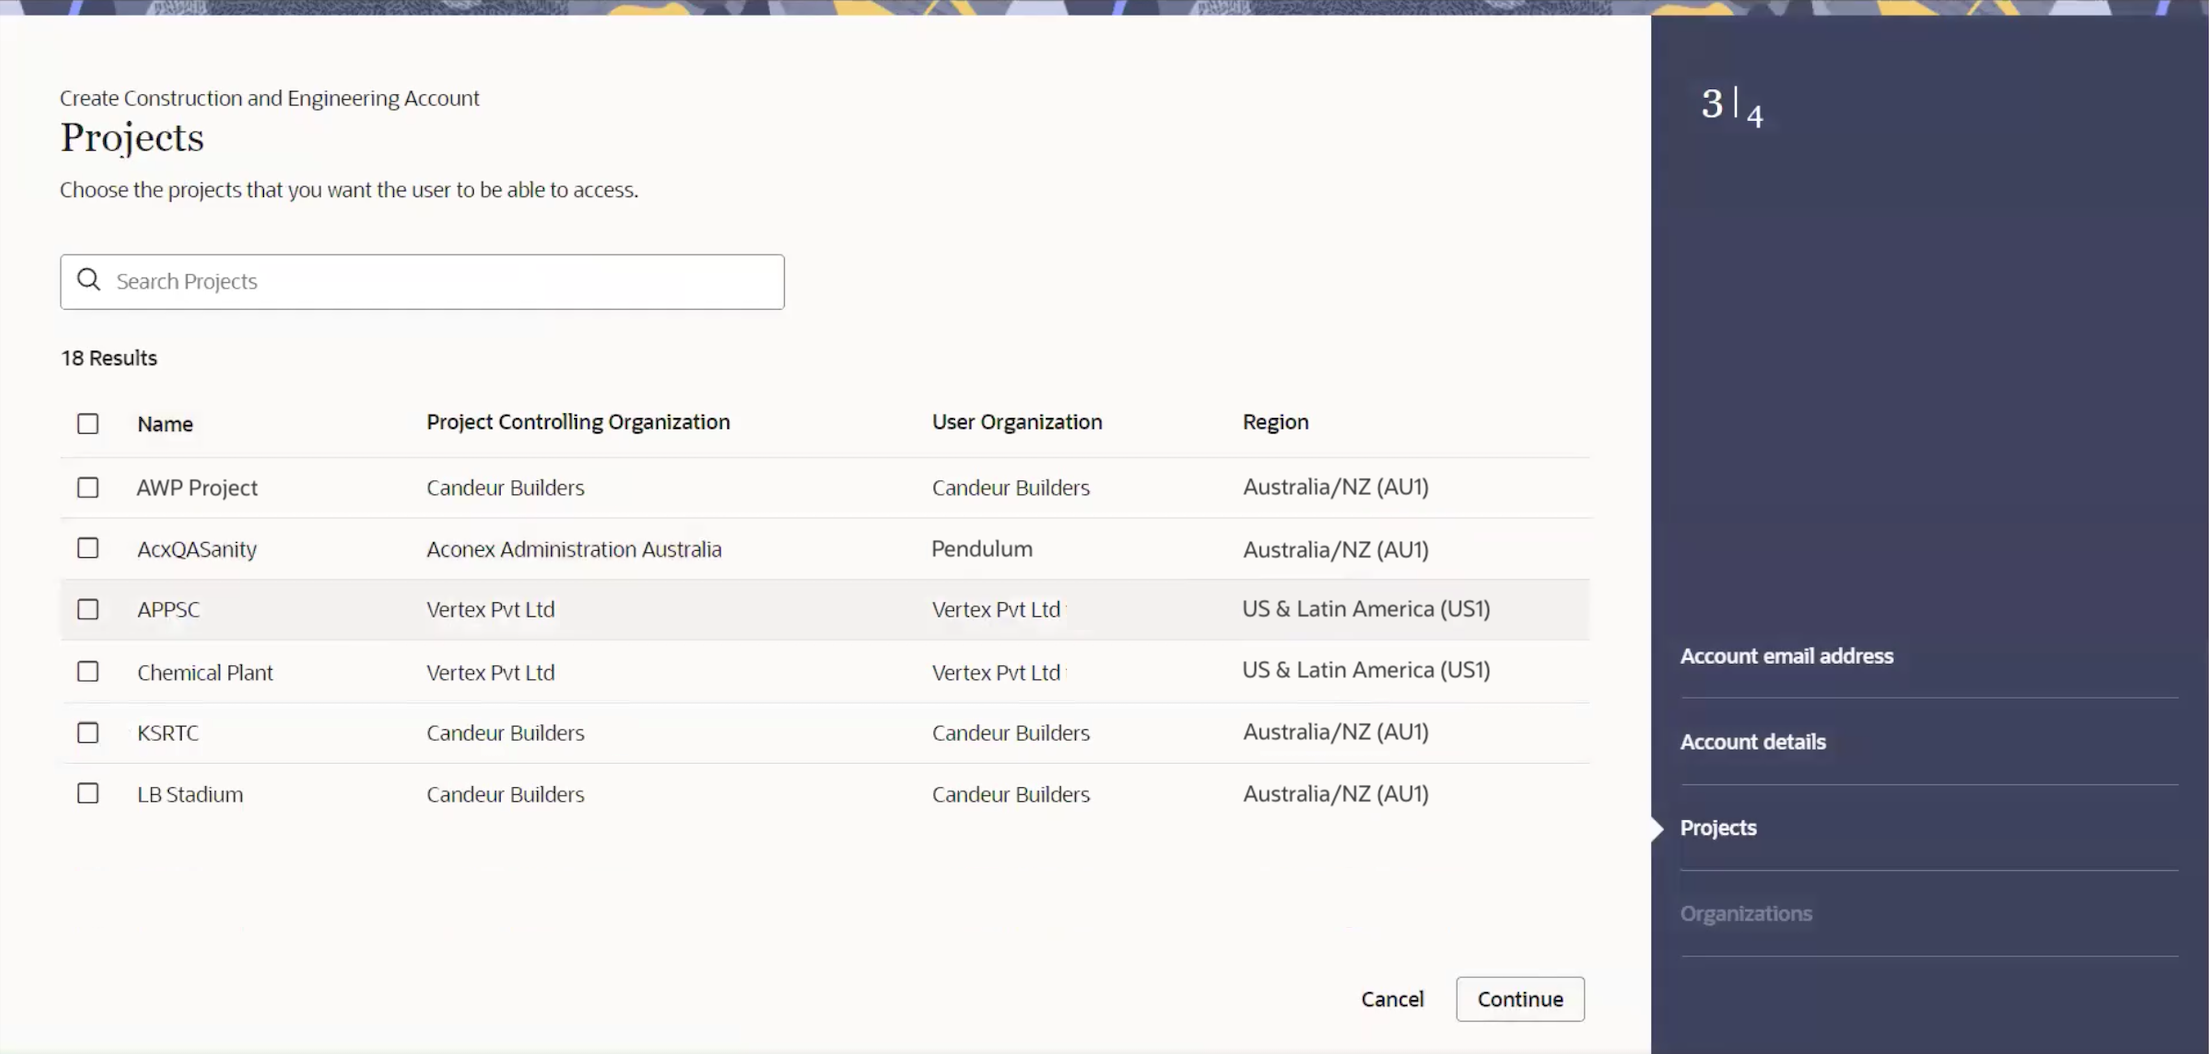
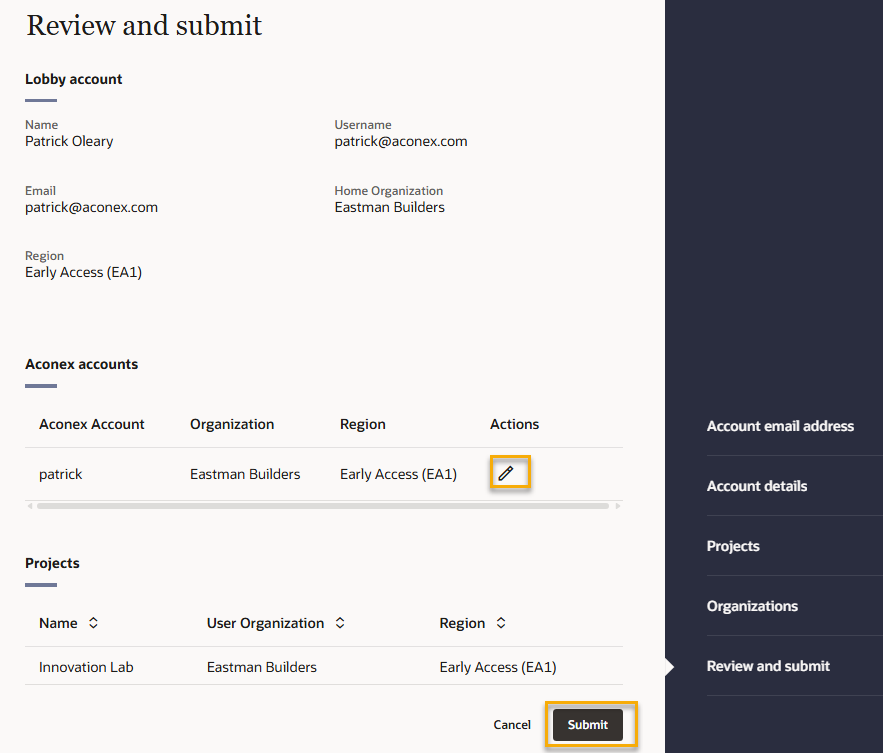
All users access Aconex using a Lobby account. To give a new user access, you'll follow a process to create both a Lobby account and associated Aconex account(s) for the new user.

You can only create users within your own organization. An account can have access to multiple projects, so you should only create one account for each person in your organization.

New users can set their visibility in the global directory when they log in for the first time. To find out more about why they should or shouldn't do this, you can ask them to read changing your visibility in the global directory.

  1. Log in to Aconex.
  2. Click Setup from the top navigation menu.
  3. Under My Organization click Create User.

Tip!

If you see the message 'you do not have permission to create user accounts', it means you are not a Lobby Admin. You'll need to ask your existing Lobby admin to make you a Lobby admin so you can create user accounts. Alternatively, you can unlink and re-link your Aconex account to refresh your Lobby Admin status.

  1. Enter the email address of the new user. They will use this to access Aconex.
  1. If the user already has a Lobby account, click Create Aconex account to create a new Aconex account for them as described in the section below.

Tip!

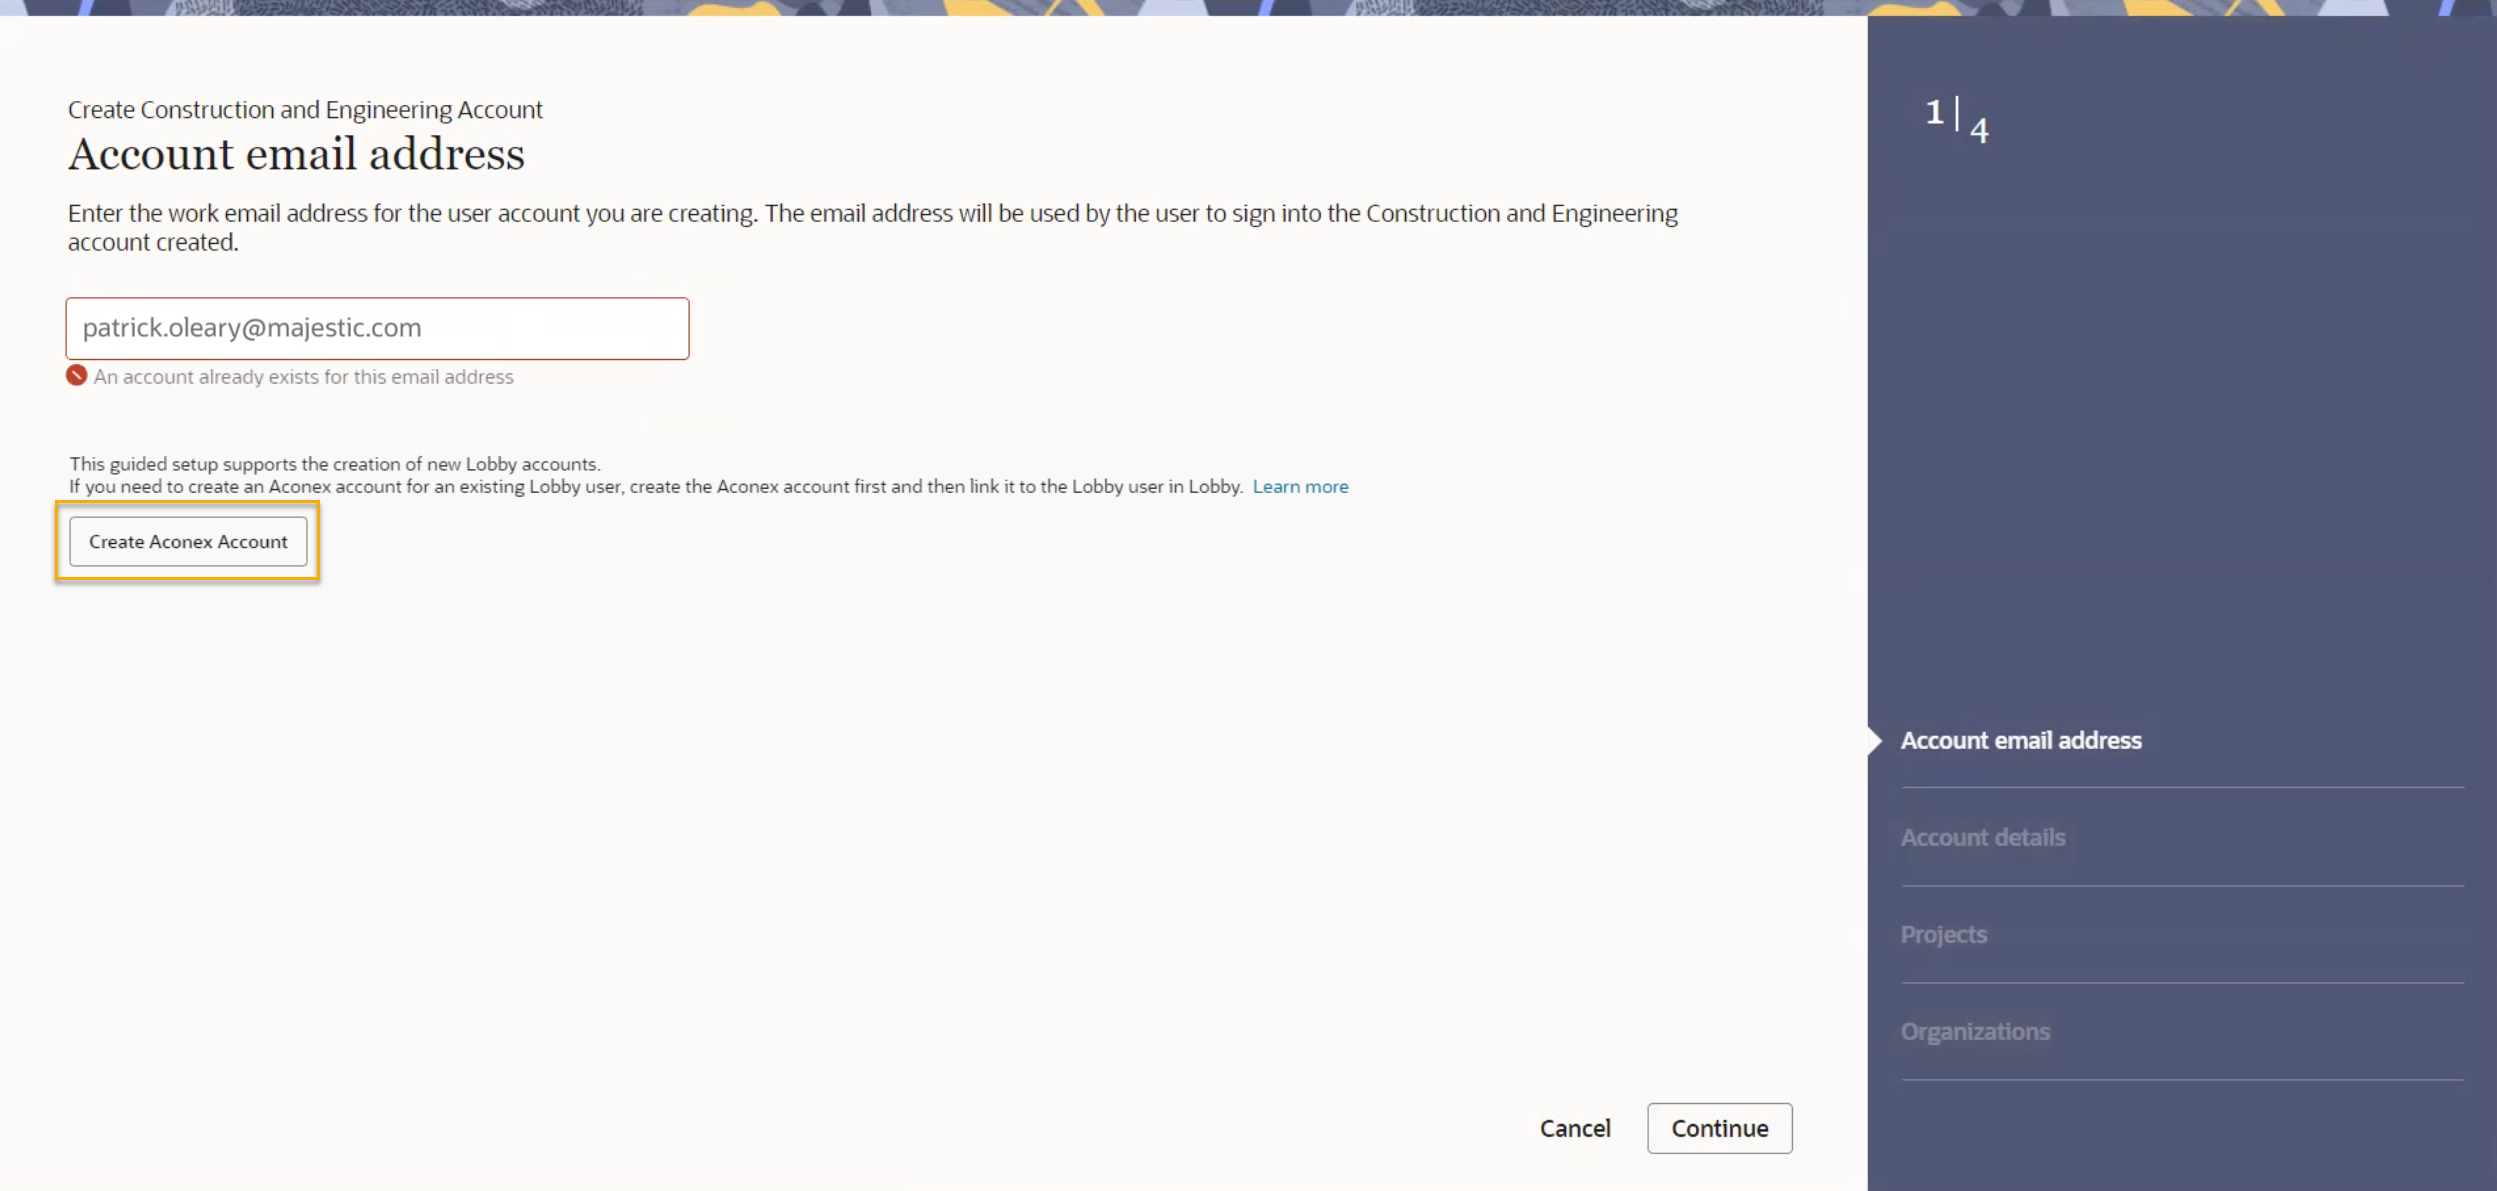
The user can link the new Aconex account to their Lobby account, or you can link it for them using the migration tool.

  1. Complete the required fields:
  • First name.
  • Last name.
  • Email. (optional field) Provide an email address to send email notifications to (including password resets). This is the email address that will be used on the associated Aconex account. This is helpful if you have a shared email address you want the notifications to be sent to. For most users, the email address should be the same as the username.
  • Choose a Home organization. Note: An Aconex account will be created in the selected Home organization.
  • Password requirement.

Tip!

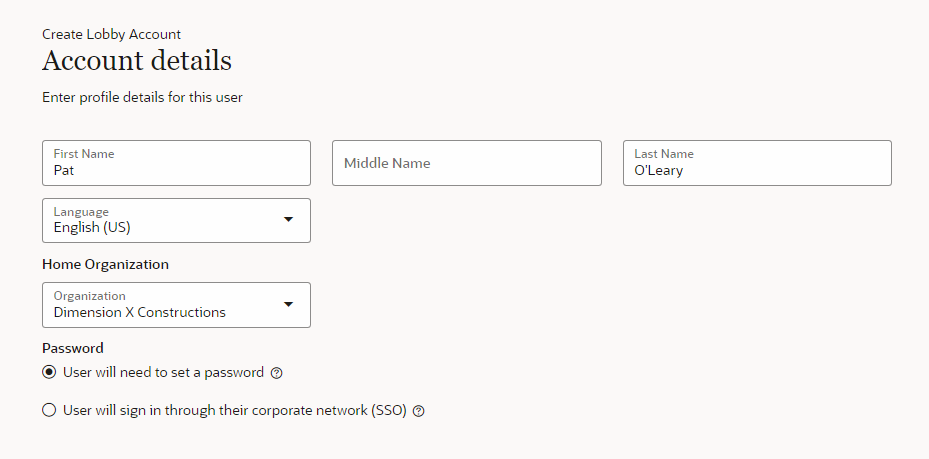
If your organization uses Single Sign-On (SSO), the user does not need to set a password because they will use their SSO password.  What is Single Sign-On?

  1. Select the projects this user will be working on.

    You’ll see all projects your organization is invited to, across all your linked Aconex accounts that have permission to create a user.

    If a project appears multiple times, make sure you select the correct organization the user should have access to. Generally this will be the same as the home organization you chose in the previous screen.

    If a project isn't appearing the list, it means the Project Admin has set the invitation mode to explicit. Once the user account is created you can ask the Project Admin to add them to the project.

Tip!

You don't have to add the user to a project at this time.  You can add them to an organization in the next step.

  1. The organizations this user will be added to are displayed, based on the selected home organization and selected projects.
  2. (Optional) You may want to add this user to an organization without inviting them to a project. This is useful to create an additional Org Admin in an organization that doesn't need to see project data. Click Add Organizations to add the user to an organization without inviting them to a project.  You can click the bin icon to remove the added organization before moving onto the next step.
  3. Click Continue.

Tip!

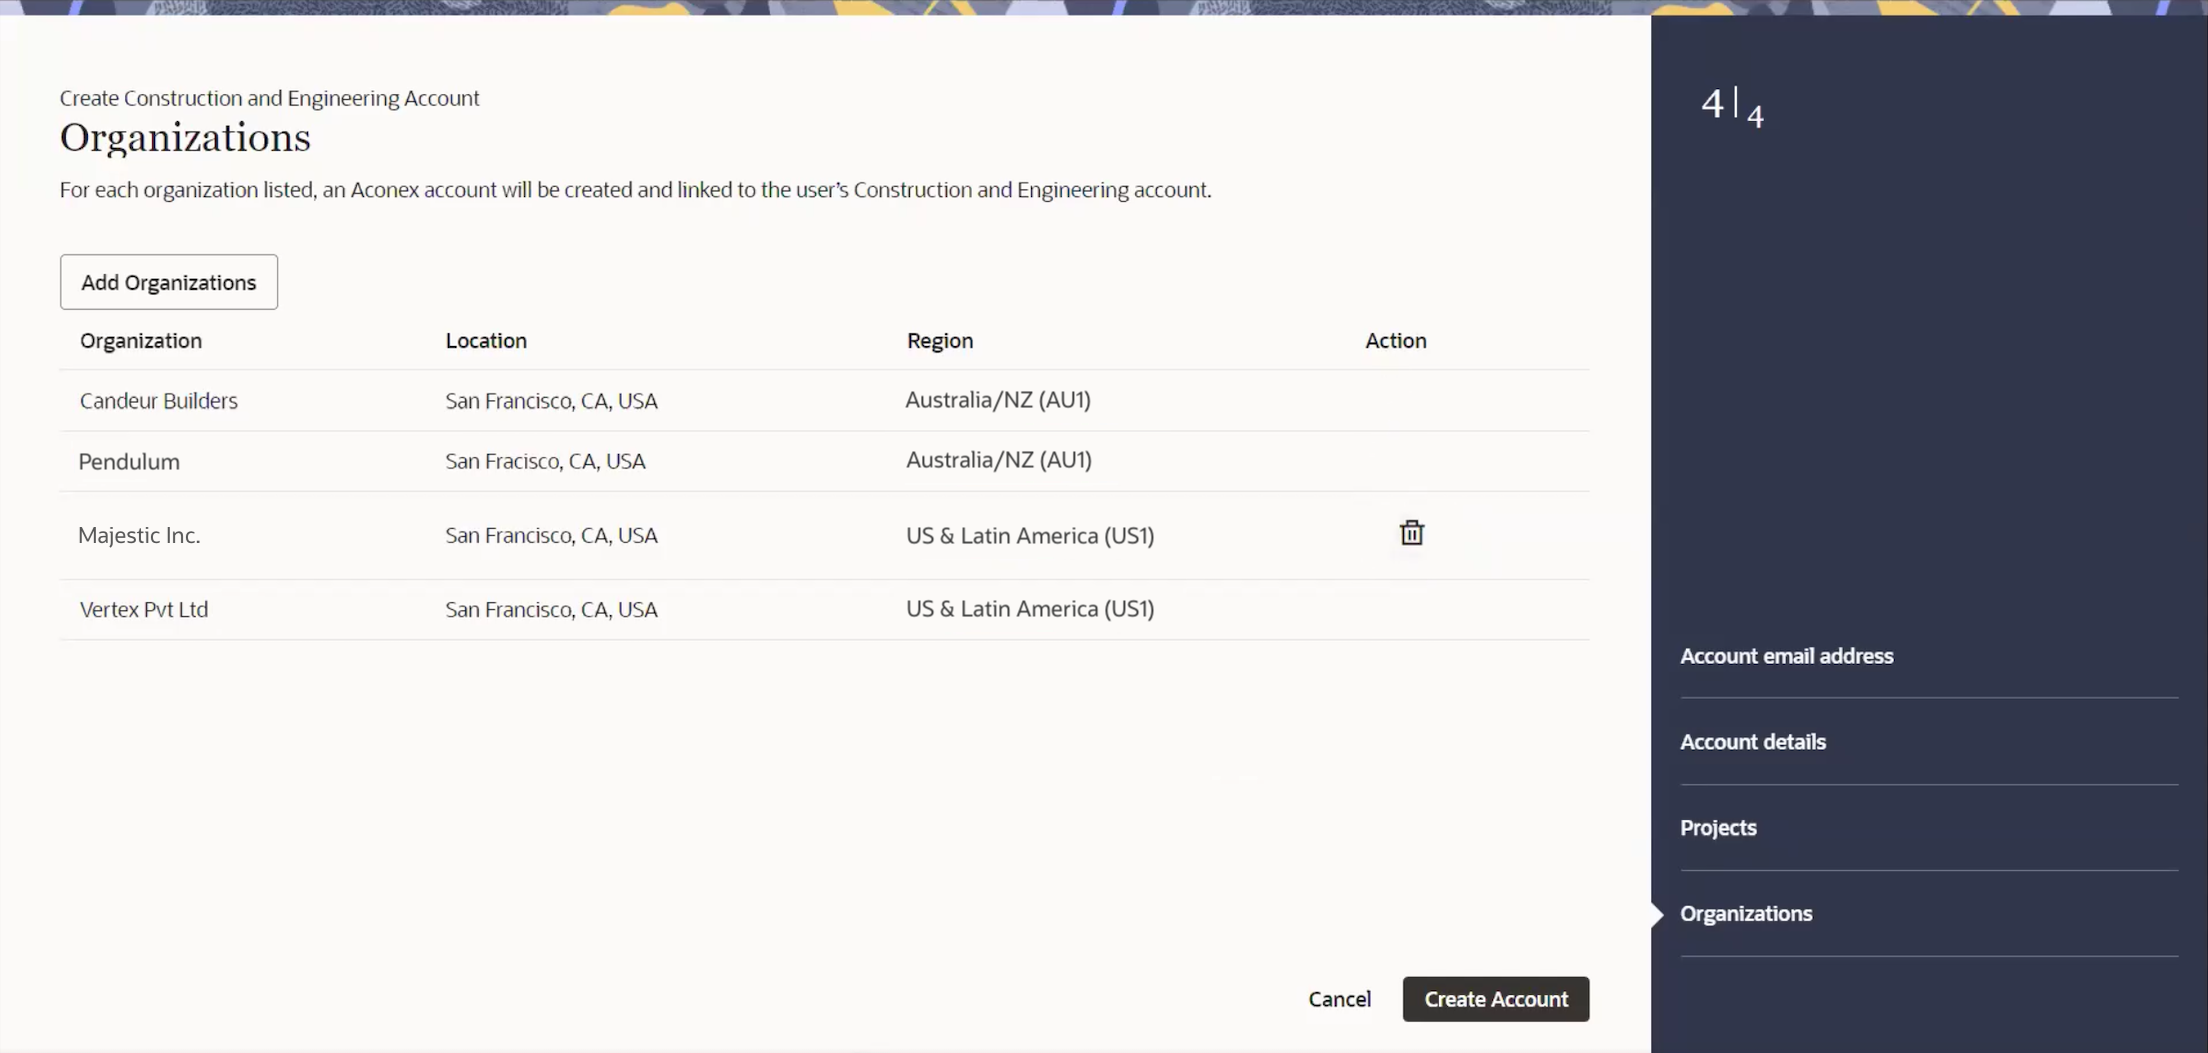
You can’t remove the organization you selected as the user's home organization, or organizations associated to the selected projects.

  1. You'll see a summary screen to help you check the details are accurate before you proceed to create the account(s). The login name for the associated Aconex account is automatically generated, but you can click the pencil icon to change it. This is helpful if you use a naming convention for login names in your organization.
  2. Click Submit. The new user's Lobby account is created. One or more Aconex accounts will be created and linked to the Lobby account.
  1. Click Done to return to Aconex, or click Create Another Account to create a Lobby account for another user.
  1. The user will receive an email with links to access Aconex using the Lobby or the Aconex instance directly.

    If you selected User will need to set a password, on the account details screen, the email will contain a link to set their password.

Tip!

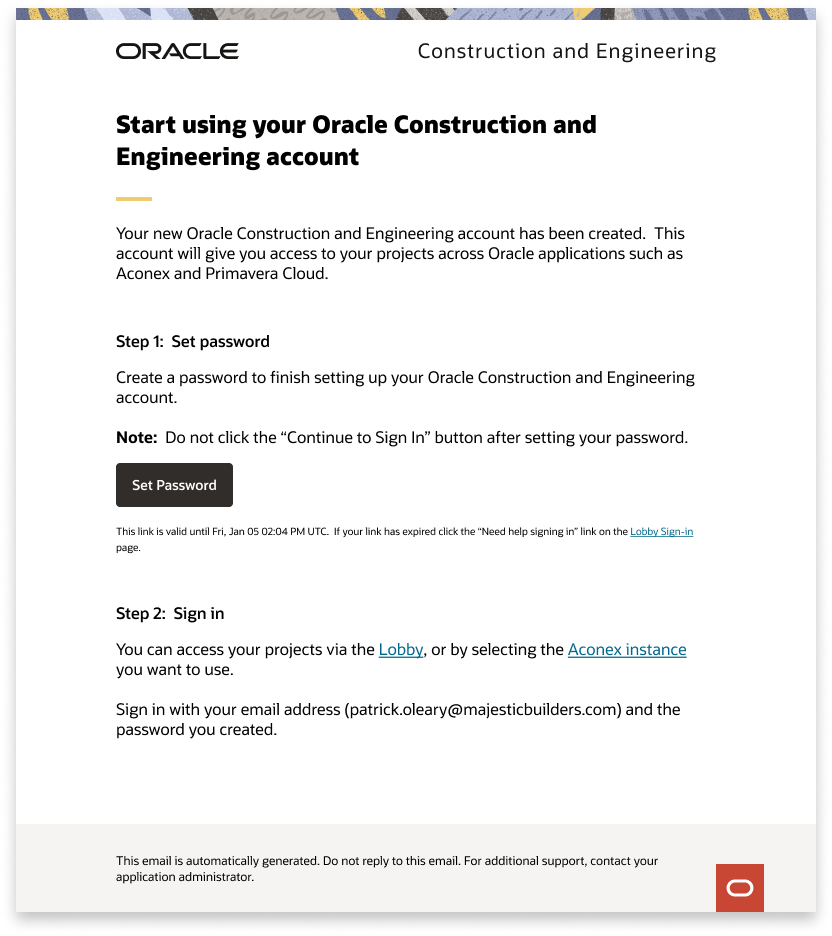
If the email hasn't arrived make sure to check the junk or spam folder. If it still doesn't arrive, contact your IT administrator. They may need to allow emails from the Lobby following these steps.

  1. The new user will also receive an email for each linked Aconex account that was created.