Update Documents

Update documents with new metadata or files.

Required permissions
Update a document

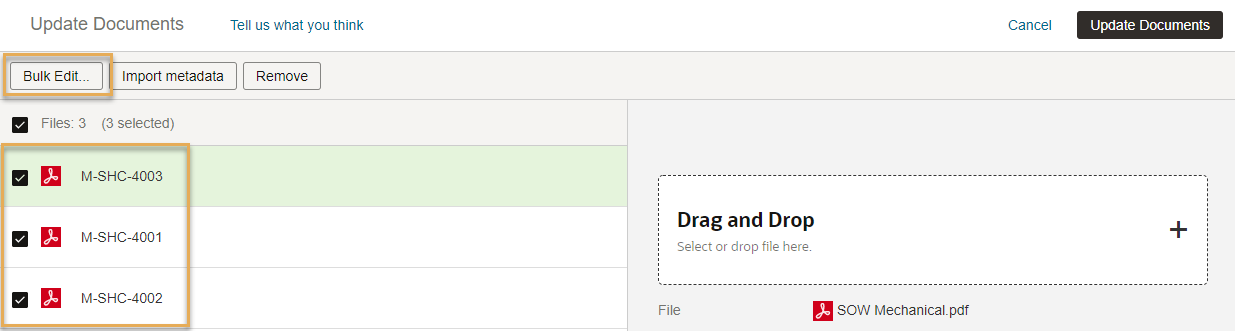
You can update documents one by one, or in bulk. In Aconex, updating a document is sometimes referred to as 'superseding'. 

You can update an existing document to:

  • Upload a new file
  • Update the metadata (such as the discipline or status)
  • Correct a mistake (such as fixing a typo in the title)

Updating a document creates a new version for it. The new version will become the current version of the document. All versions of a document are kept in Aconex automatically. If you need to, you can access previous versions of a document.

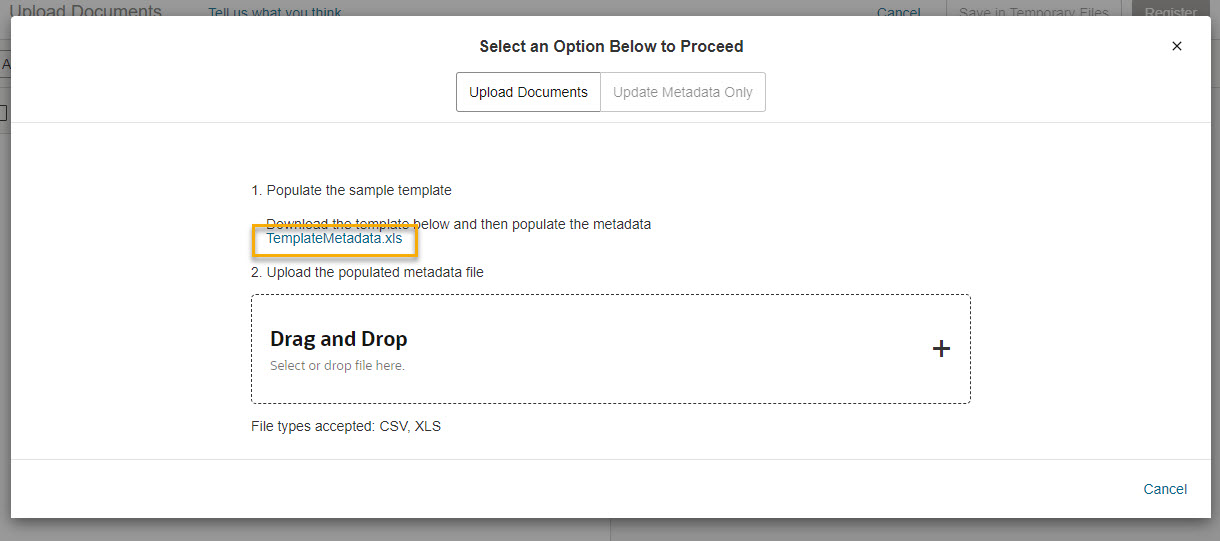
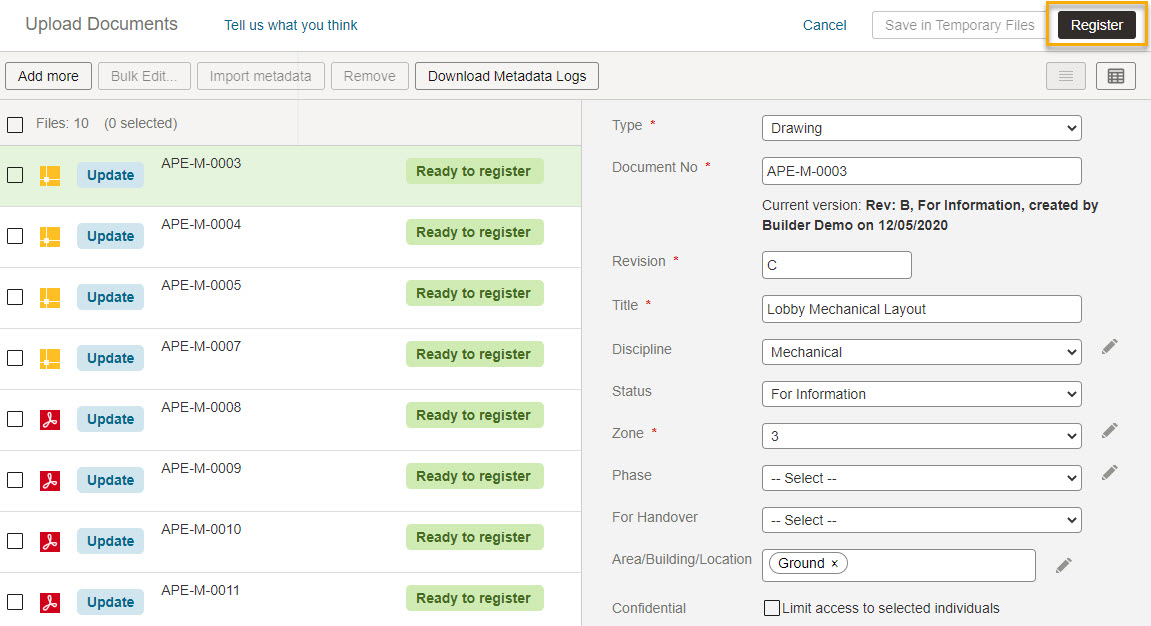
Before you start, it's a good idea to prepare the files with a consistent naming convention. Including the document number and revision in the filename helps Aconex prefill information during the process; saving time.

Tip!

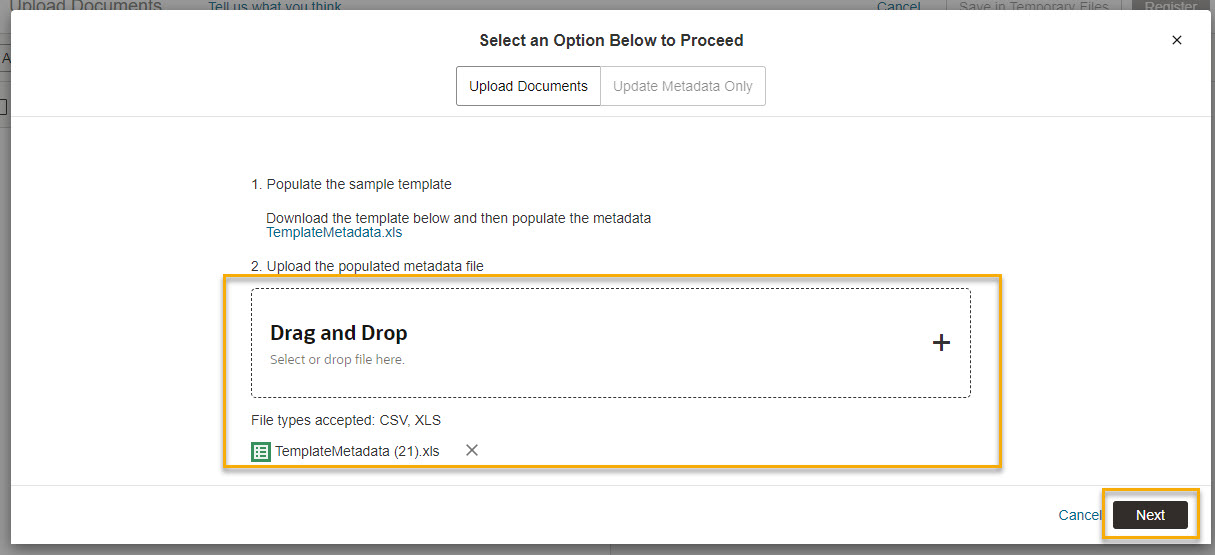
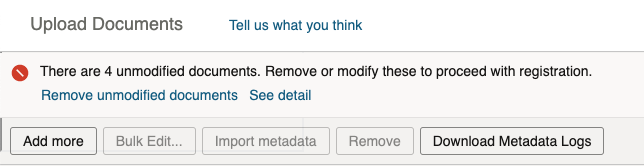
If you need to update files for many documents, follow the steps to Add Documents. If an existing document number is recognized from the file name you'll see an Update label.

Upload a new file

  1. Search the document register and select the document(s) you wish you update.
  2. Click Tools > Update.

Tip!

If you see different menu options, you may be using the classic upload.

Switch to the new upload today.

  1. To update a single document select it and change the values within the right-hand panel such as Title, Status, or Discipline.
  1. To update the file associated with this document, simply Drag and Drop the new file from your computer into the space provided. Alternatively, click anywhere in the outlined space and choose files from your computer. You can also Upload from Dropbox or Box.
     
  2. To update multiple documents select them and click Bulk Edit. For example, you may want to set the Discipline as Electrical for all except one of the files you just uploaded. 
  1. Once you have updated the values for the selected documents, scroll to the bottom and click Apply.

Import Metadata

  1. If you are working with hundreds of documents you may prefer to populate your metadata from an Excel spreadsheet. Click Import metadata. Otherwise, you can skip to finalizing your documents.
  2. Download the template containing the document fields that need to be populated. Each project will have a unique template. Templates will change if document fields are changed on your project, so it's always best to start with a fresh template.
  3. Open your metadata template file in your spreadsheet application such as Excel.
  4. Complete all the mandatory fields. They're shown in bold in your file.
  5. You'll notice the File field is automatically populated for you. Make sure you enter the correct document numbers and other metadata against the correct files.
  6. Complete as many of the other fields in the template as you need to.
  7. Upload the populated metadata file by dragging and dropping the file, or click anywhere in the outlined space and choose files from your computer. 
  8. Click Import.
  9. Click Download Metadata Logs after importing a metadata file. Check the result column for any errors with the imported file. If there are no errors you'll see an OK result.

Tip!

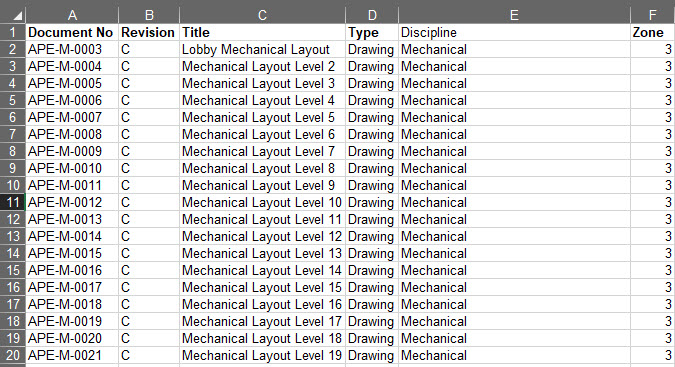
Once you are familiar with the process, you may choose to bulk upload all your documents in a single worksheet.

Finalise your documents

  1. Once you have completed all your updates click Update Documents.
  2. You'll see a prompt that your documents have been updated in your organization's Document Register
  3. Click Transmit the document(s) so other organizations can access them.

Update metadata only

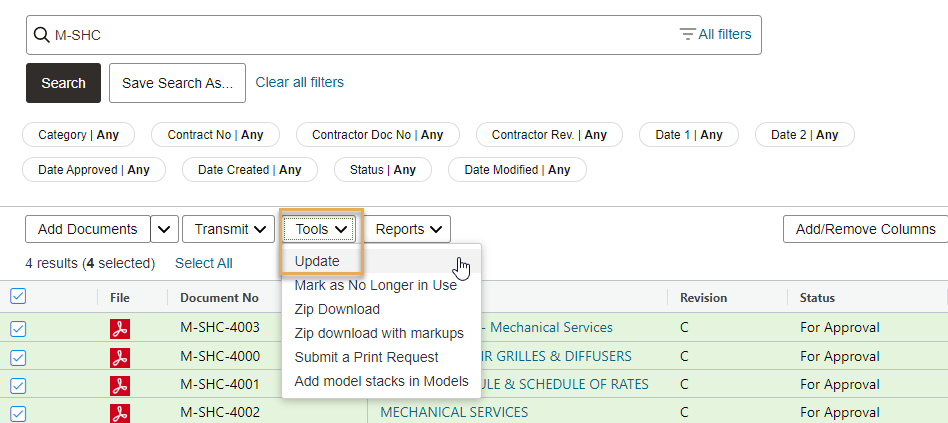
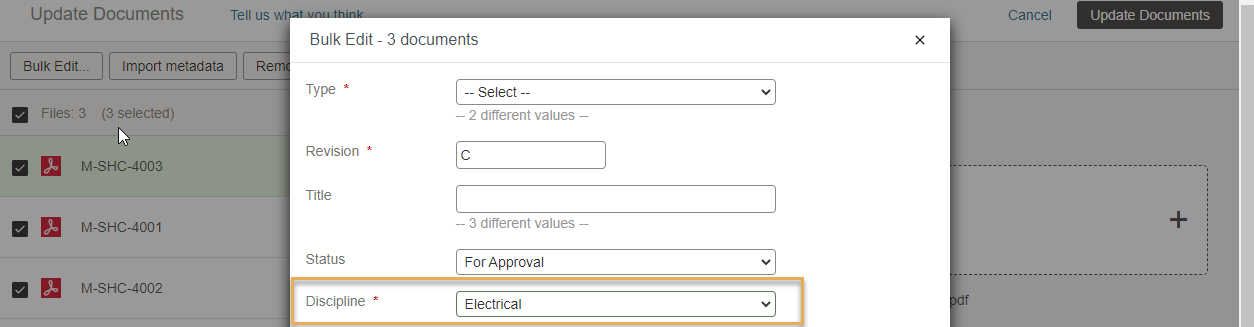
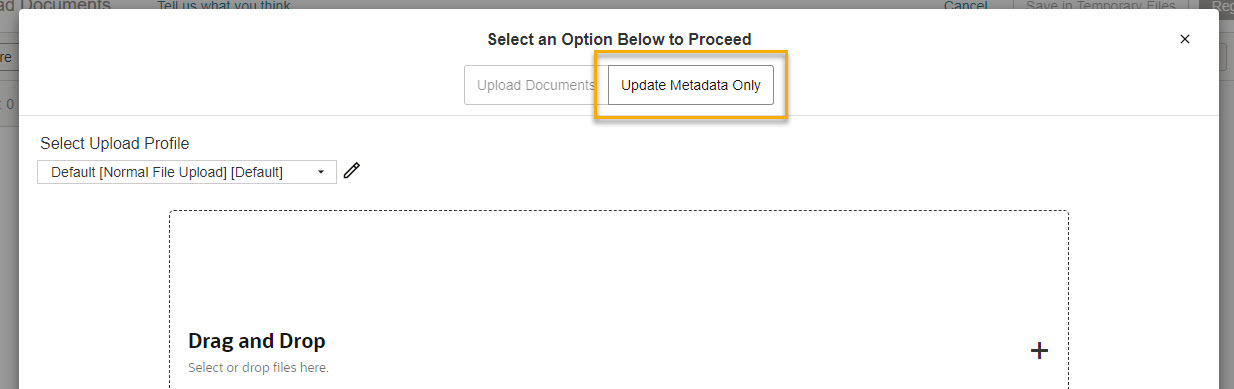
Use this process to update document metadata in bulk, without changing the files.

Before updating make sure you refresh your Document Register to see the latest documents. To do this click Documents > Document Register. Then click Clear all filters, and Search. Then come back to this process.

  1. From the top navigation click Documents > Add/Update Documents.
  2. Choose Update Metadata Only.
  1. Click to download the metadata template.
  2. Open the template in Excel and populate the fields as required. Note: fields in bold are mandatory and must be filled.
  1. Select or drag and drop your completed metadata template in the area shown.
  2. Click Next.
  1. You'll see a preview of the documents you are updating. Review and make any changes as required.

    Note: If your template contains documents that don't have any changes, Aconex will ask you to remove them from the list. Click 'See detail' to see these documents. Alternatively, update your spreadsheet with the required changes for these documents and try again.
  1. Click Register to update the documents.

Tip!

You'll see a prompt that your documents have been updated in your organization's Document Register. Next, you can transmit them so other organizations can access them too.

What's next?