Create your Smart Manual

Use the Rapid Wizard application to create your project's smart manual.

You’ll use Rapid Wizard to select your handover documents, import and map asset data, configure hotspots, and download the completed smart manual to your computer.

We recommend creating your smart manual when the documentation required for handover has been defined and uploaded to your project. If you are only just starting a project, you may not have any documents to sync to the manual.

Before you begin

Download the smart manual applications

Download the following applications to your Windows computer and place them in a folder on your C: drive.
  • Rapid Wizard: This is the tool you'll use to create the smart manual.
  • Smart Manuals: This is the application you run to open the manual in read-only mode. 
  • Smart Manuals Dynamic: This is the application you run to open the manual and allow documents and assets to be synced from Aconex.

Log in to the application

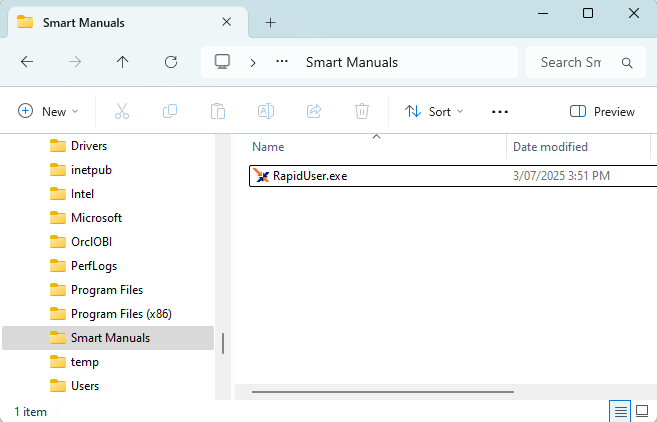
  1. Double-click the RapidUser.exe file to start the process. Note: The file must be in a folder on your C: drive, otherwise it will not open.
  2. You'll see a few folders and files being created in that folder. 

3. Click Oracle Construction and Engineering.
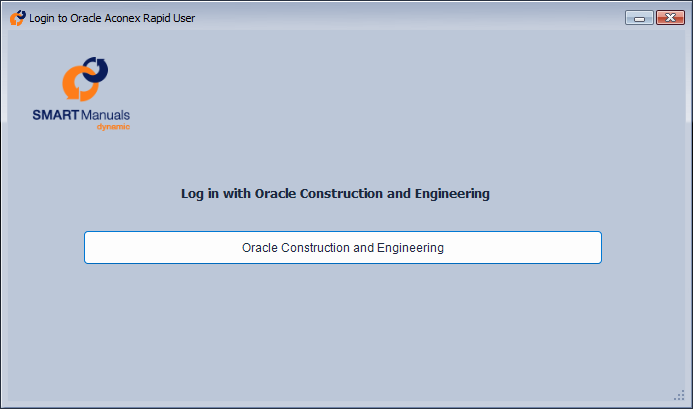
  1. Your web browser will open the login screen. Enter your email address and password (the same details you access Aconex with).
  2. If you are prompted, select the appropriate linked Aconex account that has access to the project you want to build your smart manual for.
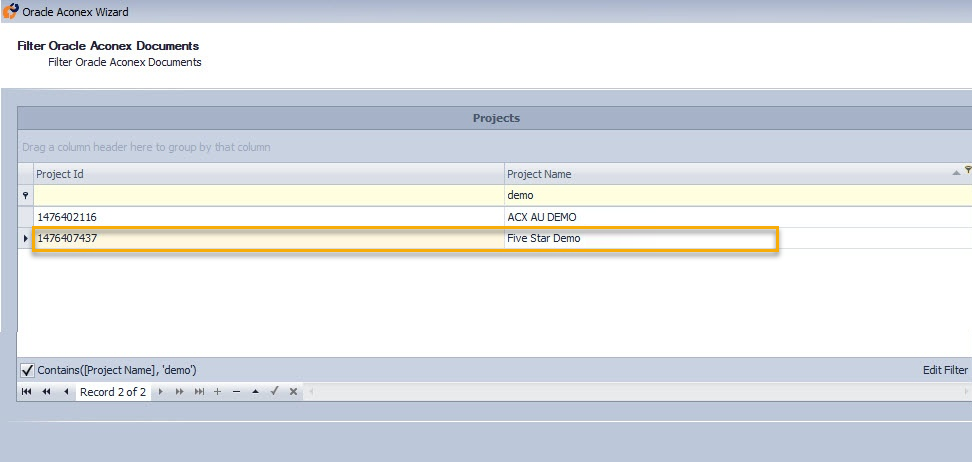
  3. Select the appropriate project. You can search the project list from the yellow bar at the top of the list.

You'll see a message that says "Thank you for verifying your security information". Close the browser tab and switch back to the Rapid Wizard application to continue the process.
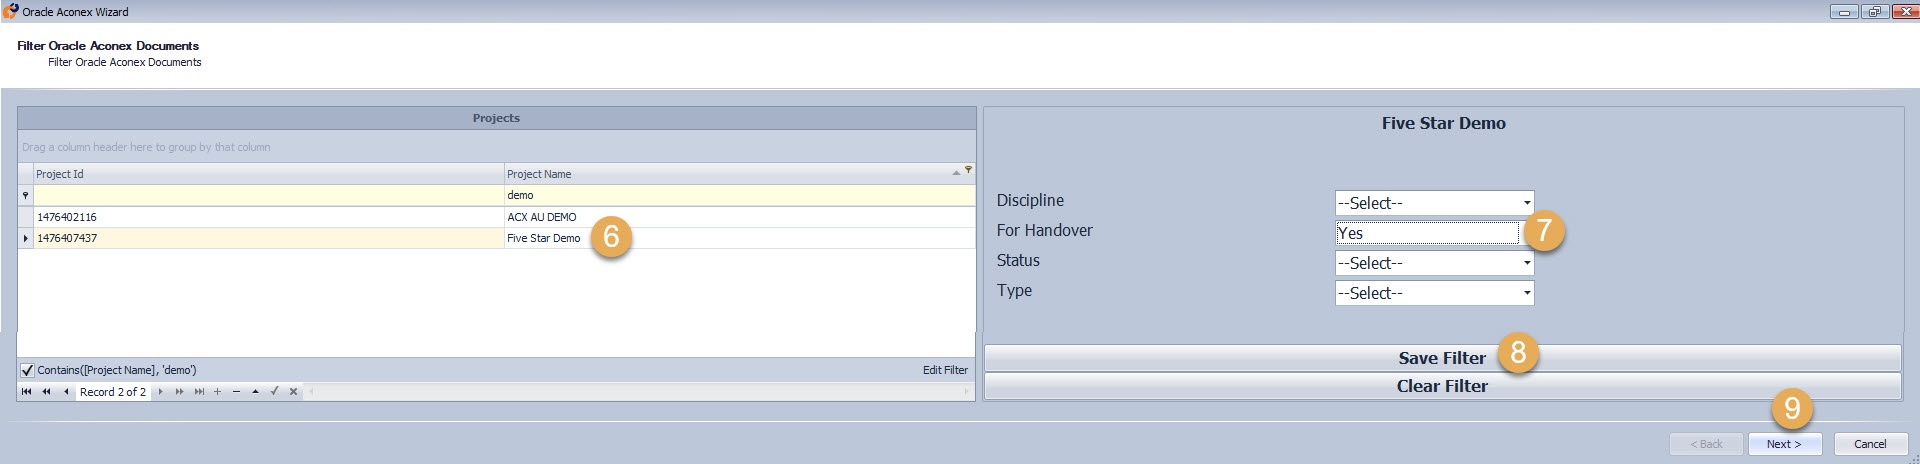
  1. Filter the documents that you want to appear in your manual. For example you may have a field to filter for all documents required for Handover.
  2. Click Save Filter.
  3. Click Next.

Map the discipline field

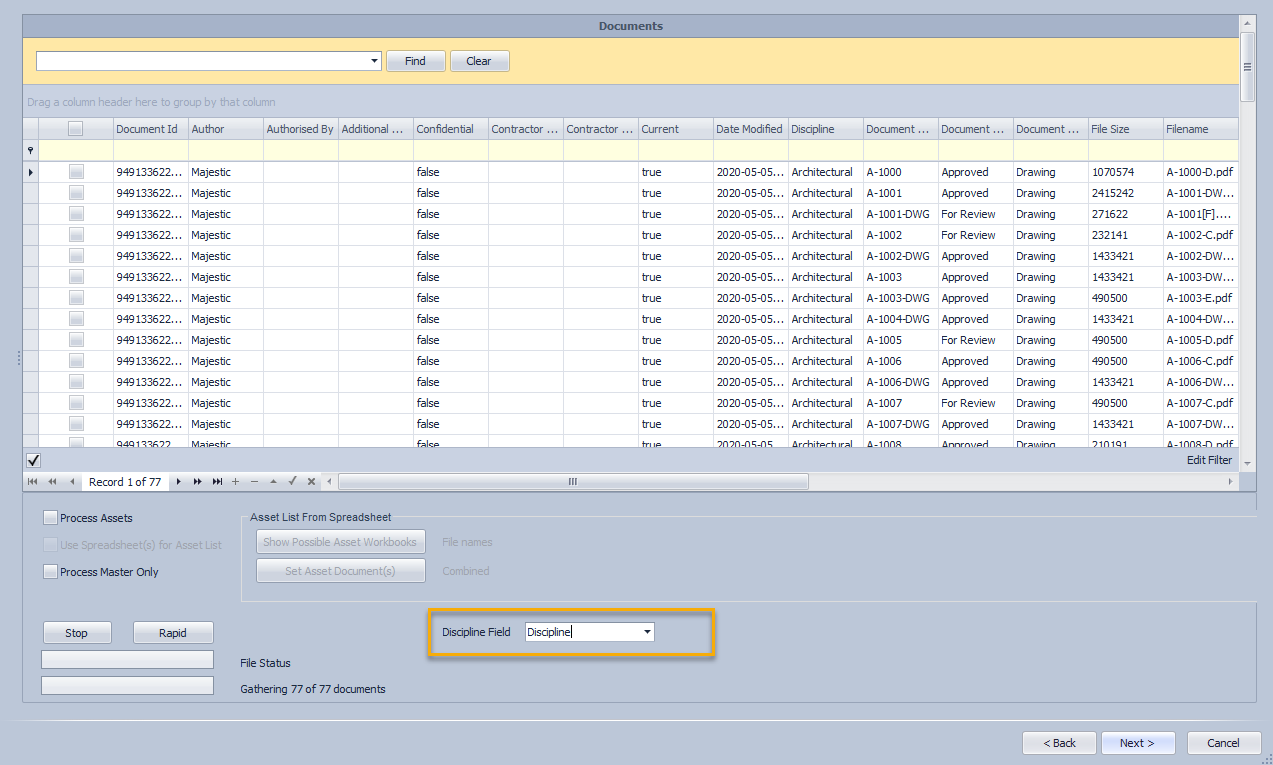
  1. You'll see a list of documents that will be included in the manual.
  2. Choose the correct Discipline field name from the dropdown list. This ensures the disciplines for documents and hotspots are correctly mapped in the application.

Select your asset lists

Choose your asset lists from your project's document register. Note you can skip this section if you don't have any assets. If you need to create an asset list see Create an Asset Reference template for Handover and Complete the Asset Reference template for Handover.

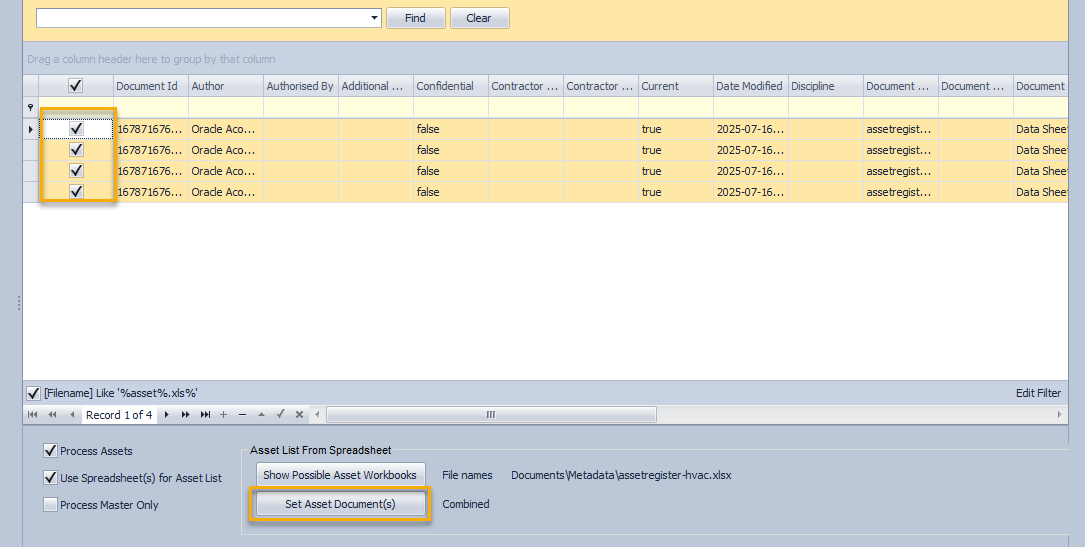
12. Choose your asset list(s) by checking both the Process Assets checkbox and the Use Spreadsheet(s) for Asset List checkbox.
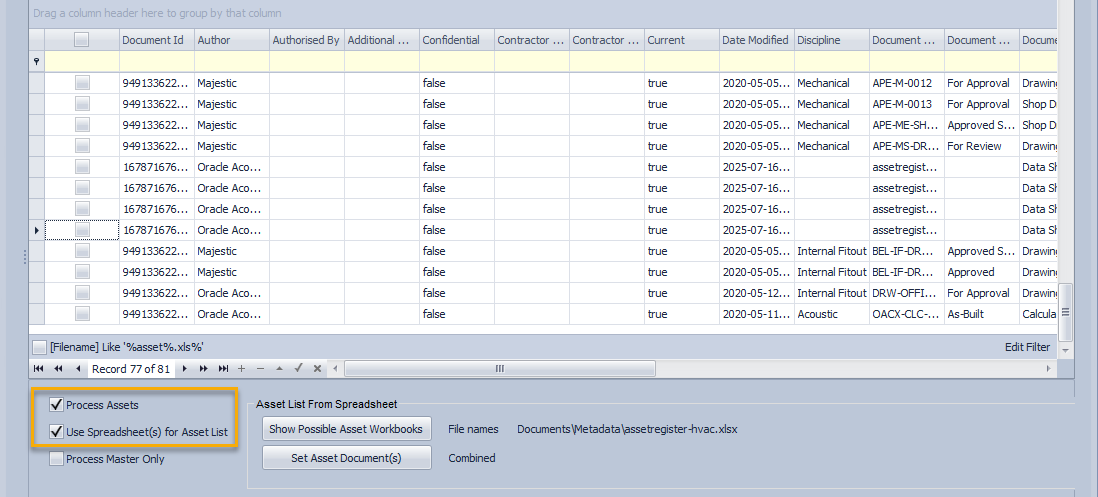
  1. Find your asset list(s). You can either search for them in the list, or click Show Possible Asset Workbooks to automatically search for Excel documents that contain the word 'asset'.
  2. Select your asset list(s) and click Set Asset Document(s). Click Yes to confirm. 
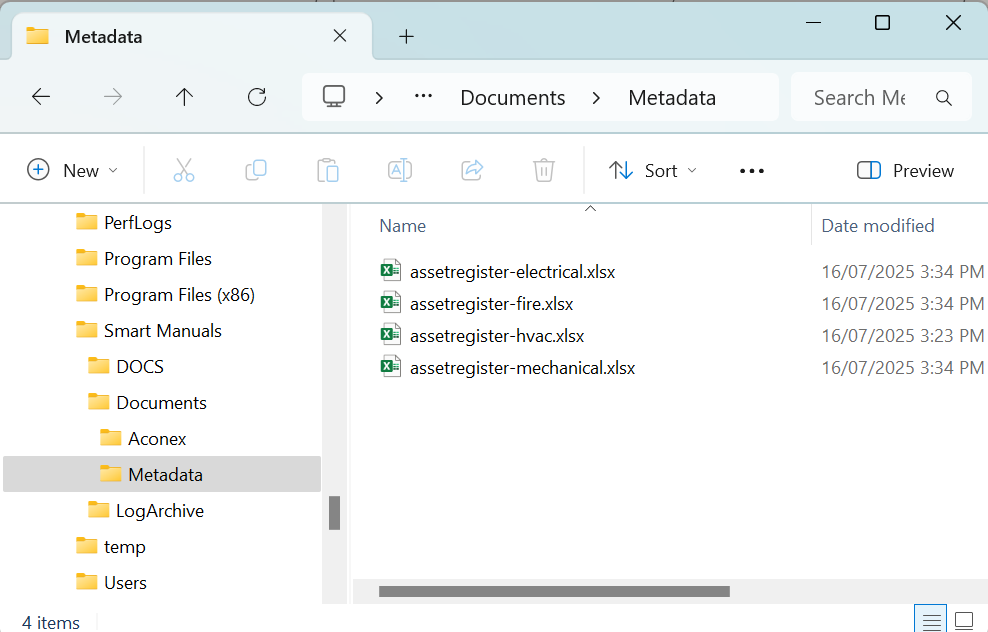
  1. The asset lists will be downloaded to your computer under the documents/metadata folder.

16. Open each asset list file and make sure they are correctly formatted to work with the smart manual as follows: 
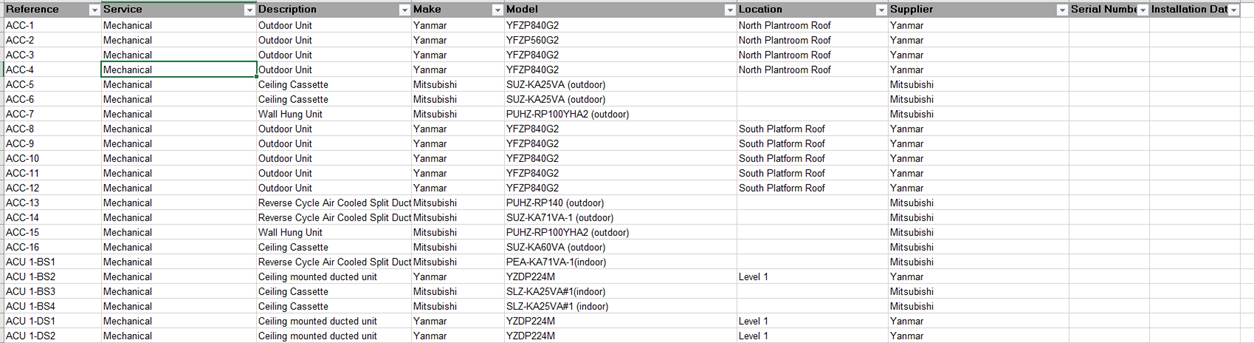
  • The top row must be the headings of the columns. Remove any logos or addresses or project information from the top row.
  • Remove all blank rows.
  • Column A must contain the Asset References.
  • Column B must contain the Service. Note: If there is a column header named ‘Discipline’, rename this to ‘Service’ and make sure it is column B.
  • Review the values in the Service column. Check and update to ensure all the values in the column are available as a discipline in Aconex.
  • Remove all other sheets from the workbook, leaving the asset list in Sheet 1.
  • You can make changes to the data in the files if required.
  1. Return to the Rapid Wizard application and click Next.
  2. All asset lists will be joined together into a single master asset list which will be created in the documents/metadata folder. You can make any final changes here. Click Next.

Review assets for hotspot creation

A hotspot allows a user to click on an asset in the smart manual to display related documents such as specifications and photos. For the hotspots to be created you must map the asset reference fields. 

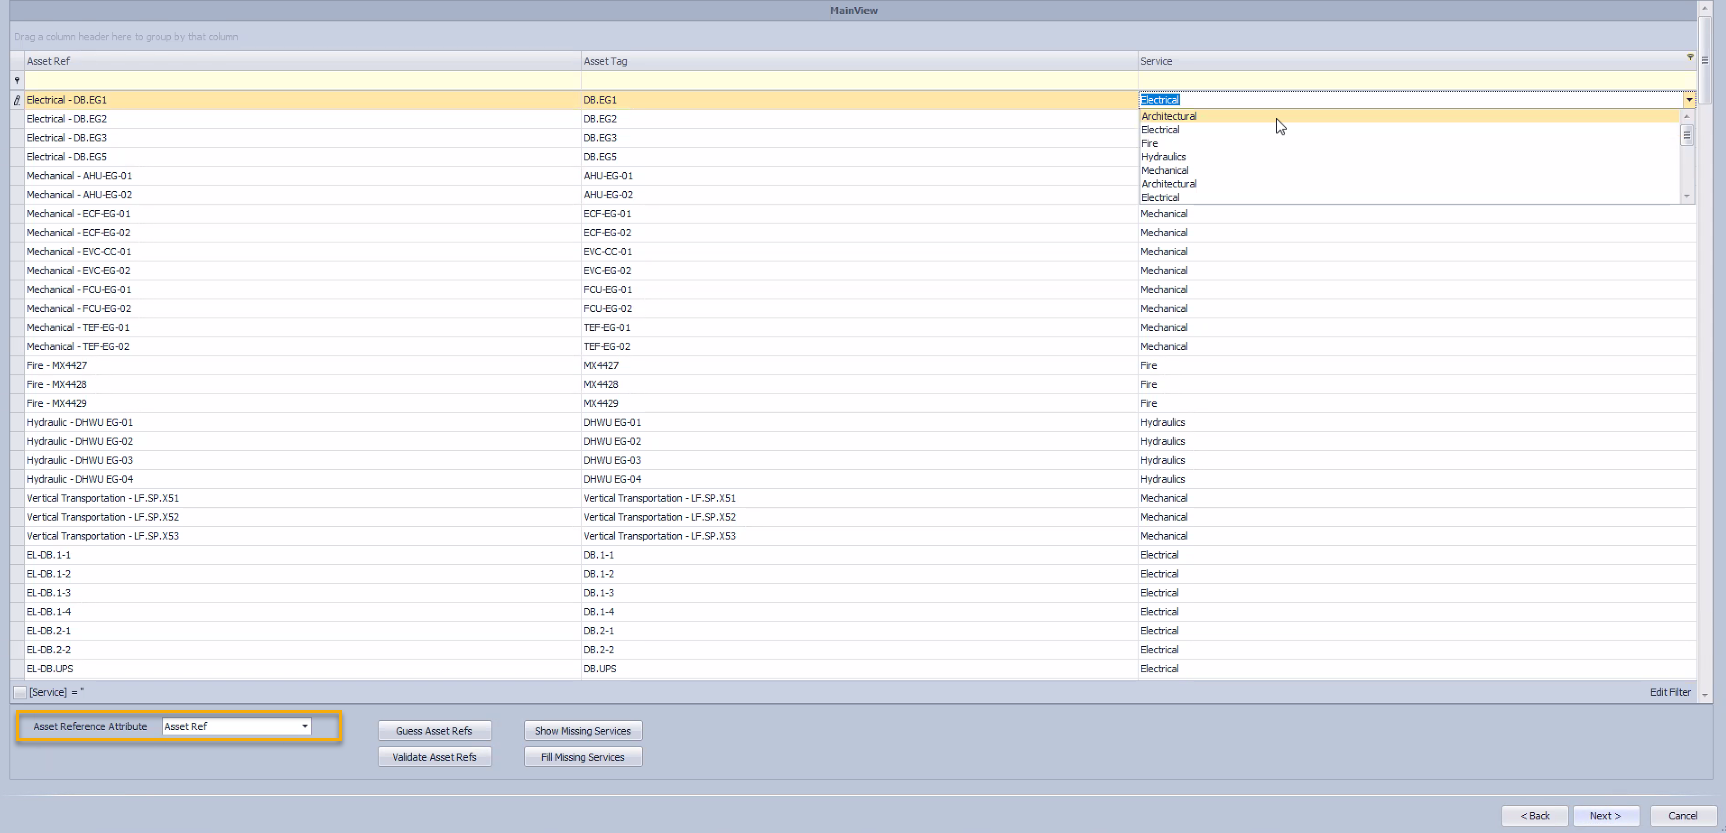
The application will compare values in your Aconex project and your master asset list to build the list of assets. You'll see three columns:

  • The Asset Ref column contains the asset reference values stored in Aconex. For example, EL-DB.1.01.
  • The Asset Tag is the text your smart manual searches for in drawings to create hotspots. Each asset will also appear in the manual’s Assets menu.  For example, DB.1.01.
  • The Service column is the discipline associated with the asset. Every asset must have the correct discipline selected, otherwise the hotspot will not be created. For example, Electrical.

You'll see the following buttons on this screen:

  • Guess Asset Refs: If your Asset Ref values include a discipline code (for example EL - DB.1.01 where EL stands for Electrical, you can click this option to automatically populate the asset tag column with the discipline code removed. It will also automatically map the service column.
  • Validate Asset Refs: Click this to check the services listed exist as a discipline in Aconex. Note: This does not check if the correct service has been selected for the asset. 
  • Show Missing Services: Click this to check if an asset does not have a service selected for it.
  • Fill Missing Services: Click this to randomly choose a service for assets that do not have a service selected for it. Make sure you review the results.


19. Every asset must have a valid service. You can make changes to the service for each asset as required. Click Show Missing Services to see which assets you need to provide a service.

20. Once all assets have a service, click Next.
Map asset database fields

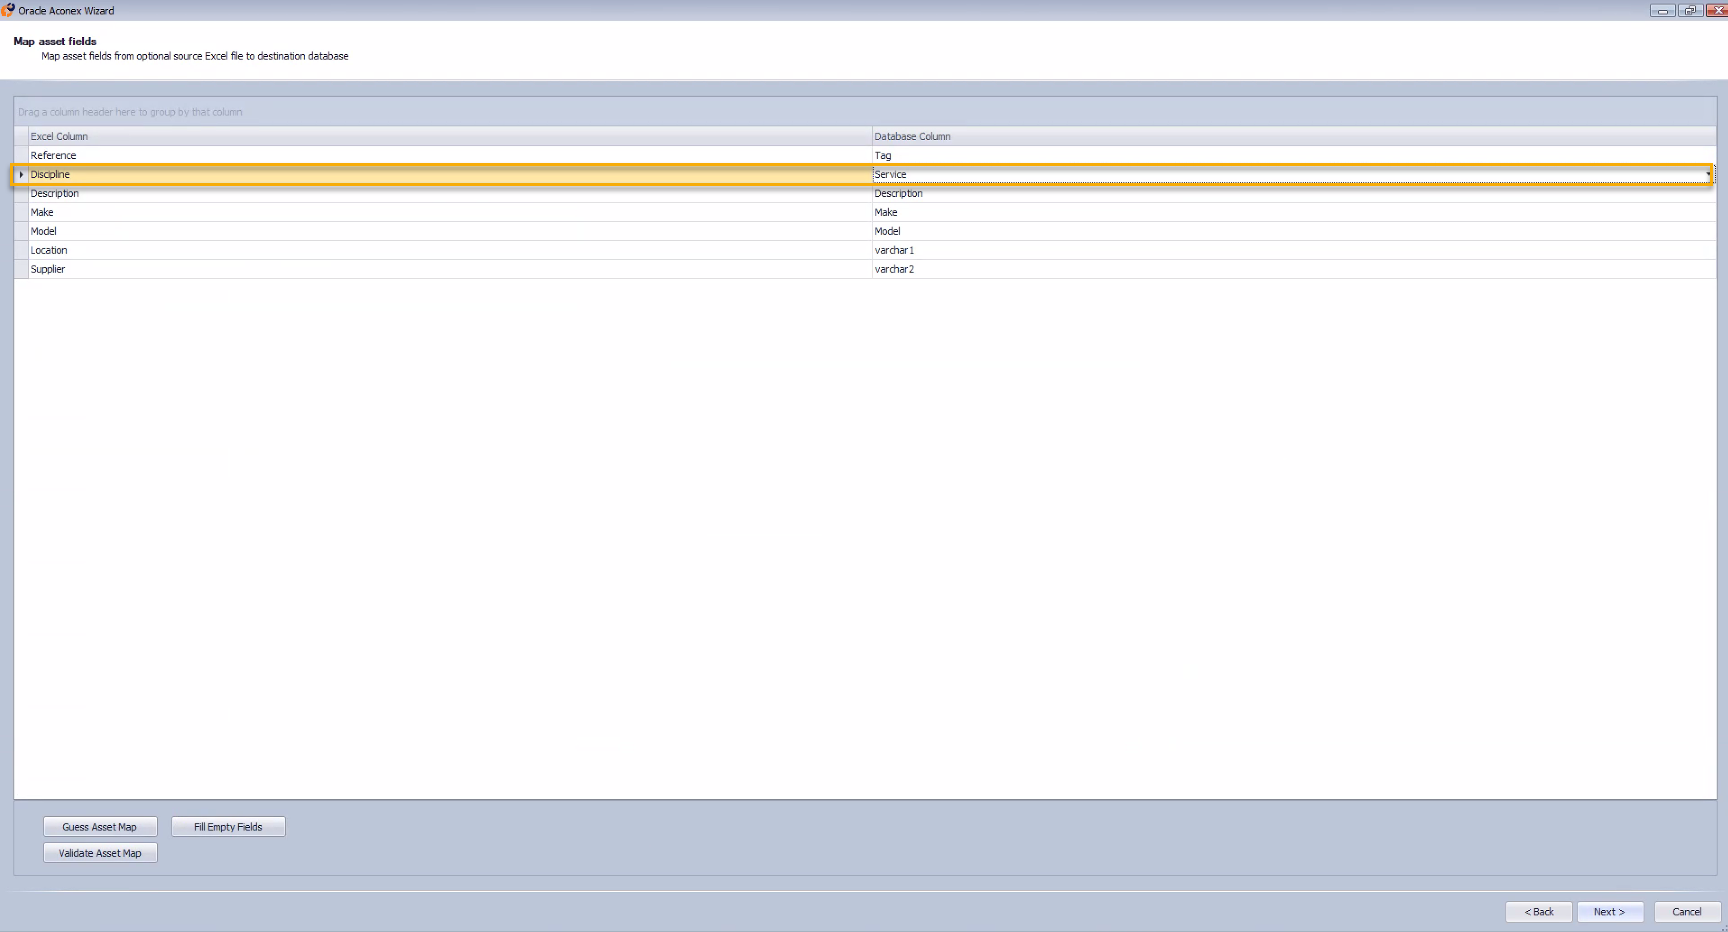
Here you'll check each field in the master asset list is mapped to a column in the smart manual database. This ensures your asset data is correctly shown. Note: You won't see this screen if you didn't provide an asset list.

The first column (Excel) is populated from your uploaded asset list. The second column (Database) is the smart manual database.

You'll see the following buttons on this screen:
  • Guess Asset Map: Automatically populates the database column if the Excel column has the same name.
  • Validate Asset Map: Checks that the Tag and Service (Discipline) fields have been mapped. Additionally checks for any empty or duplicate entries.
  • Fill Empty Fields: Selects the Varchar (variable character) data type for empty entries in the database column. This allows the smart manual to populate text data for those fields.
  1. Ensure the Discipline column is mapped to Service database column.
  2. You can click Fill Empty Fields to allow the application to fill in the fields for you.
  3. Once all fields are mapped, click Next.

Finalize your smart manual

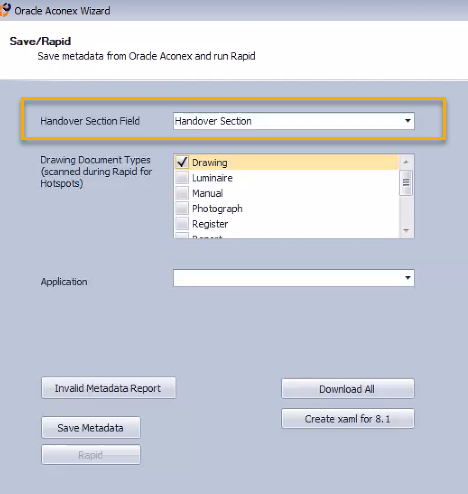
  1. If you've configured a Handover Section document field on your project, select the appropriate field here. The Handover Section is a custom set of documents that can be included in your manual.
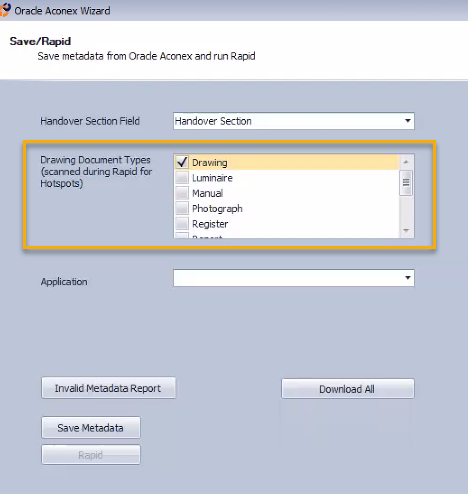
  1. Select which document types should be scanned for hotspots in the smart manual. Only select document types that contain drawings that are text readable for the hotspot scanning process.

Here are some examples of document types you might select for hotspot scanning:
  • Drawing
  • Shop Drawing
  • As-Built Drawing
  • Single Line Diagram
  • Process Flow Diagram
  • Process & Instrumentation Diagram
  • Layout
  • Section, Elevation
  • General Arrangement
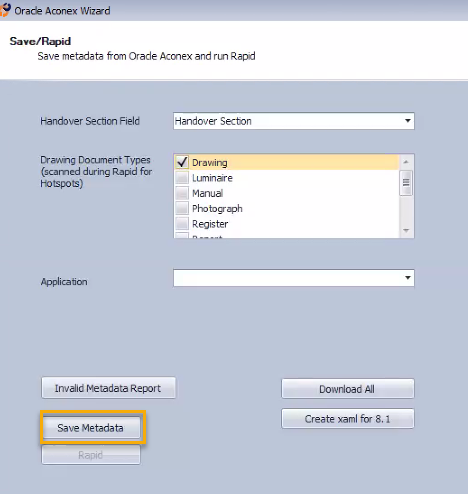
  1. Click Save Metadata.
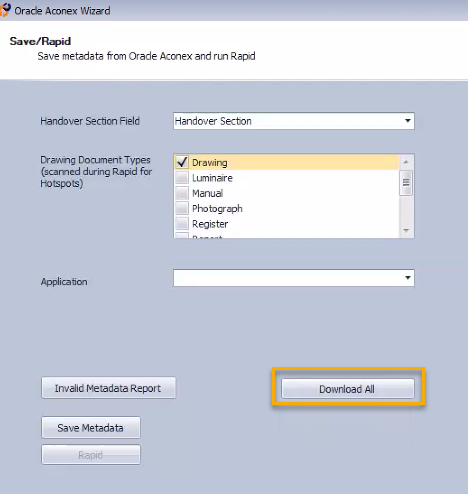
  1. Click Download All to download all documents required for the manual to your computer. This may take some time.
  1. Once the download completes, click OK
  2. Click Next, and then Finish.
  3. A folder with your project name will be created on your computer (in the same location you ran the application from) with all relevant subfolders moved into it.
  4. Place the smart manuals.exe and smart manuals dynamic.exe files into the project folder. You can now run your smart manual from this location.
  5. (Optional) You can create custom clickable hotspots to help users navigate the manual. For example, you can add clickable images to the landing page that link to different sections.
  6. Your smart manual is ready to use. Next Log in and Sync your Smart Manuals and Update and Sync your Smart Manual.