Support Central
Configure your zone breakdown to match your project delivery program using a variety of editing tools.
Zones are used in a clash space to create a division of areas in the project. This division is called a zone breakdown. The breakdown can represent your complete building, a part of it, or a set of individual adjacent areas. This drives a more focused clash process.
Tests in the clash space are run across models or objects and the results are grouped by each zone.
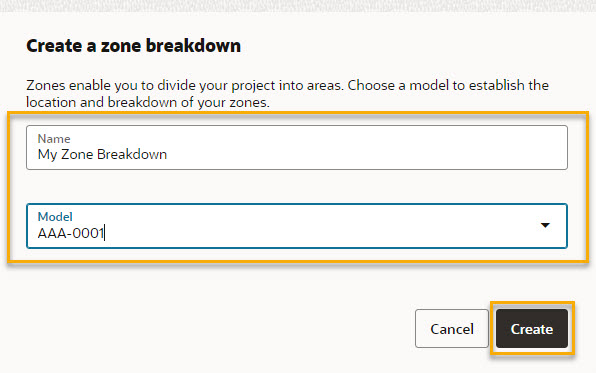
Zones are created using a model in the project (a structural model for example). This model serves as the primary reference for the breakdown.
Zones are created or edited from a clash space. You'll need to have clash space first before setting up zones.
When a zone breakdown has been created for the first time, a single zone is generated around the model geometry. You can configure your zone breakdown to match your project delivery program using the following tools:
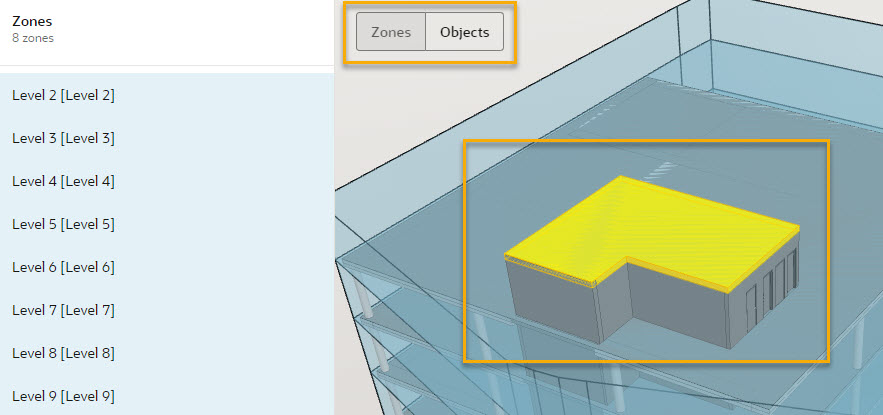
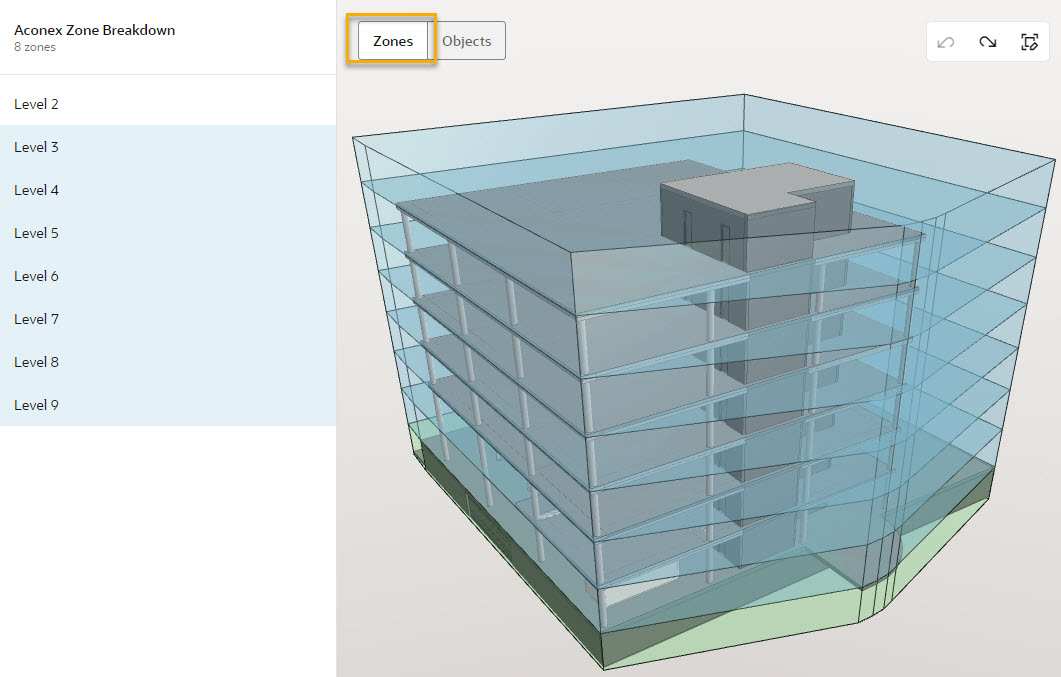
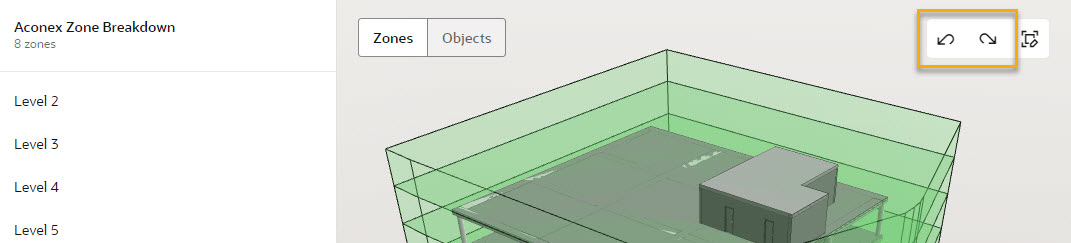
There are two modes when creating a zone breakdown - Zones and Objects mode. You can switch between modes at any time.
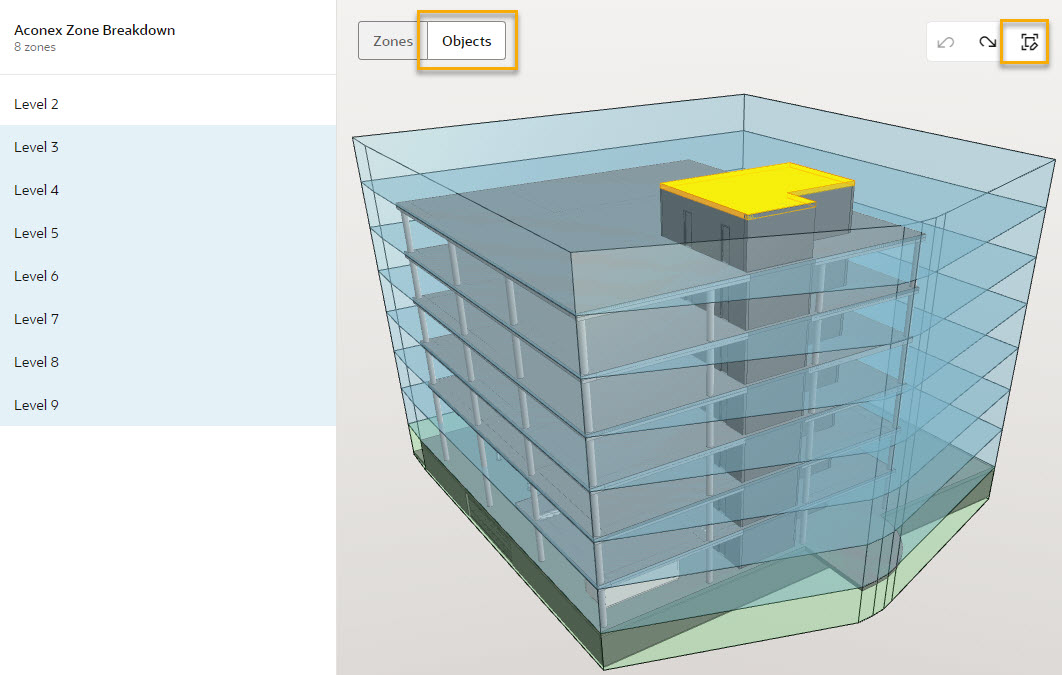
In Zones mode, only zones can be selected and edited. In Objects mode, object selection/deselection works the same way as zones.
Zones
Objects
Below is an example of a selected object inside selected zones.
The boundaries of zones can be adjusted to achieve the desired coverage across the model. You need to consider that this boundary will affect what Clash includes in the test results. All clashes outside the boundary of the zones breakdown will be excluded from the results
The shape of the zone breakdown can be modified by moving and/or changing the number of vertical edges.
To move a vertical boundary, hover over a vertical edge then click and drag.
To add or remove vertical edges:
Note: Vertical edges may not be removable if it means the shape of the zone breakdown may intersect itself. The zone breakdown must have a minimum of three vertical edges
To modify the height of a zone within the breakdown, hover over a horizontal edge then click and drag.

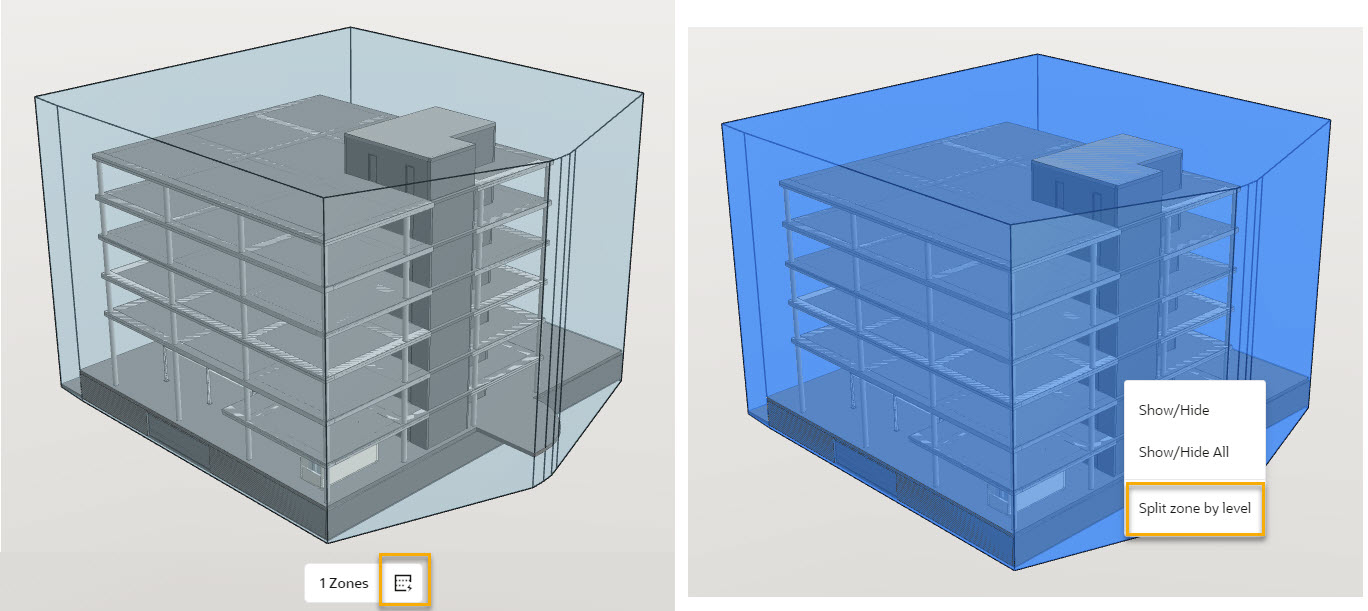
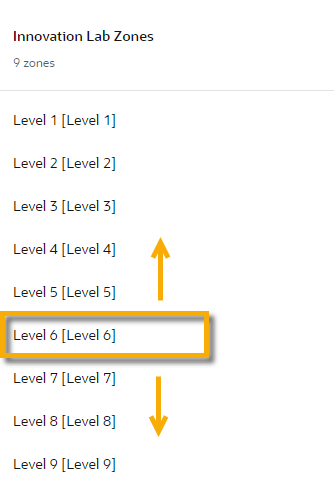
Splitting by level is helpful to quickly break down the starting zone. A single zone may be split using levels in the model if a significant level elevation is present inside the zone’s volume.
There are two ways to action split zone by level:
When new zones are created, they are also listed in the panel on the left of the screen. Zones created from split by level are named after the level name.
Merging is a handy way to simplify the number of zones in a breakdown, especially after using split zone by level. Zones can be merged when they are adjacent.
There are two ways to merge zones. Start by holding Ctrl (Windows) or Command (Mac) and left click to select multiple adjacent zones, then:
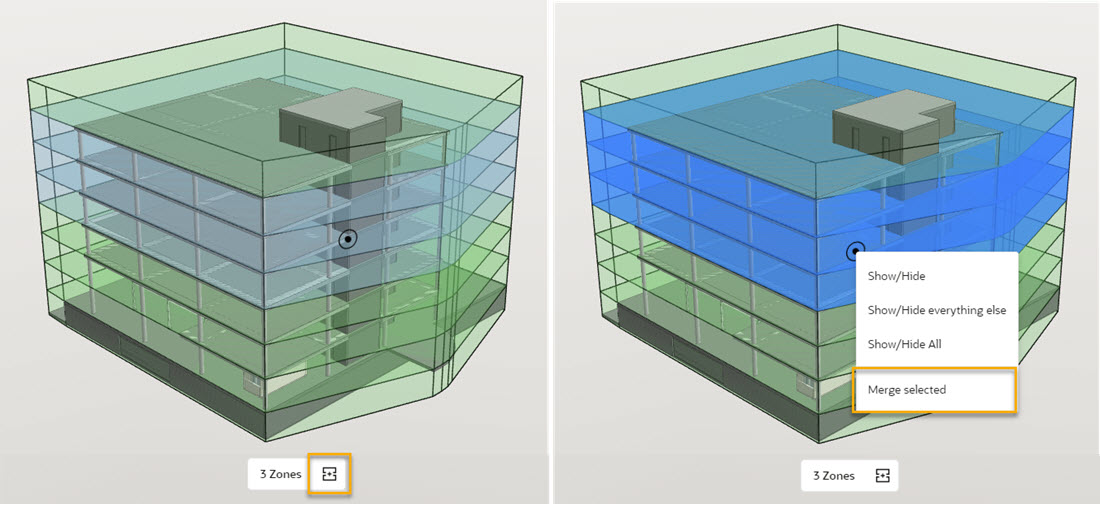
When zones have been merged, they collapse into one zone in the left list panel.
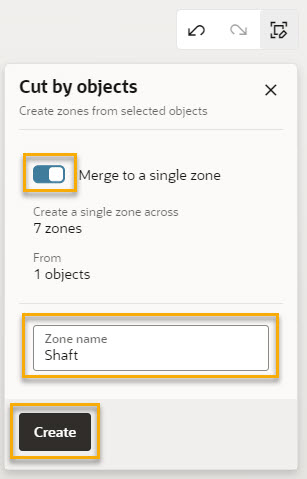
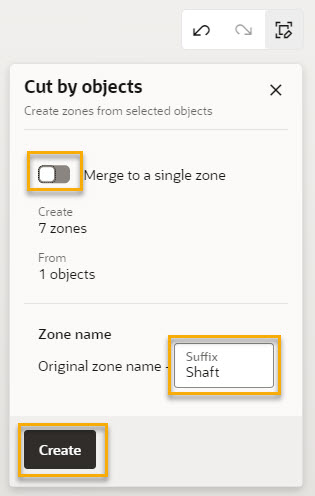
Use the Cut by objects tool to create a zone for a vertical shaft or similar. This tool uses the shape of selected objects in the model to create a new zone within selected zones.
For best results, use a perpendicular object to form the cut shape (for example, a rectangular shaped object). Currently, other shapes result in a simplified cut shape.
Have lots of zones to select? You can quickly multi-select a range of zones using the left list panel by clicking the first zone, holding Shift then clicking the last zone in the range.
The steps for each method are detailed below.
You can undo editing changes if you’ve made a mistake or the result isn’t as expected. You can also show/hide zones to help inspect newly cut zones.
Merge to a single zone
Choose this option if you require a single zone to span across multiple zones. The merge method requires selected zones to be adjacent. Perpendicular object shapes create the best results.
The new zone appears in the left panel with the name you provided.
Cut new individual zones
Choose this option if a new zone needs to be cut inside each selected zone. Perpendicular object shapes create the best results.
The new zones appear in the left panel using the suffix provided.
Zones within the breakdown can be hidden from view to help focus on specific zones. When a zone is hidden, it will disappear from the viewer. You'll see an eye icon in the list panel.
If zones are hidden while selected (from a left click), they will stay selected. Selected zones are highlighted in the list panel.
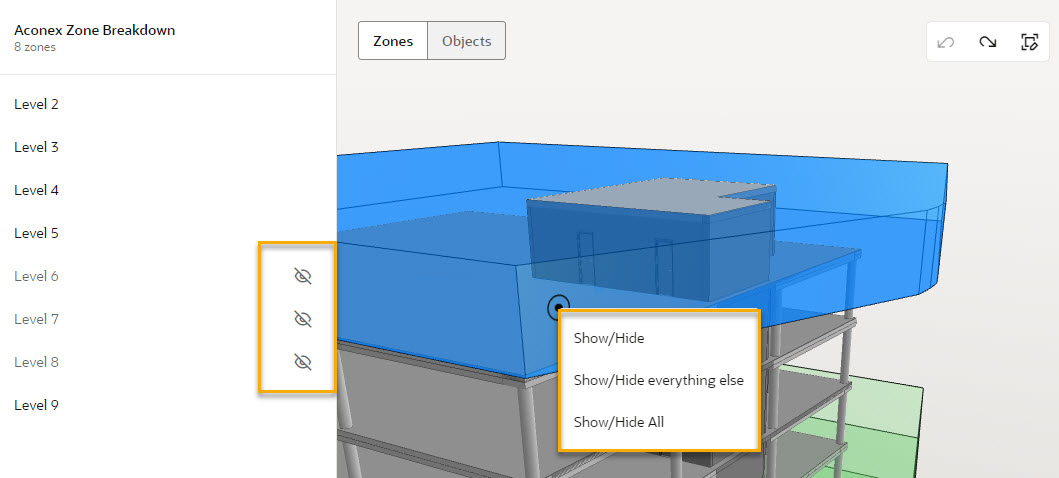
Right click anywhere in the empty viewer space to activate a menu for the option to Show/Hide All zones.
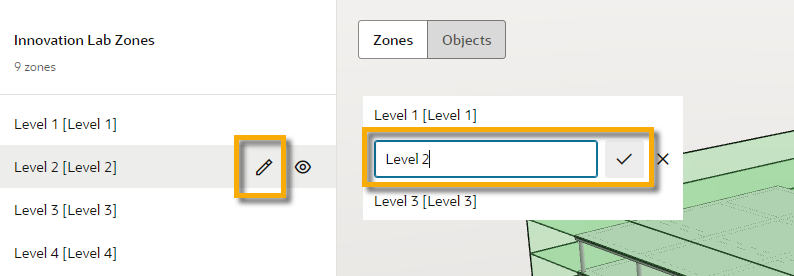
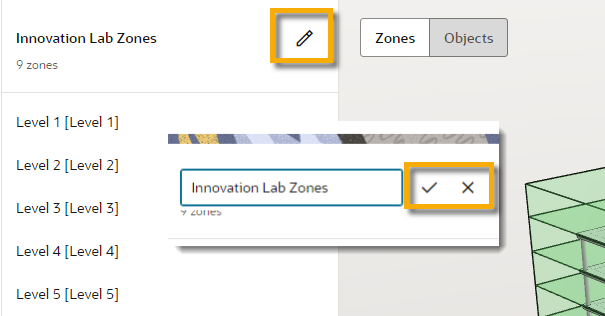
Zones are automatically named when they are generated. But, you can rename an individual zone or zone breakdown to make the zones easier to manage or better match the breakdown of the building or model.
Hover over the name and click the pencil icon to edit the zone or zone breakdown name. When you're done, click the tick icon to save the changes.
Zones can be reordered in the list panel by selecting a zone, holding it and dragging it to another position in the list.
Any edit in zones, for example, splitting, merging, moving boundaries, or cutting by objects can be undone or redone for up to 5 steps.
The Undo and Redo buttons are in the top right toolbar menu in the viewer. When an undo or redo action is available, the icons will become active to click.
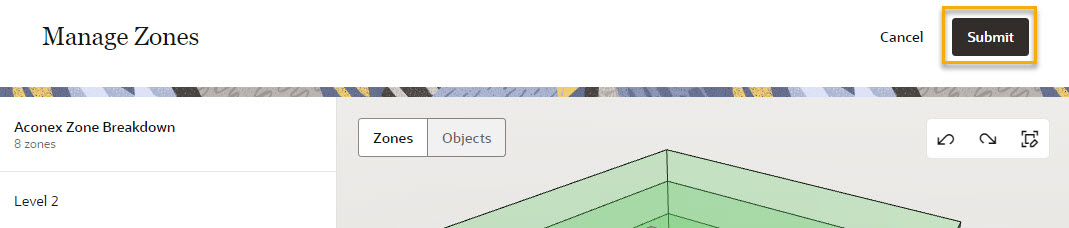
Once you’re done editing the zones, click Submit in the top right header. This will save the zone breakdown for use in Clash in the Cloud.