Add or update documents using Bulk Processing

Add or update hundreds of documents in bulk using a metadata template.

Required permissions
Access Bulk Processing
Upload new documents
Update a document

Bulk Processing helps you add, update, or create placeholders for multiple documents using an Excel metadata template. Before you start, it's a good idea to prepare your files with a consistent naming convention. We recommend including at least the Document number and Revision in the filename. 

In Aconex, document information such as Title, Revision, or Status is called metadata. After uploading your files, you'll need to populate metadata for them, so they're easy to find when you need to review or send them. 

If your project uses secondary files, known as renditions, make sure your file names match. This helps to group the native file with its PDF, as one document record. Metadata applies to the document record as a whole (including both the primary and secondary files).

To upload multiple versions of your documents at once add each version to your metadata template in the order they should be added to Aconex. For example, enter the details for version 1 on row 2 of the template, version 2 on row 3, and version 3 on row 4. This is useful if migrating projects or documents from another EDMS to Aconex. Learn more

Important: Documents uploaded using Bulk Processing are currently not indexed for Content Search. This means that you will be unable to find these documents using words or phrases from within the contents of the file. If you want your file contents to be searchable, we recommend that you use other methods of uploading documents in Aconex. Subscribe to release notes to be notified of updates to this behavior.

The key steps to a successful bulk process are:

  1. Upload your files. For best performance, we recommend uploading files in batches of 10,000 or less. If you want to download a template that includes filenames, upload in batches of 5,000 or less.
  2. Download the metadata template. Make sure you download a fresh template each time.
  3. Fill in the metadata template and upload it.
  4. Run a test and check the log for errors.
  5. Run the bulk process to update the document register.

Tip!

​Use Bulk Processing if: 

Step 1: Open bulk processing

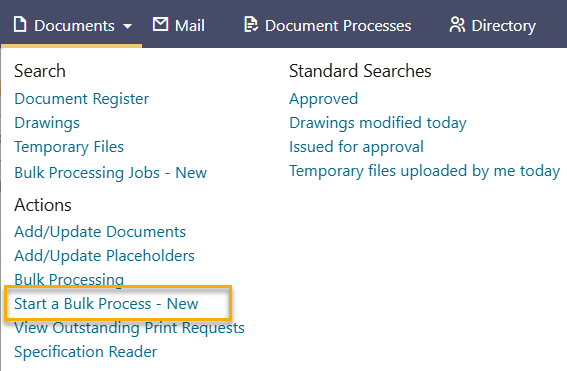
  1. Click Documents
  2. Under Actions click Start a Bulk Process - New. 

Tip!

We'll retire the previous Bulk Processing option early in 2026. We recommend you start using the new bulk processing today and let us know what you think.

Step 2: Upload files

Upload your files in this step. To update metadata only or create placeholders, click Skip to continue without uploading files.
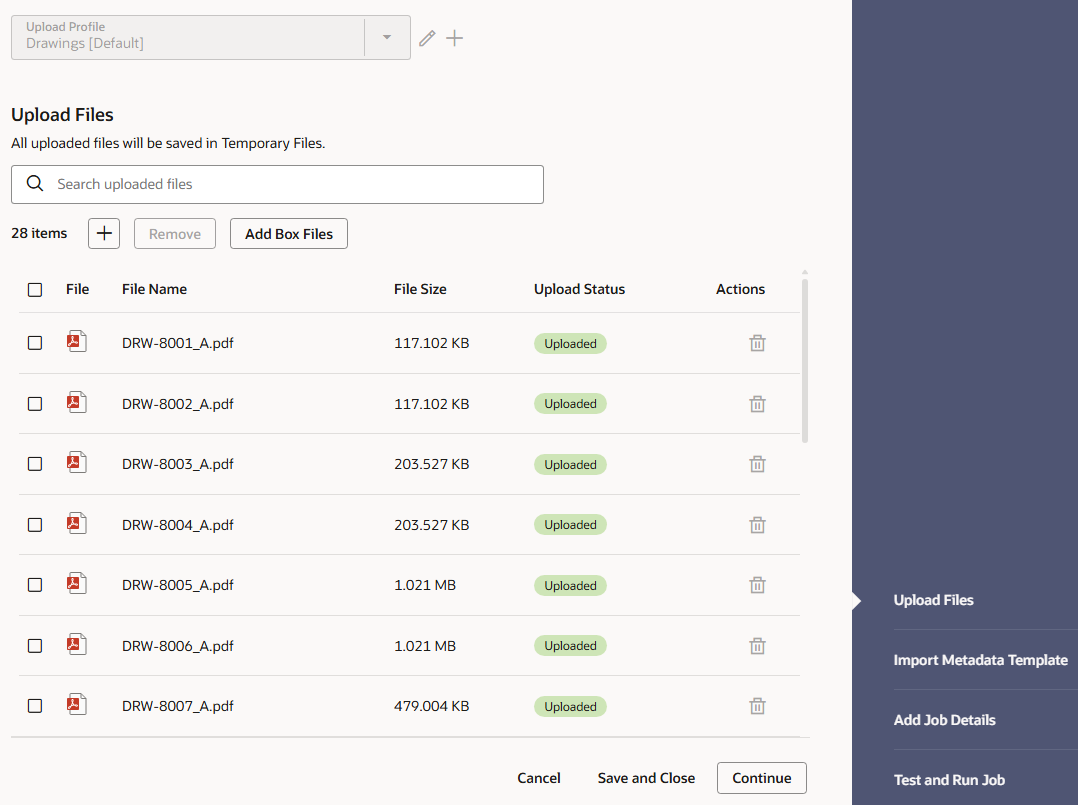
  1. (Optional) Select an Upload Profile from the dropdown (or just leave it as default). Document upload profiles save you time by automatically populating metadata for you. 
  2. Drag and Drop your file(s) from your computer into the space provided. Alternatively, click anywhere in the outlined space and choose the files from your computer. You can also Upload from Dropbox or Box. 
  3. When the upload finishes, your files are stored in the Temporary Files area

Tip!

Files uploaded to temporary files have their delete icon greyed out, but you can delete them directly from the temporary files area.

Files can be uploaded to the temporary files area without specific permission granted. They can be deleted as they are not yet registered documents in the Aconex audit trail.

Step 3: Download metadata template

Download a new template for every bulk process. Templates are specific to your project and may change when project fields are changed.
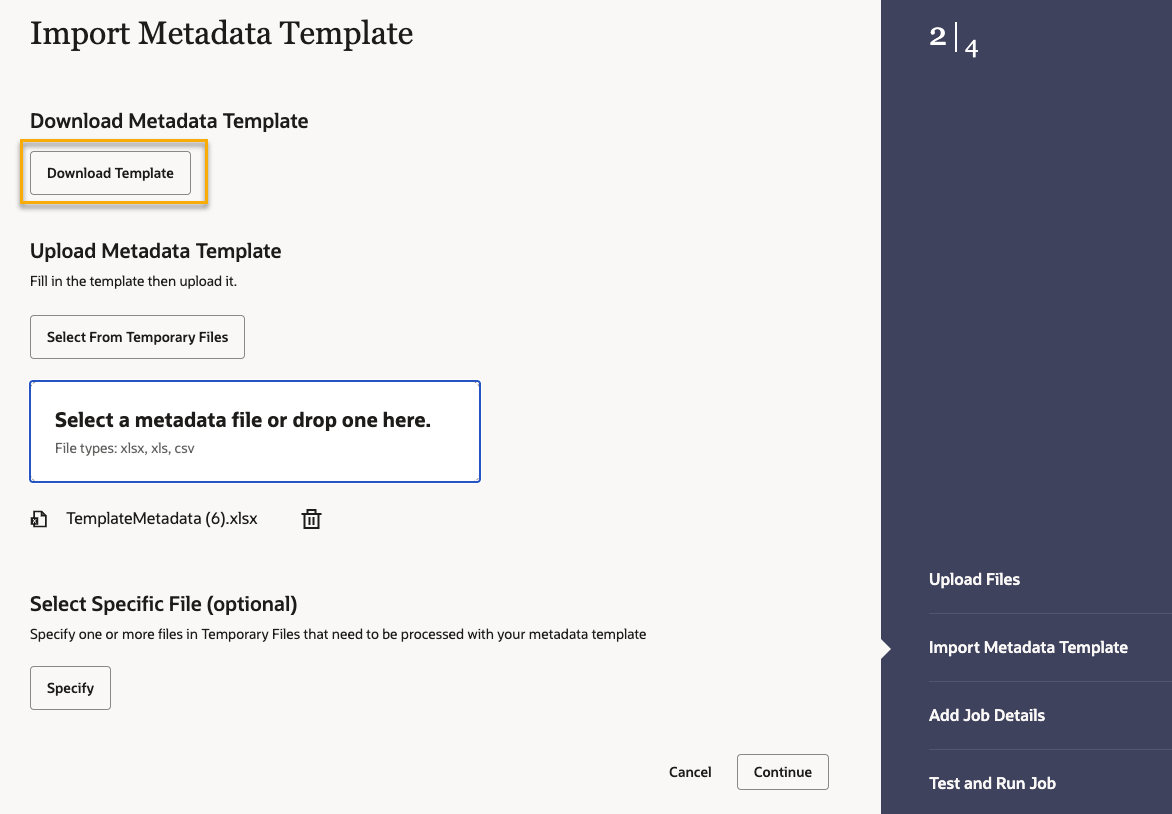
  1. Click Download Template.
  2. If prompted, click to save the file on your computer. It may download directly depending on your web browser.

Updating existing documents?

You can download a pre-filled template for up to 5,000 documents already in the Document Register. The template will be populated with all the required metadata for the documents.
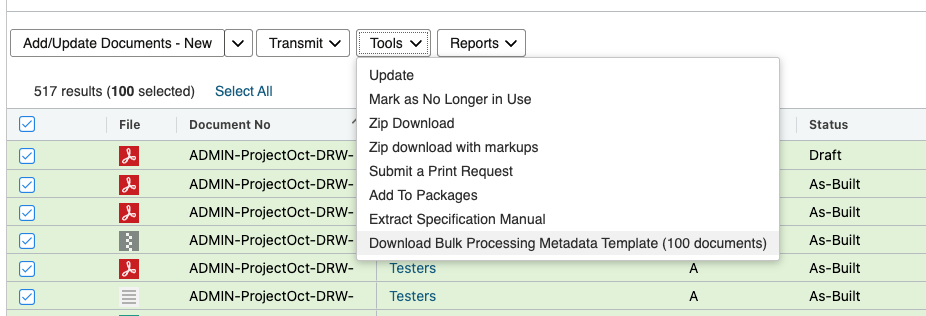
  1. Find and select the documents you want to update. 
  2. Click Tools and select Download Bulk Processing Template.

Step 4: Complete the metadata template

  1. Open the downloaded template in Excel or other spreadsheet application. The first worksheet contains instructions to guide you through each step.
  • If your project is configured to use a multi-sheet template, you'll see a worksheet for each document type. There's a separate worksheet with your uploaded filenames. Copy each filename to the correct document type worksheet. Note: During the import process, worksheets are read from left to right. If a document is changing its document type from one version to the next, the order of the sheets can be changed to achieve the correct ordering of versions. Do not remove any of the worksheets otherwise the process may fail.
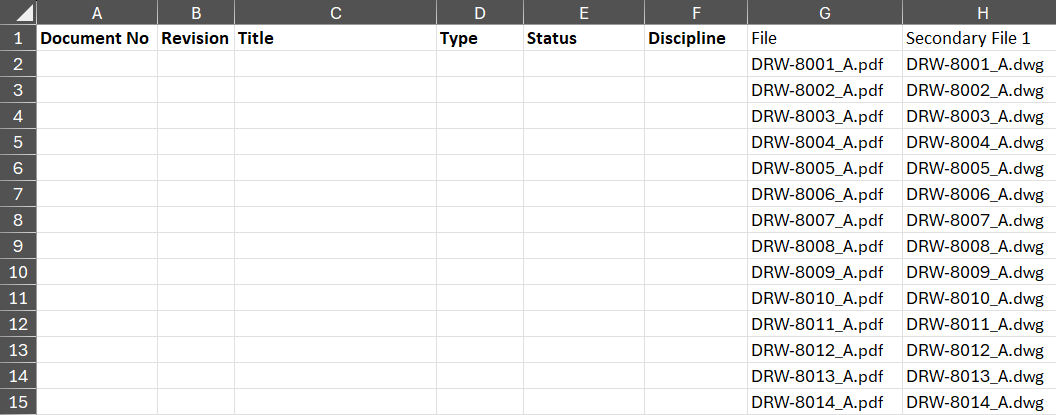
  • If your project is configured to use a single-sheet template, you'll find the filenames in the File column.

Tip!

If you uploaded a zip file, only the zip file will be listed (not the files within), even if your upload profile is set to extract files from a zip.
  1. Check your filenames. 
  • To replace an existing file, enter the complete uploaded filename, including its extension, in the File column. For example, DRW-0012_C.pdf.
  • To create a placeholder, leave the File column blank.
  • If you uploaded secondary files, enter their filenames into the appropriate Secondary File column. Keep PDFs as the primary file so they can be used in review processes. 
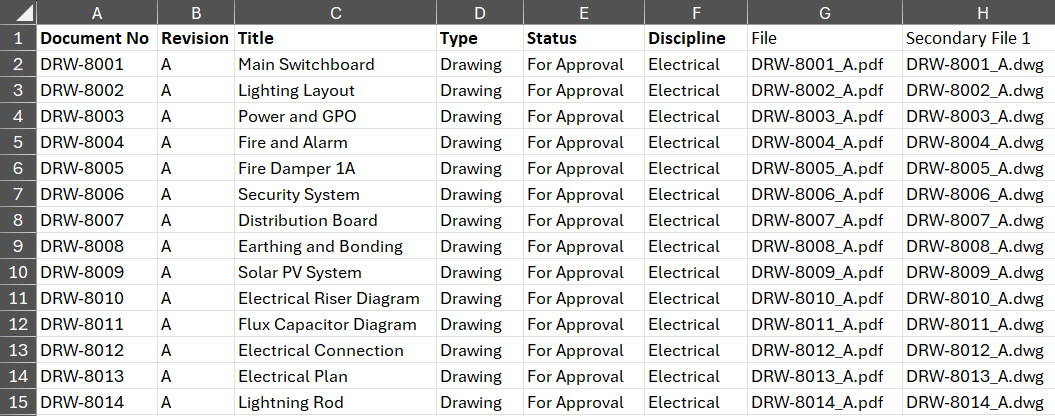
  1. Complete all mandatory fields. They're shown with bold headings in your template.
  • Enter the correct document numbers and other metadata against the correct files.
  • Select values from dropdowns for each single-select field. For multi select fields, type the relevant values and use commas to separate them. The values entered must match the system values exactly.
  1. Complete project fields as required. They're displayed in blue font.
  2. Complete as many of the other fields as you need to.
  3. Check that you've entered the correct document numbers.
  4. Save the completed template as an Excel file.

Tip!

Bulk Processing does not support document auto-numbering schemes. If you are using Bulk Processing to register new documents, you'll need to enter the document numbers in your metadata spreadsheet.
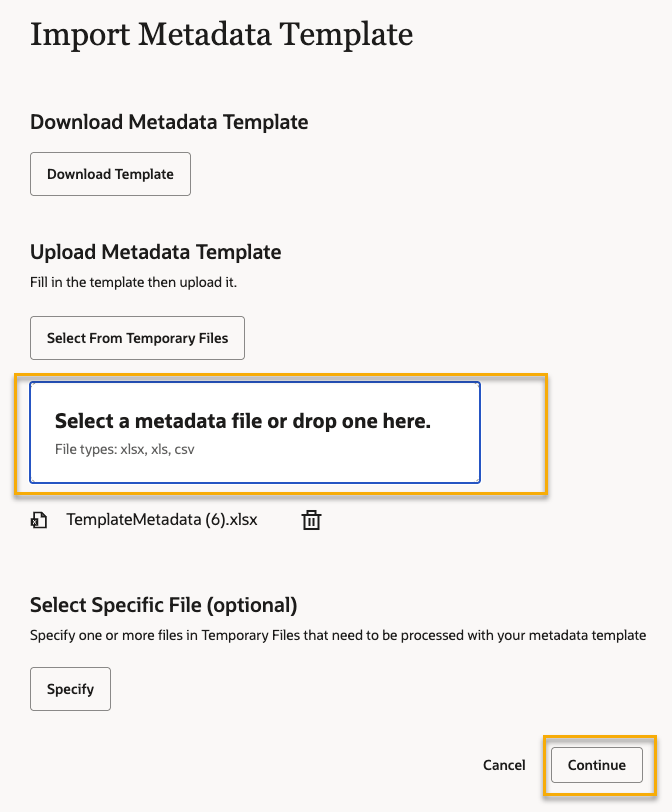
Step 5: Upload the template

  1. Upload the populated metadata file by dragging and dropping the file, or click anywhere in the outlined space and choose the file from your computer. 
  2. Click Continue.

Step 6: Edit job name and rules

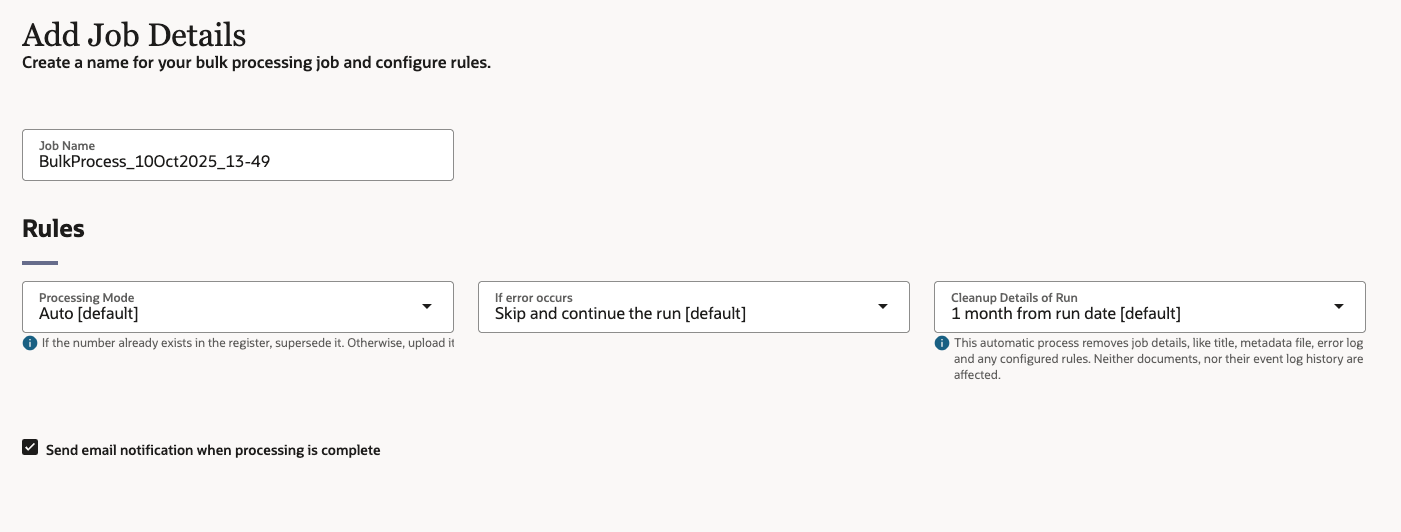
  1. Enter the job name so you can find it again later, or just leave it as the pre-filled name. This field is mandatory.
  2. Select the bulk processing rules. In most cases, you won’t need to change the defaults. However, if you're only updating documents, you may want to select the Supersede Documents Only rule. Below are the descriptions for each rule in the dropdowns.

Processing mode

  • Auto (default): If the document number already exists in the register then supersede the document, otherwise upload it.
  • Supersede Documents Only: If a matching number does not exist, an error is logged.
  • Upload New Documents Only: If a matching document number already exists, an error is logged.

If Error Occurs

  • Skip and continue the run (default): Does not process the document that caused the error, and continues the bulk process.
  • Abort the run at this row: Does not process the document that caused the error, and stops the bulk process.

Cleanup Details of Run

  • Automatically clean up details of this run: Removes the details of this job — the title, metadata file, error log and any rules configured. It doesn't affect the documents or their event log history.
  1. Tick the box to receive an email notification when the job completes.
  2. Click Continue.

Step 7: Test your template

Test your metadata template to check it for errors. After the test, view the log file and fix any errors before you run the bulk process job.
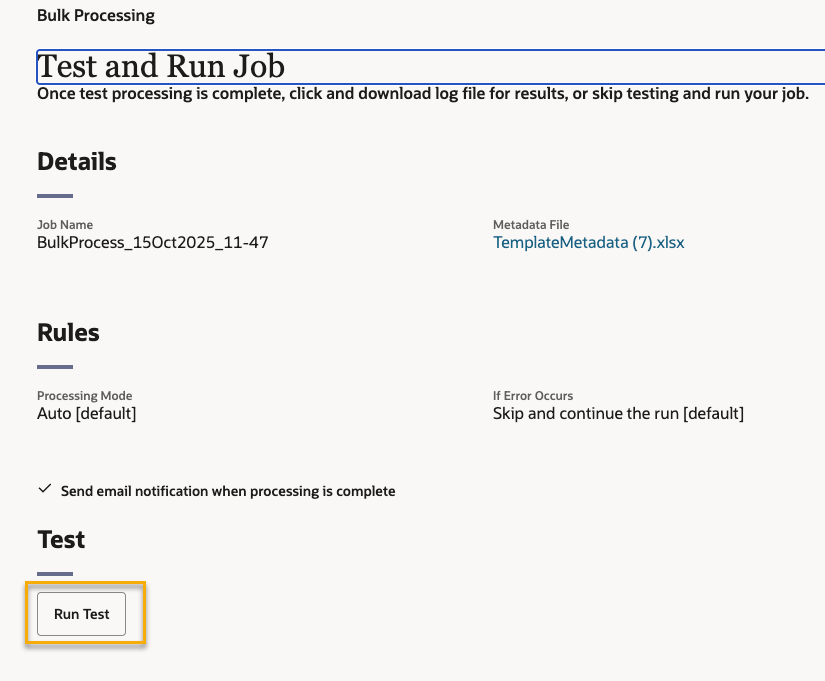
  1. Click Run Test.
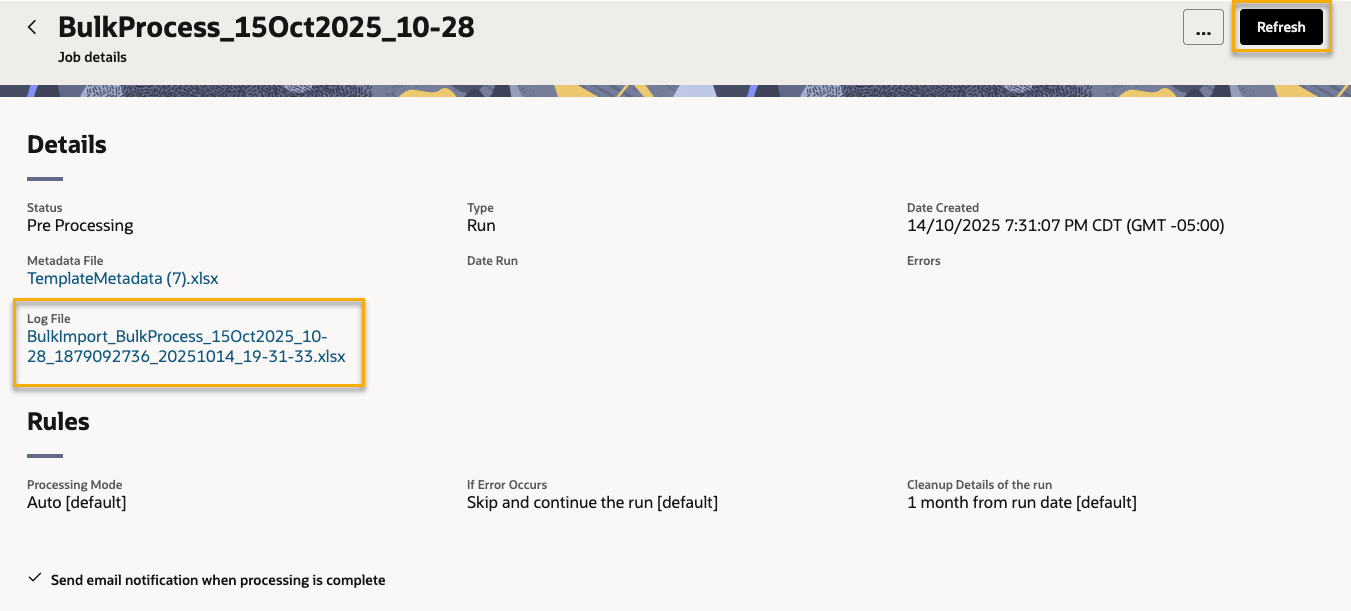
  1. After about 10 seconds, click the Refresh button. 
  2. You’ll see a file appear in the Log file section. Click it to open the log file.

Note: If the file does not appear, wait another 10 seconds and click Refresh again until it appears. You may need to repeat this a few times.
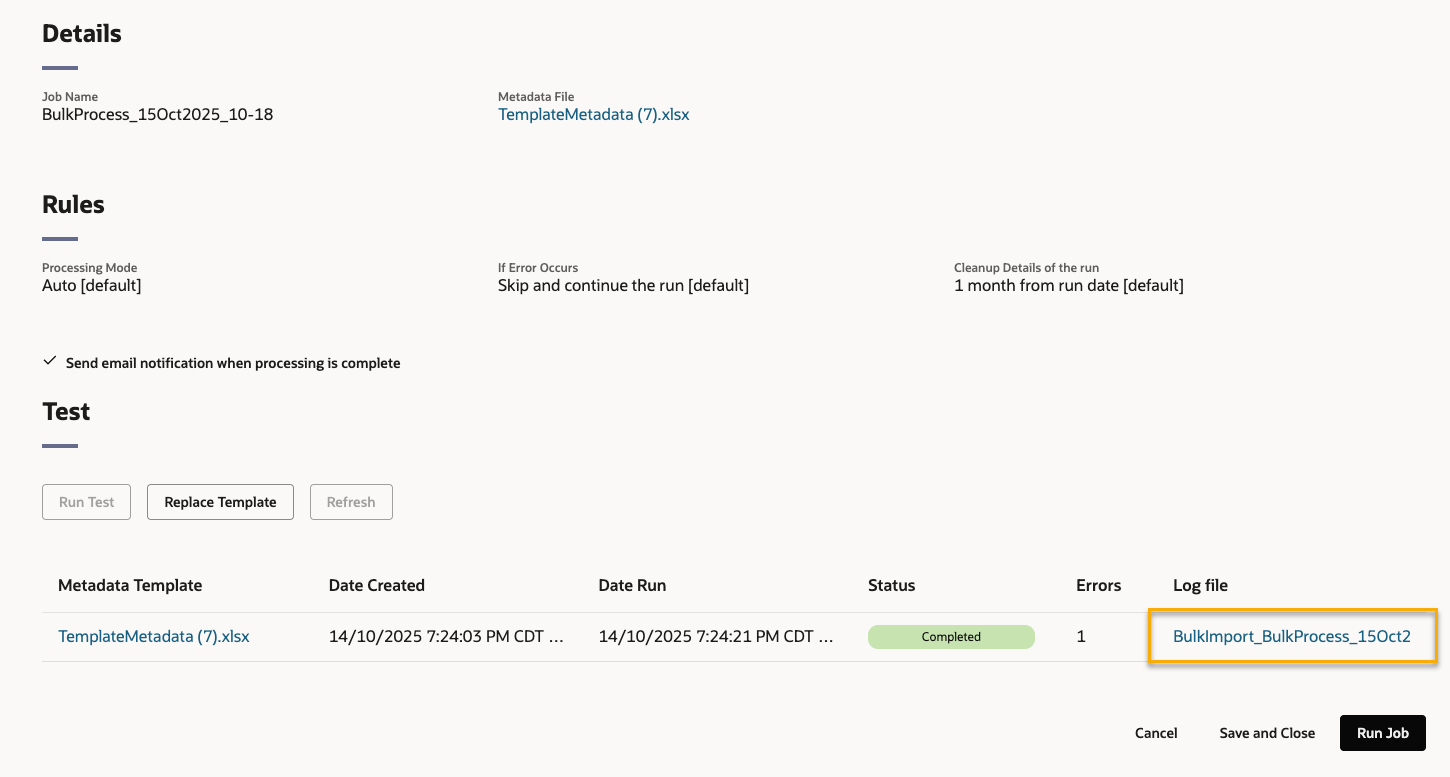
Tip!

You can stop the test by clicking Terminate.
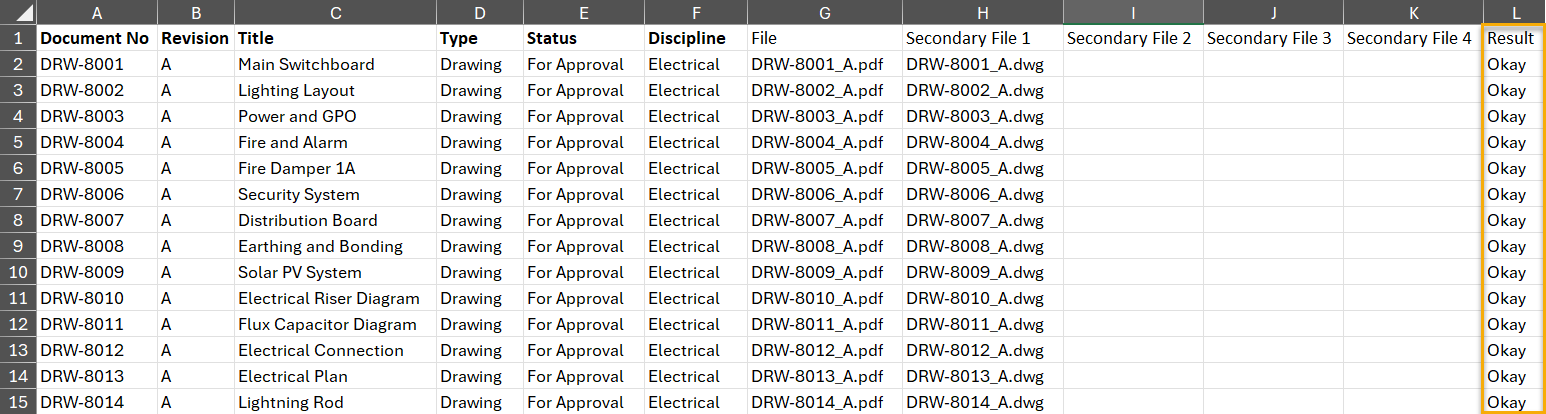
  1. Check the Result column in the Log file.
  2. If everything is marked as Okay, continue on to the next step to run the bulk process.
  3. If there are any errors to correct:
  • Edit your metadata file in Excel and fix the errors.
  • In Aconex, click the Replace Template button to upload your updated metadata file into the same job.
  • Repeat the Test procedure with your updated metadata file.

Step 8: Run the bulk process

When your test shows no errors in the log file, you can run the bulk processing job to update the document register.
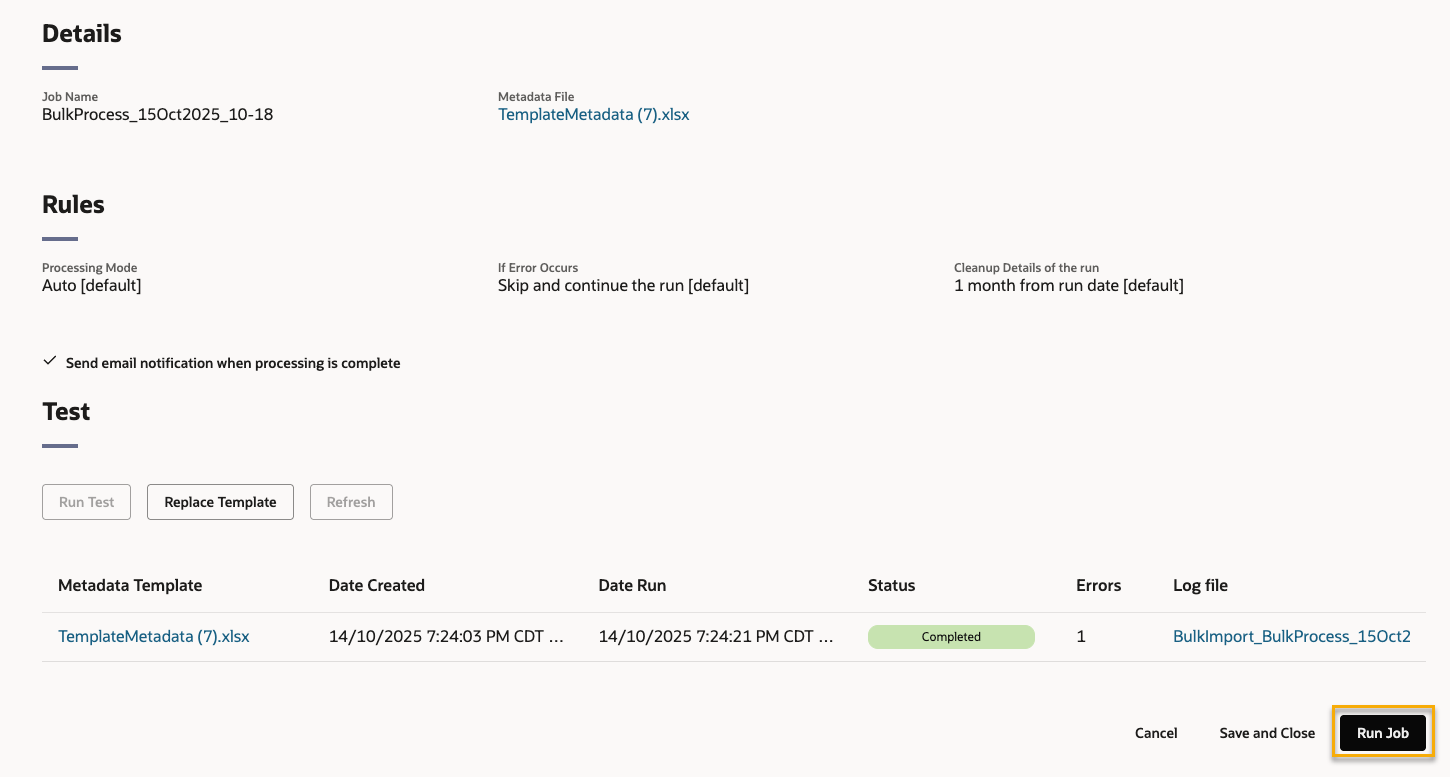
  1. Click Run Job to start the job.
  1. Click the Refresh button.
  2. Open the Log file report.
  3. Check that Okay is recorded against all documents in the Result column. 
  4. If there are no errors, your documents have been updated in the document register.

What's next?